Scroll down for English Version
Wie immer fängt alles im Kleinen an:
Leo sprach mich im Vorbeigehen auf meine Nassplattenfotografie an. Er erzählte mir, dass er in Kürze eine neue Harley bekommen wird und diese soll ich mit meiner 100 Jährigen Kamera auf einer Kollodiumnassplatte ablichten. Cool, dachte ich mir und freute mich schon auf das Shooting. Wir hatten noch keinen richtigen Zeitplan, aber es sollte geschehen.
Einige Wochen später bekam ich einen Anruf vom ORF, bezüglich einer Dokumentation über meine Arbeit. Ich musste natürlich nicht mehr lange überlegen welches Motiv in Frage kommt.
Kurz bei Leo nachgefragt – er war dabei.
Locationsuche war jetzt der nächste Plan – Nachbars Hallentore boten sich dafür hervorragend an – nach dem OK vom Nachbarn, ging ich gleich in die Planung.
Shooting Tag
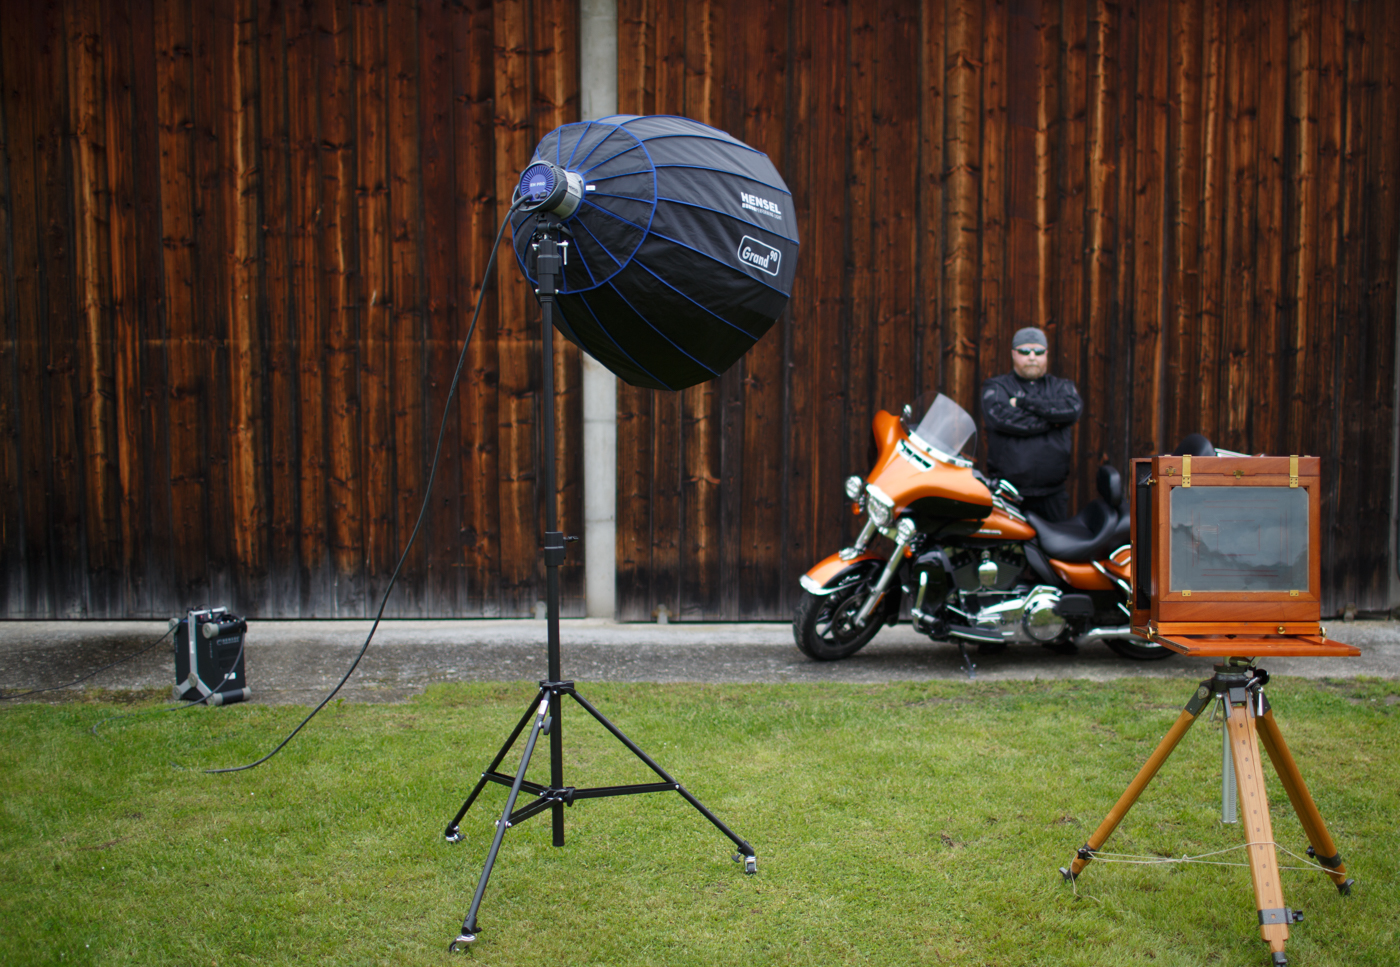
Ich erstellte meine Chemie kurz vor dem Shooting und testete alles. Damit ich die Belichtungszeit so kurz wie möglich halten konnte, plante ich meinen Hensel Generator samt Blitzkopf mit ein. Als dann der Tag kam, fing es leider früh morgens zum Regnen an. Leo kam schon vor dem ORF Team und wir scherzten schon ein wenig, dass wir heute im Regen stehen (Was natürlich nicht möglich ist mit meiner 100 jährigen Kamera und 6000W Blitz).
Um 13:00 sollte alles starten, ab 12 wurde der Regen deutlich weniger und hörte dann auf.
Somit stand dem Nassplattenshooting nichts mehr im Wege.
Das Shooting
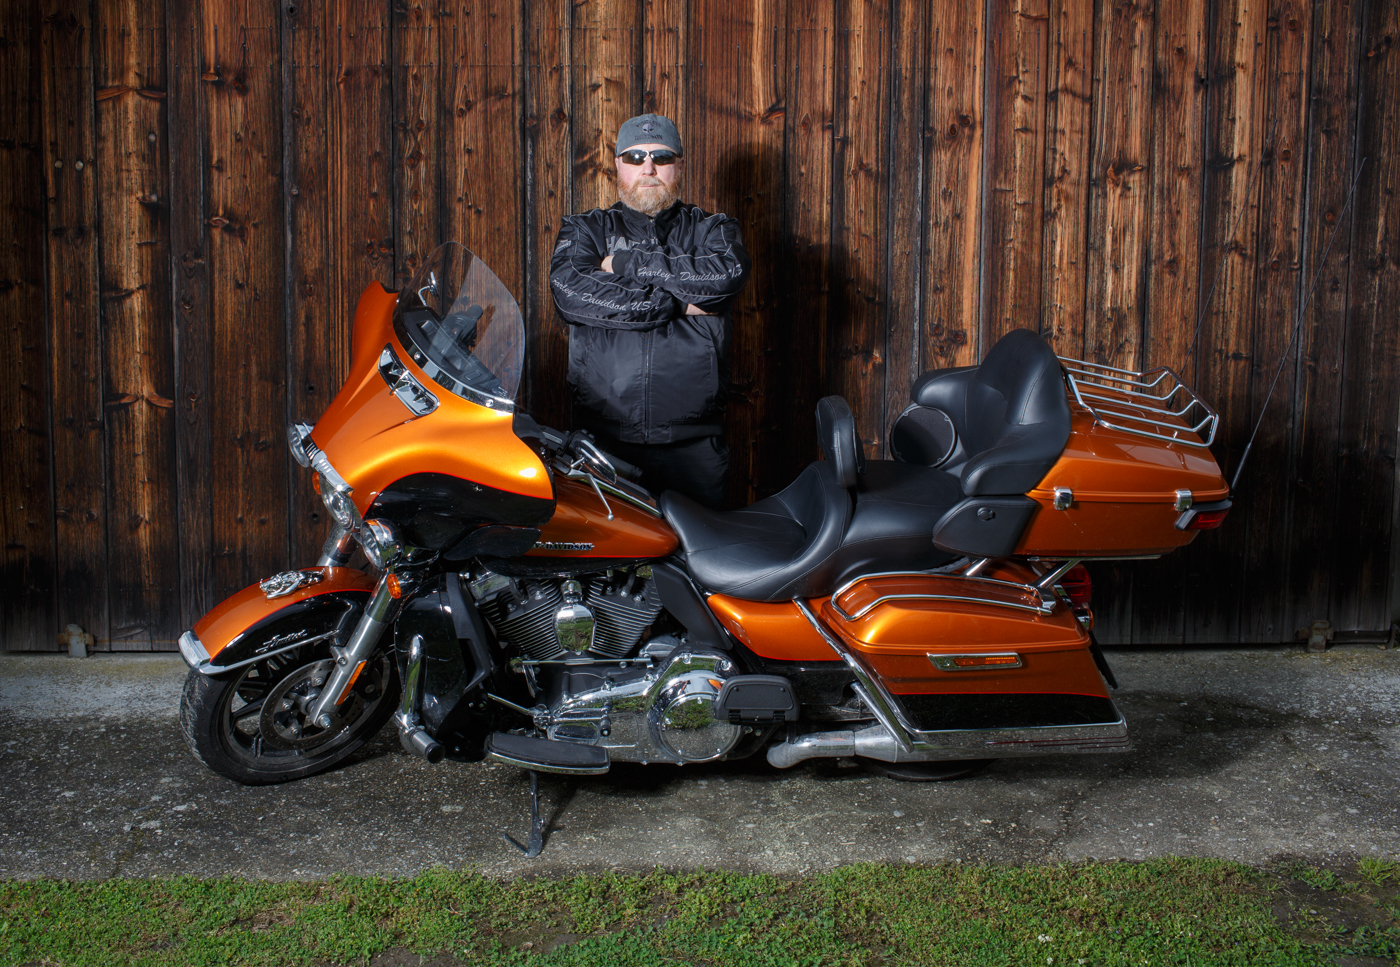
Nachdem wir alles durchgegangen sind, haben wir die Harley positioniert. Dann baute ich den Blitz und die Kamera auf – beides hat schon ordentlich an Gewicht und erfordert ein Maß an Kraft um es bewegen zu können. Jetzt gab ich Leo noch Anweisungen bezüglich Haltung und Positionierung. Und schoss das erste digitale Bild um die Komposition vorab beurteilen zu können.
Jetzt kam ein Belichtungstest für die Nassplatten an die Reihe. Dazu verwendete ich die selbe Kamera, belichtete aber nur eine 10×12 cm große Platte. Die Platte war ein wenig zu hell, also blendete ich von 5 auf ca 7 ab.
Jetzt ging es mit der Beschichtung der großen Platte los. Natürlich etwas aufgeregter, da alles von einem professionellen Kameramann mitdokumentiert wurde. Eigentlich sollte ich es ja schon gewohnt sein, da ich schon zum dritten Mal dabei gefilmt wurde, aber eine 30x40cm große Platte per Hand zu beschichten wird nicht so schnell zur Routine. Die Beschichtung gelang mir richtig gut, danach begab sich die Platte ins Silbernitratbad und verweilte dort für 3 Minuten. In der Zwischenzeit lief ich nochmal zu Leo und der Harley um alles zu kontrollieren. Dann wieder zurück in die Dunkelkammer, jetzt holte ich die Platte aus dem Silberbad und reinigte die Rückseite, um sie dann in die Holzkassette zu packen. Mit der Holzkassette lief ich zu meiner Hundertjährigen und schob sie statt der Mattscheibe in die Kamera.
Kappe runter vom Objektiv, die 6000W Henselpower auf Leo loslassen und eine halbe Sekunde später die Kappe wieder verschließen. Die Kassette aus der Kamera raus und wieder schnell in die Dunkelkammer.
Hier wartete die nächste Herausforderung auf mich. Den Entwickler gleichmäßig auf alle Stellen per Hand auftragen. Das gelang mir dank einer neuen Technik sehr gut und ich konnte schon erkennen, dass das Bild gut geworden ist. Aber richtig weiß man das erst nach dem Fixieren.
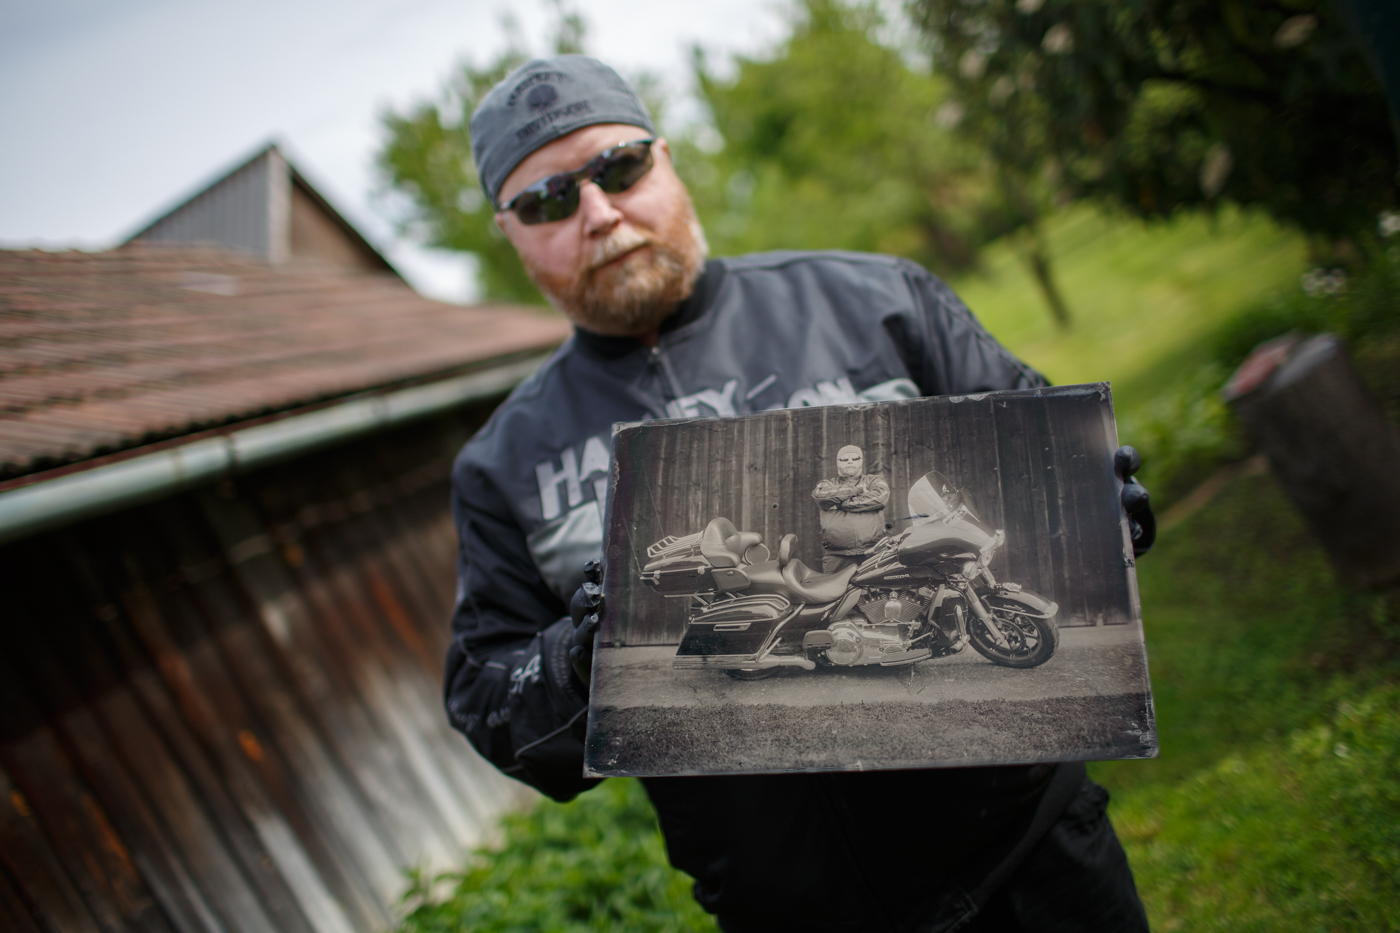
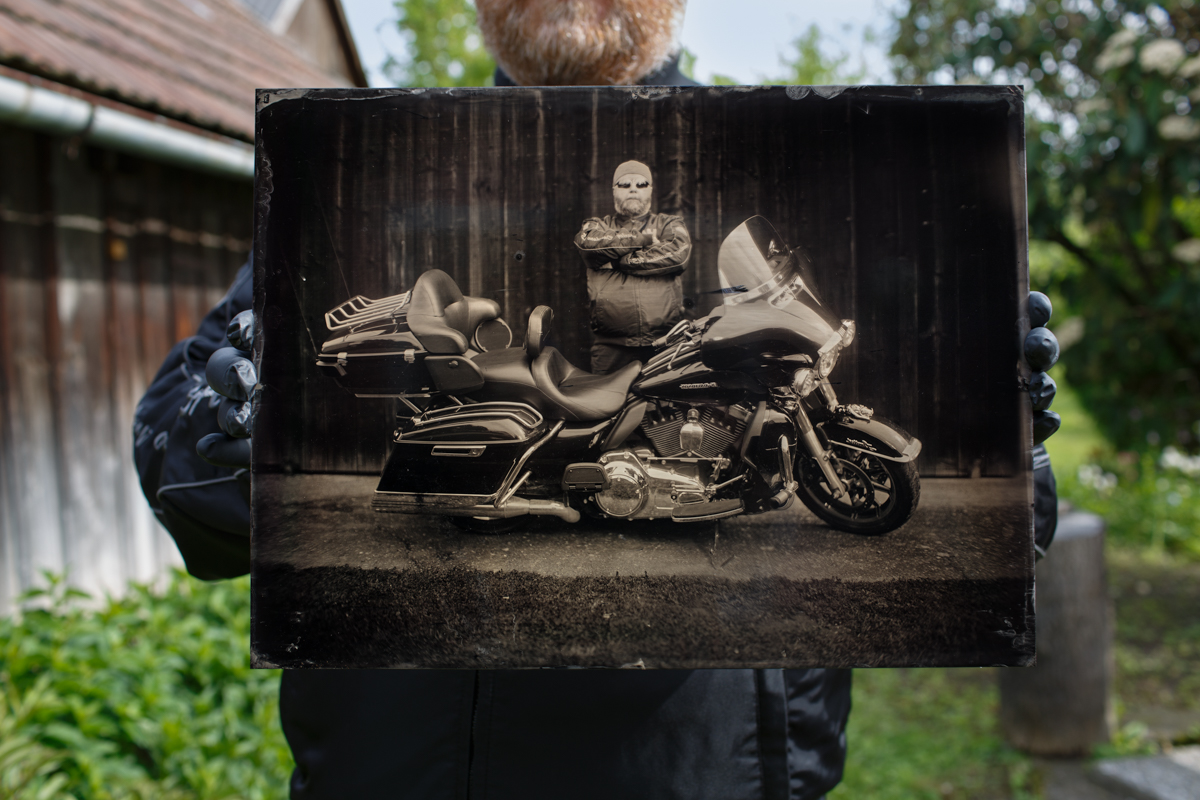
Nach einem kurzen Waschgang der Platte, ging ich ins Freie wo Leo und das Fernsehteam schon auf mich warteten. Jetzt kam der Moment „where the Magic happens“. Die Platte in die Fixiererschale gelegt und schon startete der Prozess. Zuerst verschwand das Bild fast komplett und dann konnte man schön langsam sehen wie es wieder entsteht. Alle waren begeistert und ich bin stolz und happy über meine Arbeit.
Sendetermine und Onlinelink poste ich hier am Blog, sobald ich die Infos bekomme.
Wenn ihr selber so eine Entstehung miterleben und so ein absolutes Einzelstück besitzen wollt, dann kontaktiert mich über meine Webseite: http://zeitreise.jetzt
Ihr könnt auch Workshops bei mir machen, wenn ihr selbst eine Platte erstellen wollt.
Tragt euch in meinen Newsletter: https://www.hs2k.at/blog/Newsletter/ ein, um mehr davon zu sehen.
Verwendete Hardware:
Hensel Tria 6000 Generator
EH Pro 6000 Blitzkopf
Hensel Grand 90
Hier möchte ich auch noch das tolle Team vom ORF erwähnen, war sehr nett mit euch zusammen zu arbeiten!
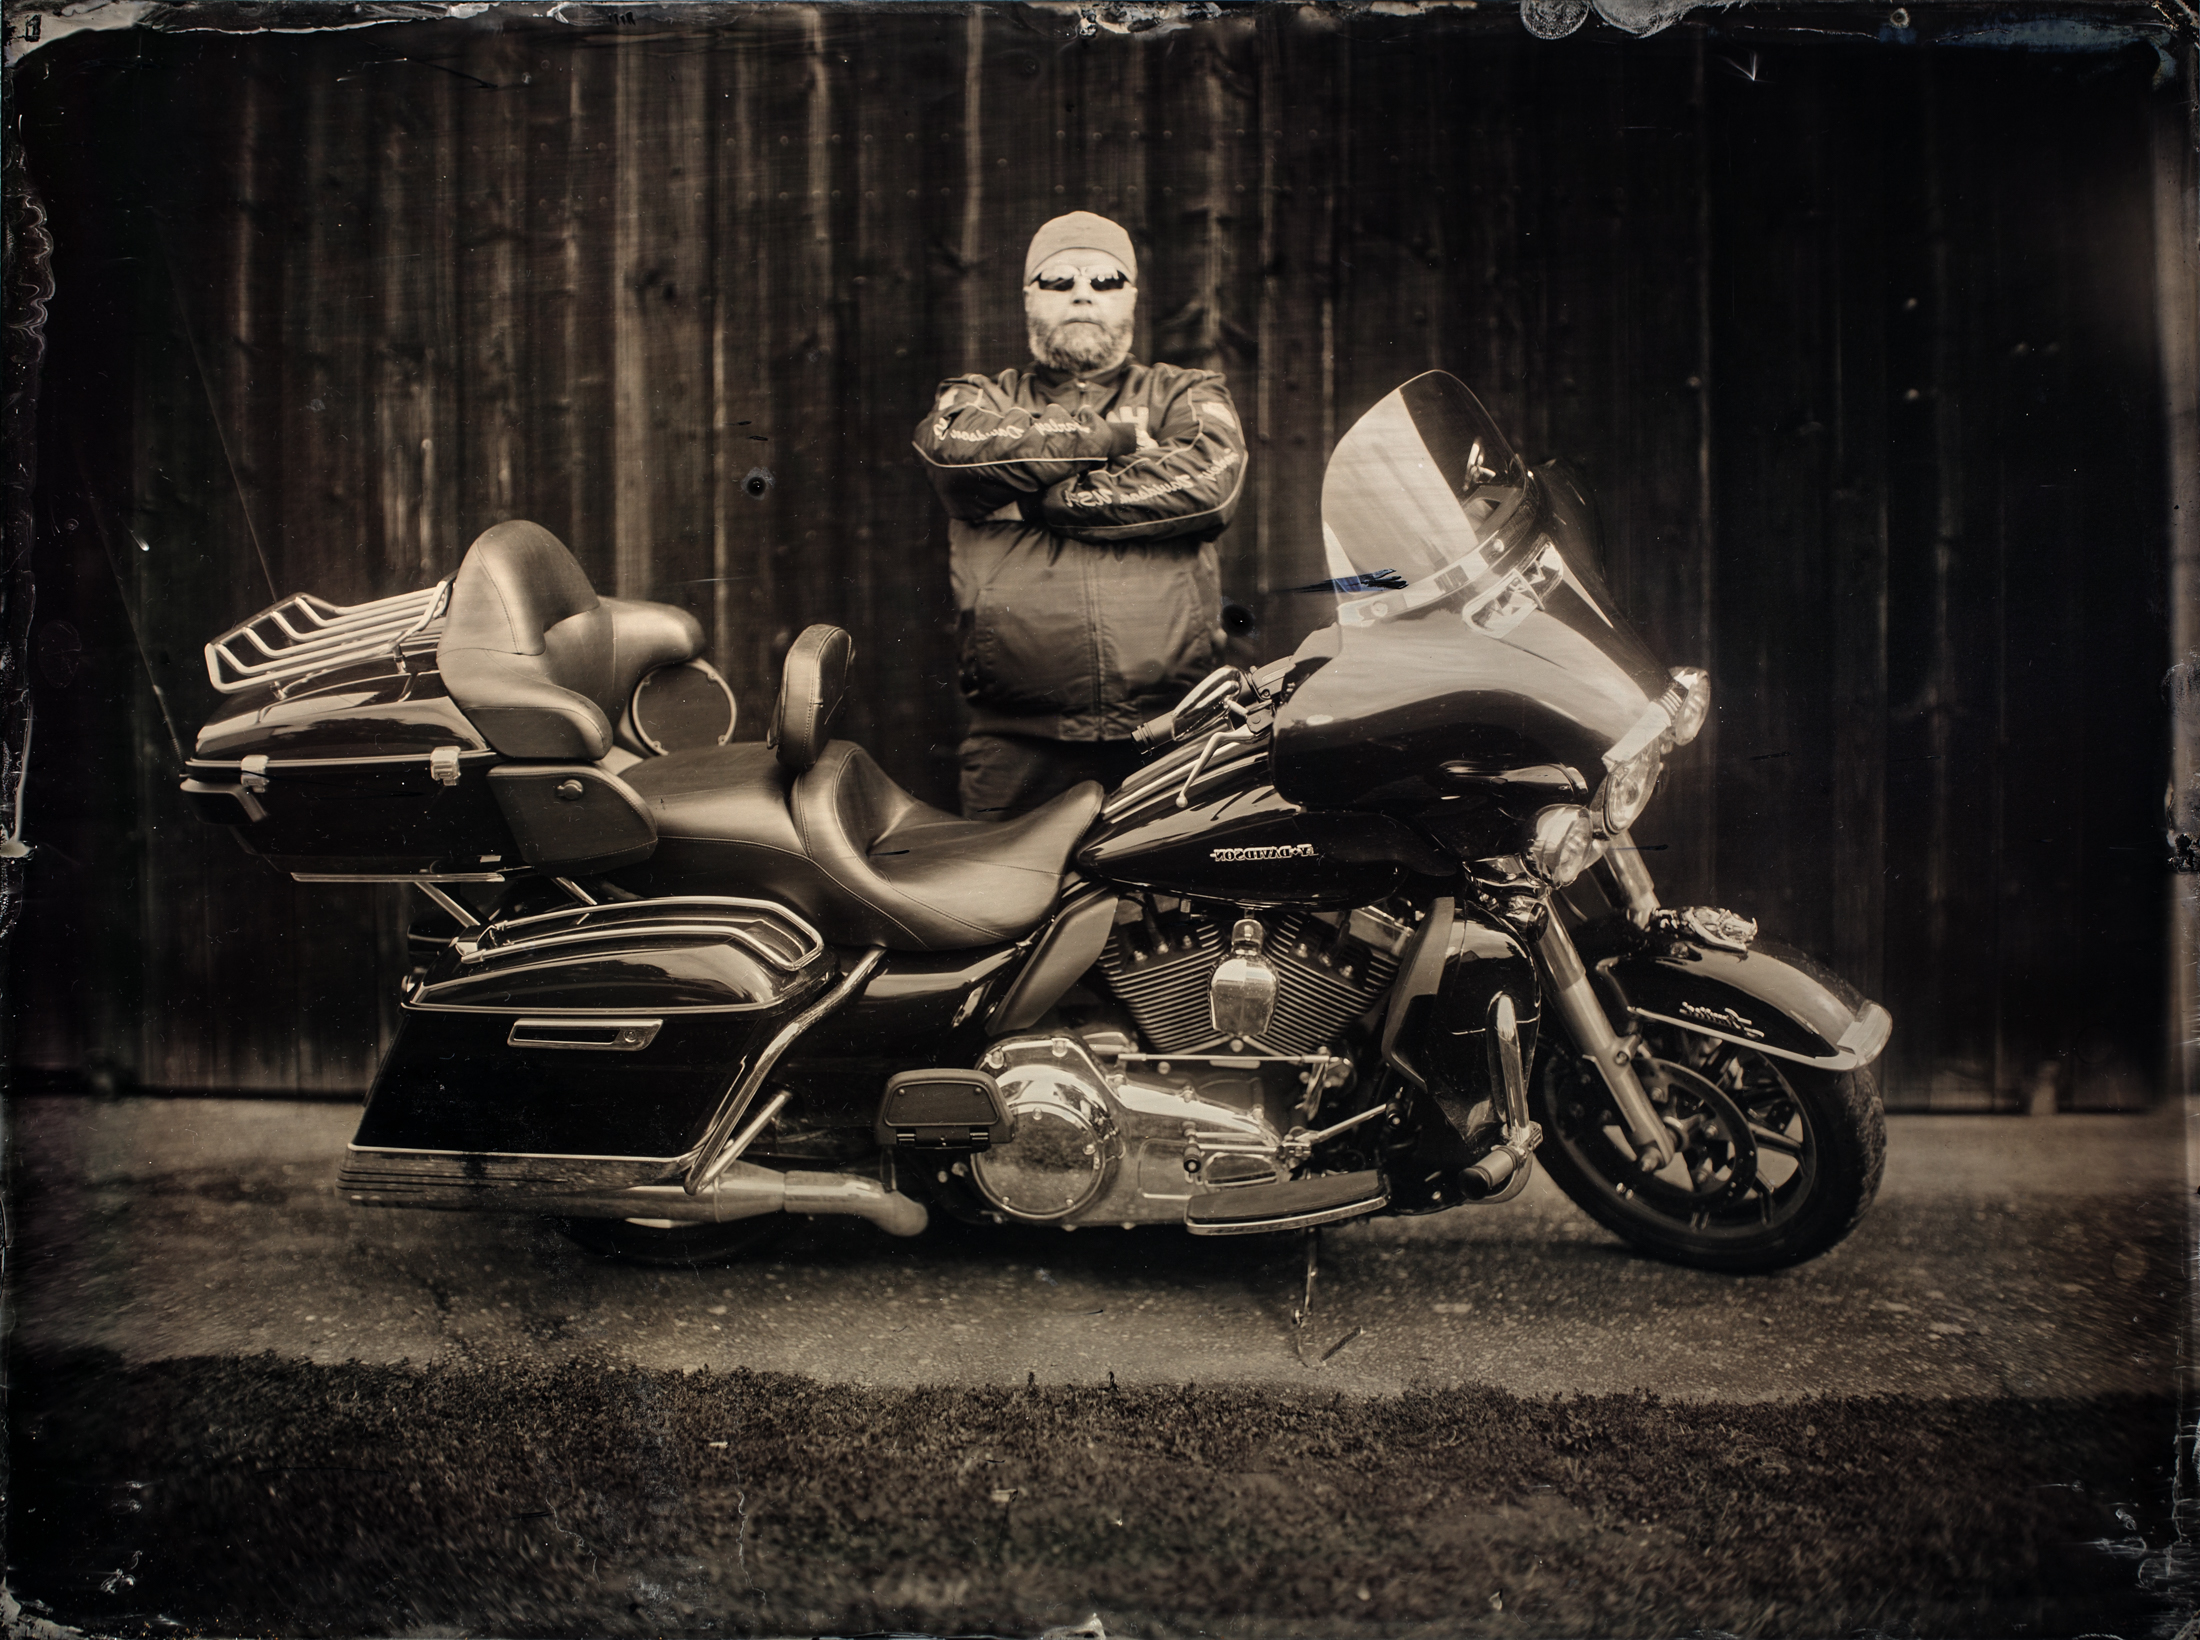
Das Ergebnis:
English Version
As always, everything starts small:
As I walked for lunch I met Leo and he talked with me about my tintype photography. He told me about his new Harley Davidson and that he wanted me to take his photo with the Harley. Of course, I should use my 100 year old Camera and capture the light on a collodion wet plate.
I just thought cool, let’s do it.
Some weeks later, I got a call from the Austrian television broadcaster ORF. I was very happy to learn, that they wanted to do a documentary about my work. As you can imagine, it wasn’t too hard for me to choose for a subject to be photographed.
I asked Leo if he is in – he said yes, so let’s do it.
Shooting Day
I prepared all the chemicals shortly before the shooting and tested everything. To get a very short exposure time, I planned to use my Hensel Tria 6000 generator with the strobe head.
On the shooting day it started raining in the morning. Leo arrived way before the ORF Team so we made fun of it that we would shoot during the rain- what actually would not be possible because of my 100 year old camera and the strobe. Scheduled start was 1pm and believe it or not, it stopped raining at noon. Wet Plate shooting here we come.
The Shooting
After we reviewed everything we positioned the Harley and I put my camera and the strobe into place. Because both are pretty heavy you need a certain amount of energy to move that stuff. After that, I instructed Leo where he should stand and how he should position his hands (no creepy hands in that pose please). Now I took the first digital picture to see how everything looks like.
After that, I did the first exposure test with a 4×5 Inch plate. I used the same camera for that. The plate was a little too bright for my taste. So I changed the aperture from 5 to about 7. Now I started to pour the big plate. This time I was a little more excited than normally. This is the third time I was filmed professionally during that whole process, but to make a 12×16 Inch wet plate is no piece of cake and not now an easy routine. Anyway, I was very happy with the poured plate and put it afterward in the silver bath for 3 minutes.
Meanwhile, I rushed back to Leo and checked the focus on the camera. Back again in the darkroom, I put the plate out of the bath, cleaned it and put it afterward in the wooden light sealed plate holder. Rushing with the holder back to Leo and my 100-year-old camera. Exchanged the ground glass with the plate holder I was ready to shoot. Lens cap of the lens – releasing 6000W during the day onto the Harley and Leo and after under a second, the lens cap was back in place again. Rushing again back into the dark room where the next challenge was waiting for me. Pouring the developer. Because I used a different technique it was much easier than I expected it to be. Slowly the Image started to appear and I saw that it looks good. A final wash before I could fix the plate and then I was on the way into daylight where everybody was waiting for the fixing process.
After I put the plate into the fixing tray the magic started to happen. It always seems that the image disappears but in the very same moment it appears again from kind of negative to a positive and it looked awesome.
Everybody was excited and happy and I was proud and happy to about my work.
As soon as I know broadcast times or I have an online link, I let you know here on the blog.
If you guys want to experience yourself how a tintype is made and own a one of a kind wet plate, please contact me via my website http://zeitreise.jetzt
I do workshops too so you can build your own tintype.
Don’t forget to subscribe to my Newsletter: https://www.hs2k.at/blog/Newsletter/
Used Hardware:
Hensel Tria 6000 Generator
EH Pro 6000 stribe head
Hensel Grand 90
the result:

