
Scroll down for English Version
Normalerweise erstelle ich Fotografien. Diesmal ist das Endprodukt aber ein Video bei dem ihr die Veränderung der Kristalle/Salze vom Kollodium-Nassplattenprozess verfolgen könnt.
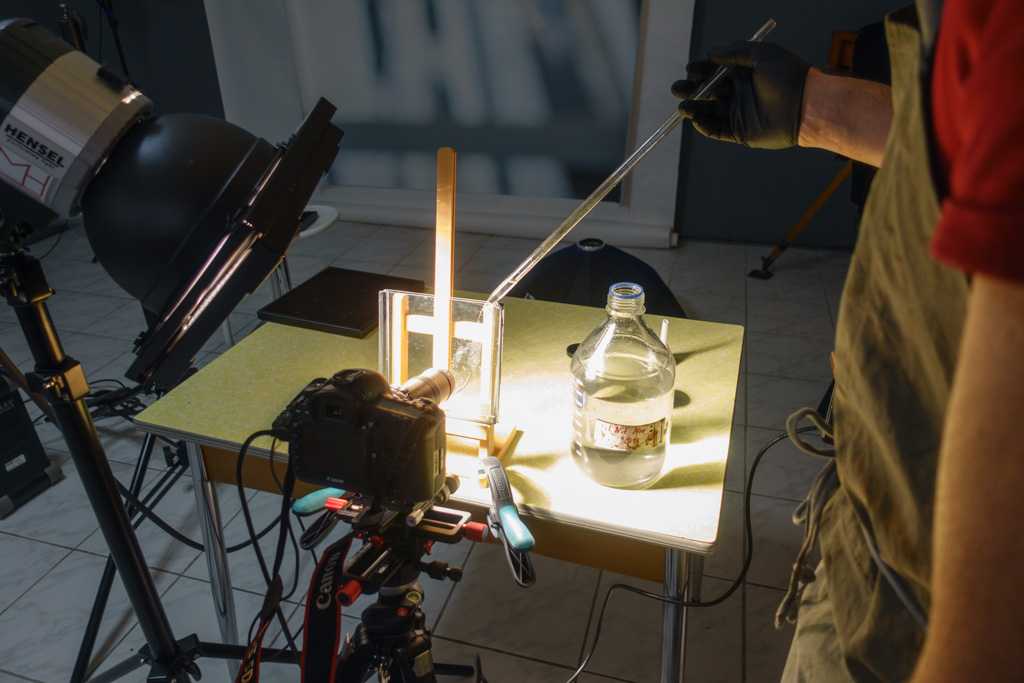
Dieses Projekt habe ich gestartet, da ich bei meinen Workshops sehr oft danach gefragt werde, was beim Entwickeln, Fixieren oder Sensibilisieren der Platten vorgeht. Natürlich habe ich es schon oft zu erklären versucht, aber ein Bild sagt mehr als 1000 Worte. Deshalb ist dieses Video entstanden. Nur war mir am Anfang nicht bewusst, dass dabei solche unglaublichen bewegten Bilder entstehen. Als wir das Video vom Entwickler live gesehen haben, waren wir beide wie hypnotisiert. Aja, wir sind Erich und ich. Erich, ein guter Freund hat mich bei den Aufnahmen tatkräftig unterstützt. Hier auch gleich nochmal vielen Dank! Und weil ich gerade dabei bin, auch vielen herzlichen Dank an Reinhold von http://www.glaserei.at, der mir die kleinen Glastanks zum Filmen erstellt hat – mehr dazu später. Bevor ich euch vielleicht mit den technischen Details langweile, hier die Videos – ja es sind zwei geworden, da ich es nicht lassen konnte und die Ultra-Macro-Videos als extra Relax-Video zusätzlich hochgeladen habe.
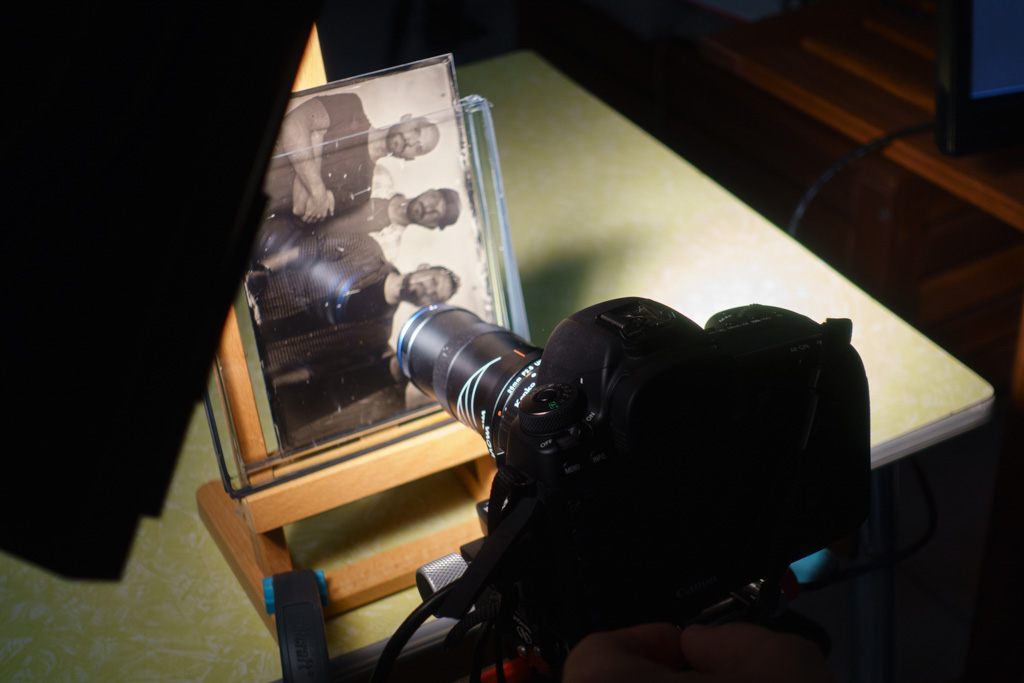
Zuerst das Video, dass den Kolloidum-Nassplatten-Prozess erklärt – alle darin enthaltenen Nahaufnahmen der Chemikalien wurden mit dem Laowa Ultra 5x Macro inklusive einem Zwischenring an einer Canon 5D MK IV gefilmt – es handelt sich nicht um Computeranimationen!
Und jetzt das Relaxvideo in 4K:
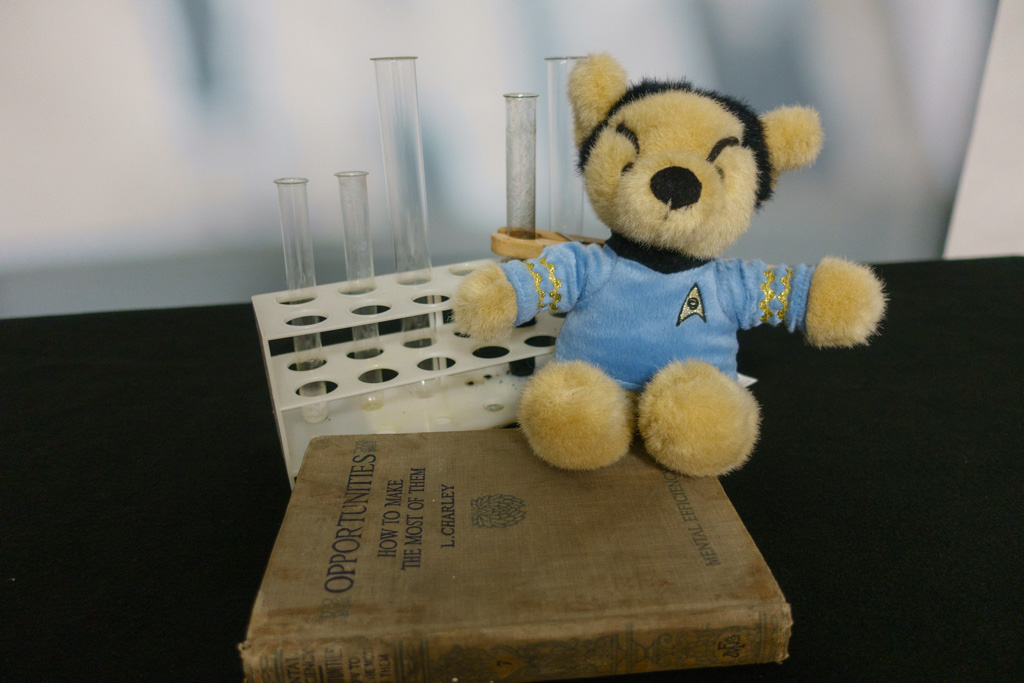
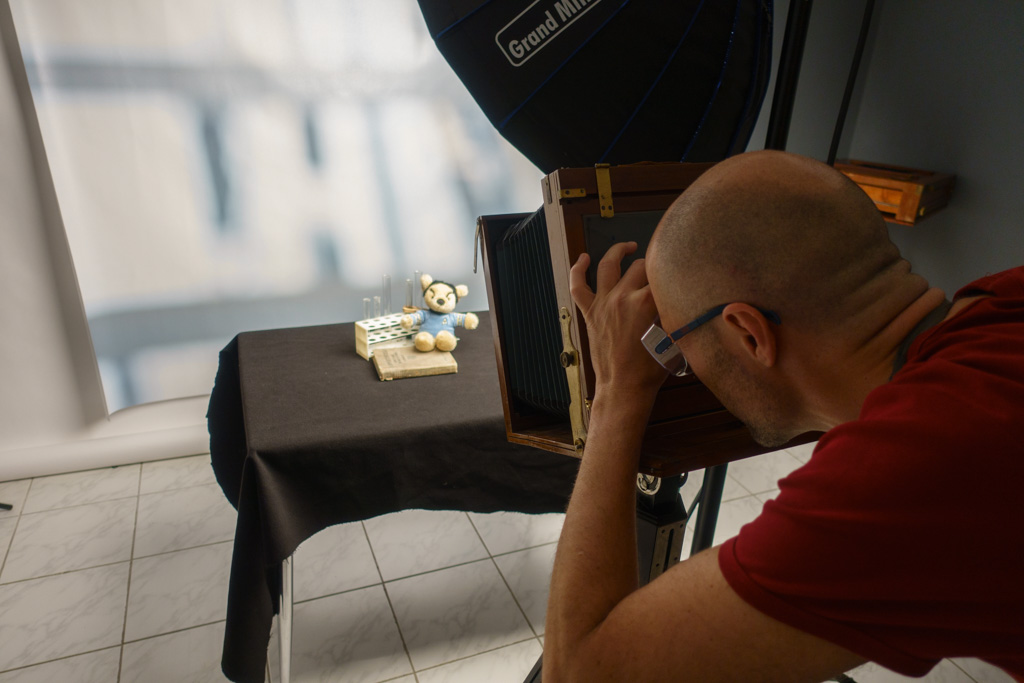
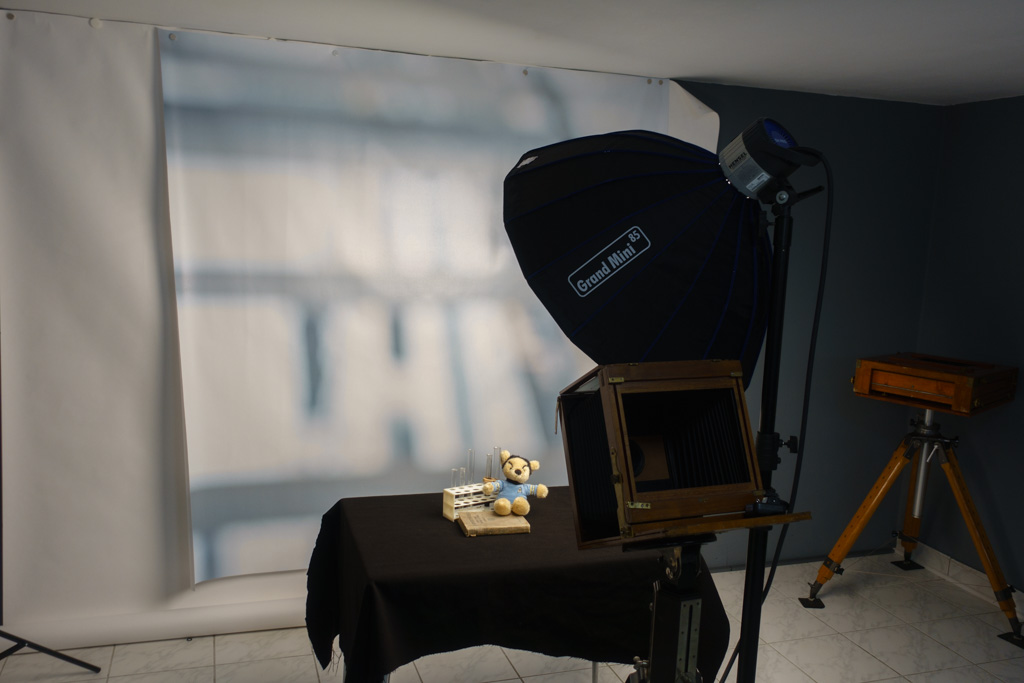
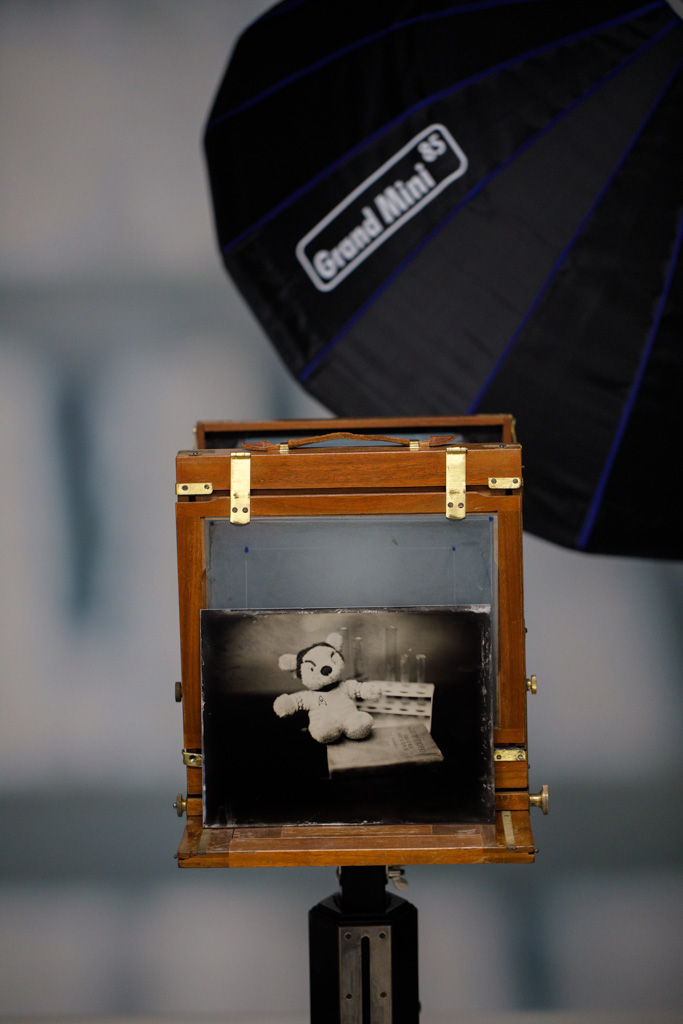
Jetzt darf ich noch unser Model vorstellen, das nicht besser zu den Projekt hätte passen können. Wissenschaftsoffizier Mr „Teddy“ Spock – der auf dem passenden Buch „opportunities and how to make the most of them“ sitzt 😉

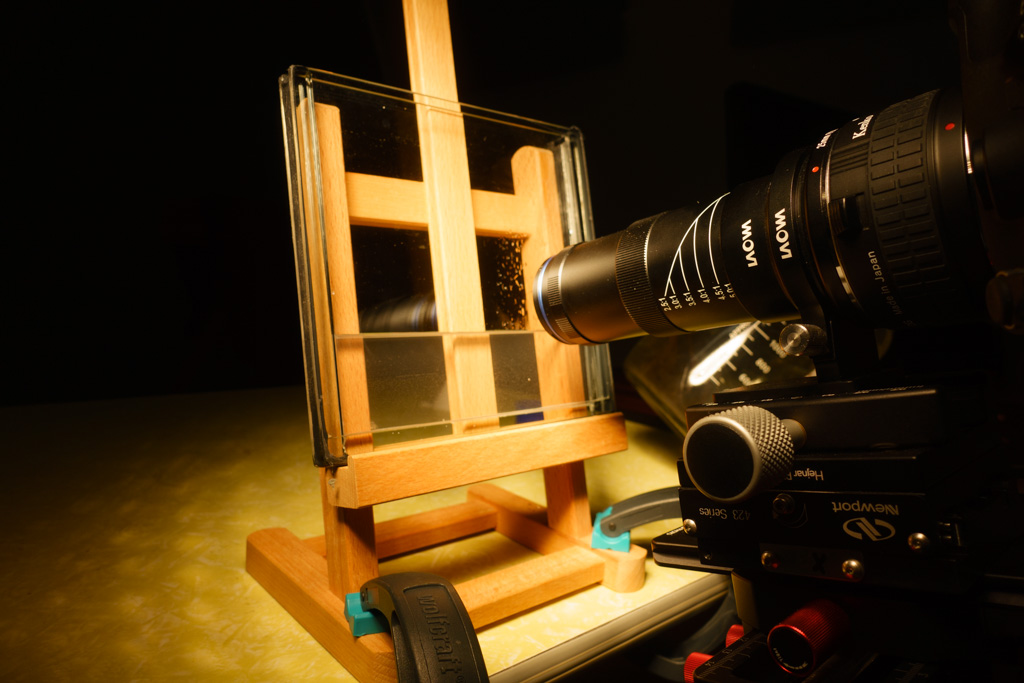
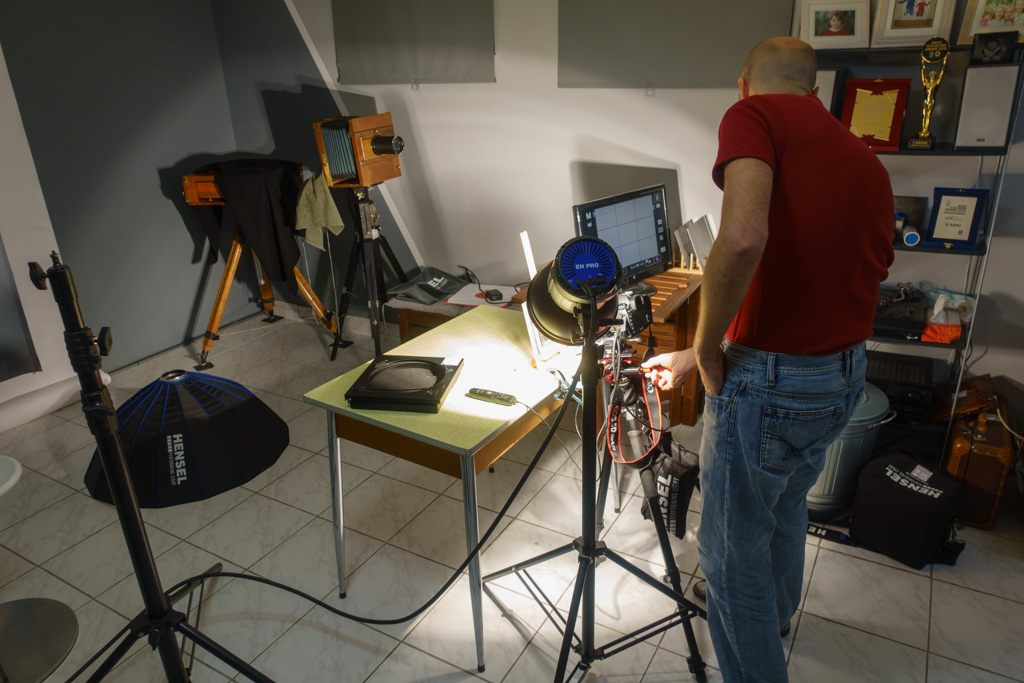
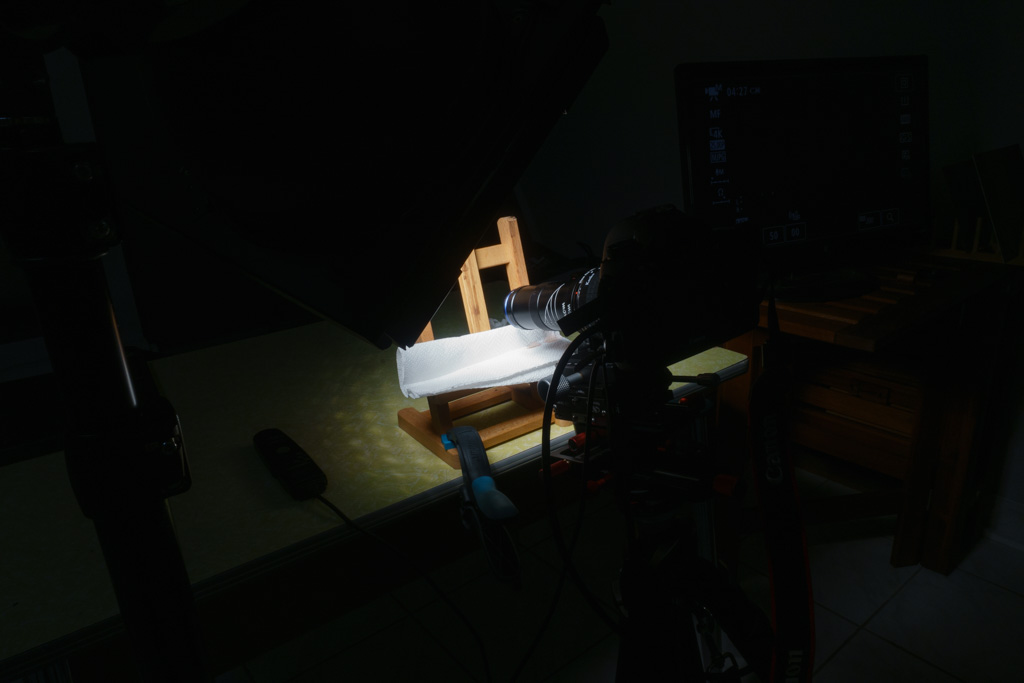
Der Aufwand dieses Video zu drehen war sehr hoch, da die Schärfentiefe auf 1/10mm begrenzt war. Ich fokussierte also mit einem selbst umgebauten Fokussierschlitten, der teilweise aus Laborzubehör gebaut wurde. Per HDMI Kabel habe ich das Bild der Canon 5D MK IV auf ein großes Display gebracht um besser fokussieren zu können.
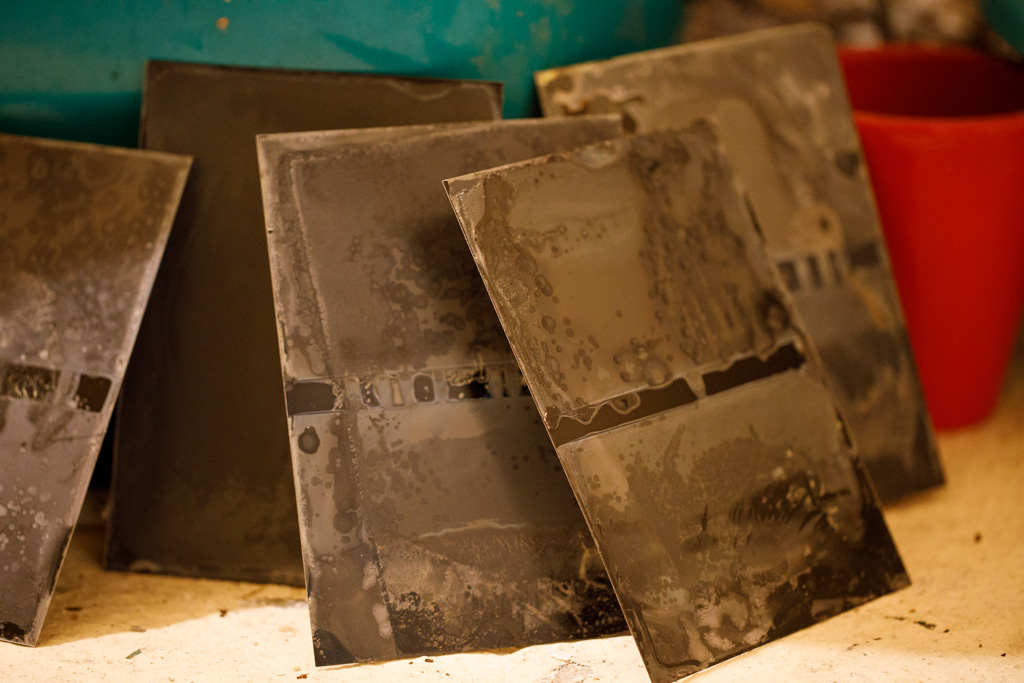
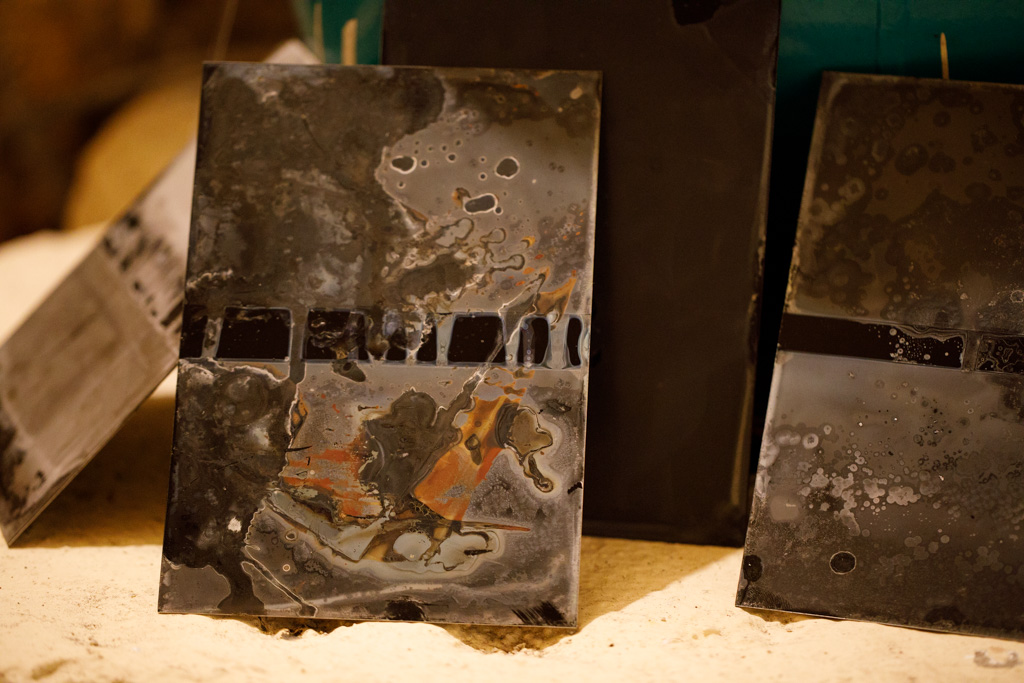
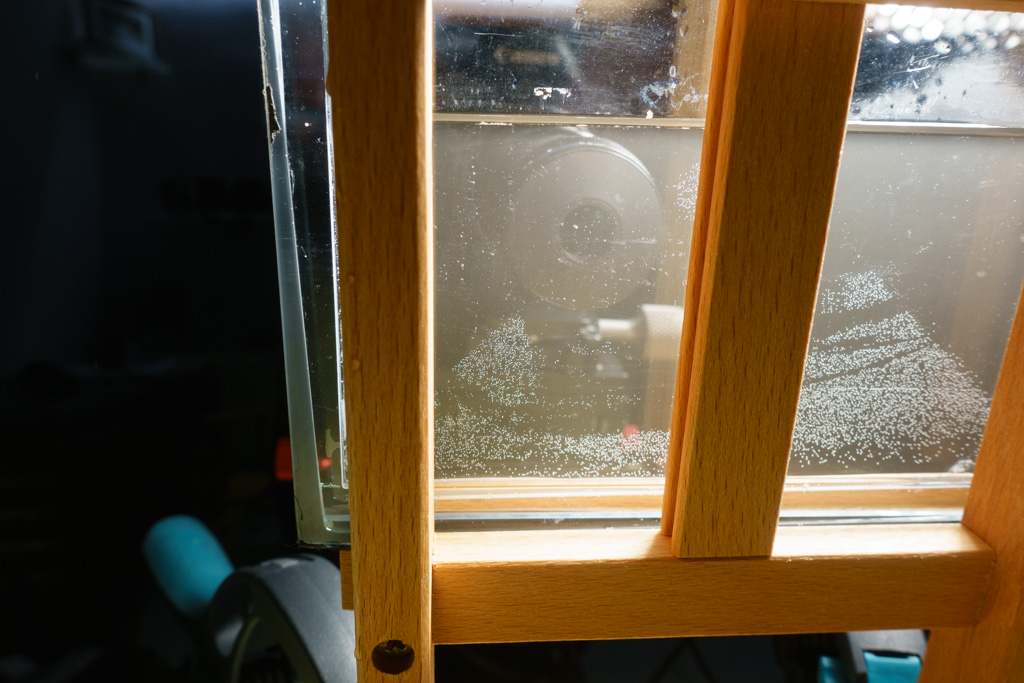
Aus diesem Grund habe ich auch viele Platten verbraucht, da die Platten nach dem Einlegen immer wieder um ein paar Zehntel Millimeter versetzt waren und ich nicht viel nachjustieren wollte, damit das Video so ruhig wie möglich bleibt – hier ein kleiner Vorgeschmack meines Verbrauchs an Platten. Irgendwie sind selbst diese zerkratzen Platten ein Kunstwerk für sich.
Neben der Schärfentiefe waren Erschütterungen auch ein großes Problem. Sollte ihr also hin und wieder kleine Bewegungen im Video sehen – das waren Erich und ich beim Stehen. Es reicht schon wenn eine Fliese um 1/10mm nachgibt. Das ist auch der Grund warum es nur wenig Making-Of Material gibt. Jede Bewegung birgt die Gefahr von Erschütterung beim Video.
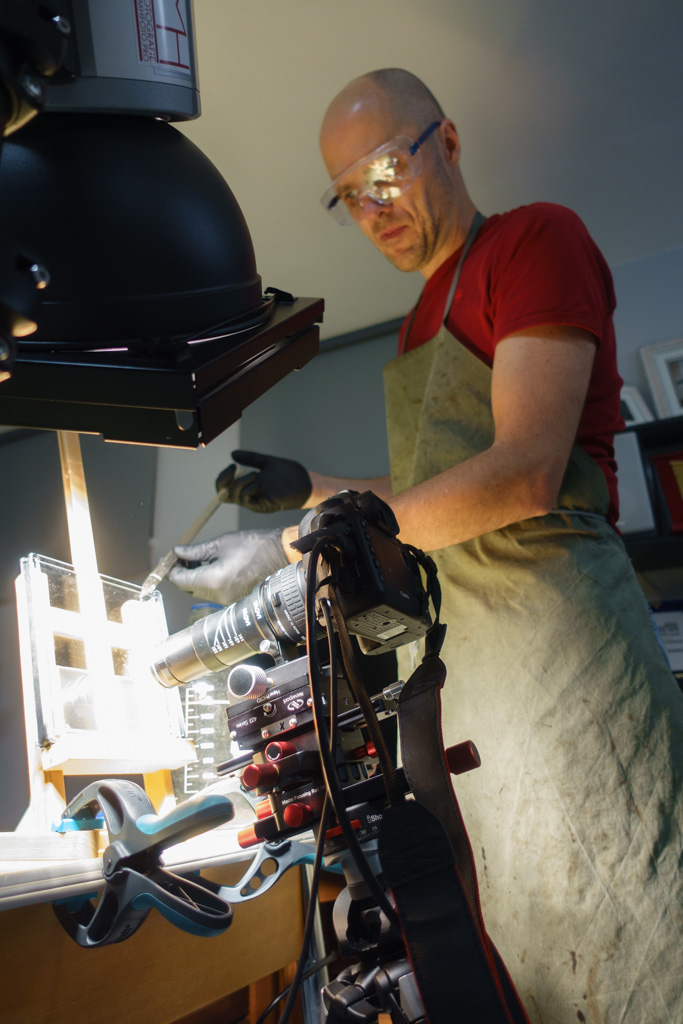
Durch die Beleuchtung entstand Hitze und Hitze erzeugt kleine Bläschen in den Chemikalien, also war öfter reinigen angesagt.
Kurze Erklärung des Prozesses:
Der Prozess nochmal kurz erklärt, ich leere am Anfang ein Gemisch aus Kollodium, Äther, Alkohol und Bromsalzen (Kadmium und Ammonium) auf die Platte. Nachdem die Platte in das Silbernitratbad eingetaucht wurde, werden aus den Bromsalzen Silbersalze die lichtempfindlich sind. Jetzt wird die Platte unter Rotlicht in die lichtdichte Kassette gelegt. Die Kassette wird dann an die Kamera montiert und belichtet. Nach der Belichtung wird die Platte mit dem Entwickler übergossen. Das beinhaltete Eisensulfat bleibt bei der Entwicklung an den Kristallen hängen, die mit Licht aufgeladen wurden. Die Entwicklung wird mit Wasser gestoppt und anschließend wird die Platte fixiert. Der Fixierer beinhaltet Natriumthiosulfat, welches die überschüssigen Silbersalze auflöst und das Bild entstehen lässt.
Hier ein Video mit genauer Erklärung des kompletten Prozesses:
https://www.youtube.com/watch?v=jRERNUBgYpw
Erzeugung und Wartung von Silbernitrat, Entwickler und Fixierer:
https://www.youtube.com/watch?v=rexAAFcq18Y
Erzeugung von Kolloidum:
https://www.youtube.com/watch?v=ozf-irotm40
Hier noch ein paar mehr Fotos von der Entstehung:

Nächste Workshops: http://www.markus-hofstaetter.at/pages/workshops/
Für individuelle Workshops kontaktiert mich hier http://www.markus-hofstaetter.at/pages/kontakt/
Wollt ihr selber eine Nassplatte samt Entstehung erleben – kontaktiert mich einfachhttp://wetplate.art
Wollt ihr immer auf Letztstand sein, tragt euch in meinen Newsletter einNewsletter: https://www.hs2k.at/blog/Newsletter/
English Version
Normally I use videos to document my work. This time the video is the main outcome of my work that shows how the crystals/salts change during the wet plate collodion process in an ultra macro video.
I started this project because I got asked a lot how the process is working. Questions like „what happens during fixing“ or „what changes when the tintype runs dry“ and so on. As you can imagine, I tried to explain every aspect of this process, but a picture is worth a 1000 words. Thats the reason of this video. What I did not know was, that the outcome will be this amazing, mesmerizing pictures from another world. Our jaws dropped during the first video of the developer doing its work. Our, because Erich a good friend helped me capturing the process. Thanks again for everything! Another great guy who made this project possible is Reinhold of http://www.glaserei.at who made the little glass containers I was filming the chemicals through. More information about that later. First I show you guys the two videos. The first one is about the whole wet plate collodion process – The second one shows the mesmerizing chemical ultra macro animation with relaxing music in 4k. That is something you can just run as a screensaver, or just if you want to slow down and relax.
All closeup macro videos of the chemicals were done with the Laowa 5x ultra macro without any CGI!
The video, that shows the whole process:
This one was just created for relaxing reasons 🙂
One more fun part. We decided to go with science officer Mr. „Teddy“ Spock as model and if you watch closely, you find him sitting on a antique book that is called „opportunities and how to make the most of them“ – I just thought this is the appropriate way to go.
It was much more work to get the job done, then I thought it will be. The depth of field at this magnification is about 1/10th of a millimeter. That is the reason I used a self modified macro focusing rail (actually three of them), partly made of laboratory equipment. The focusing on my Canon EOS 5D MK IV was done via HDMI on a bigger screen. The Screen on the 5D would have been too small for that.
This was also the reason I consumed a lot of plates. Because I prefocused before I put the plate in the glas tank to get a smooth video. If I misplaced the plate for only 2/10th of a millimeter, I had to do the shot again. But even these plates look kind of cool. I started to do scratches on the plates before I put them into the tank, so it was easier to focus.
Beside of the tiny depth of field, every tiny vibration was a huge problem. If you see some tiny movements during the video, this is because we were not standing as still as we should have. I never thought the tiles on the floor are moving, but they do – even when we stand 2 meters away. Thats also the reason our making of material is limited.
The next issue was the light, it heated up the chemistry and that resulted in little bubbles that showed up. So we had to clean the tanks pretty often to move them away.
A short explanation of the whole process:
At the beginning I pour a mixture of ether, alcohol, collodion, cadmium bromide and ammonium iodide on the plate. After I put the plate in the silver bath, this cadmium bromide and ammonium iodide turn to silver bromide and silver iodide – which are light sensitive. From now on I have to work under safe light when I put the plate into the plate holder.. After the plate holder is mounted on the camera I do the exposure. Now it’s time to go back into the darkroom and develop the plate. The developer contains ferrous sulfate that sticks to all the crystals that are charged with light. After stopping the develop process with water I start to fix the plate. The fixer contains sodium thiosulfate that washes away the unexposed silver and the image appears.
You find a detailed explanation of the process here (Sensertising, developing fixing and much more)
https://www.youtube.com/watch?v=jRERNUBgYpw
Creating and maintaining silver nitrate bath, developer and fixer
https://www.youtube.com/watch?v=rexAAFcq18Y
Creating collodion:
https://www.youtube.com/watch?v=ozf-irotm40
More BHTS pictures – thanks again to Erich for that!
Upcomming workshops: http://www.markus-hofstaetter.at/pages/workshops/
For individual workshops please contact me here: http://www.markus-hofstaetter.at/pages/kontakt/
If you guys want to experience yourself how a tintype is made and own a one of a kind wet plate, please contact me via my website http://wetplate.art
Don’t forget to subscribe to my Newsletter: https://www.hs2k.at/blog/Newsletter/


Comment on “Ultra macro video of the collodion wet plate process”
Comments are closed.