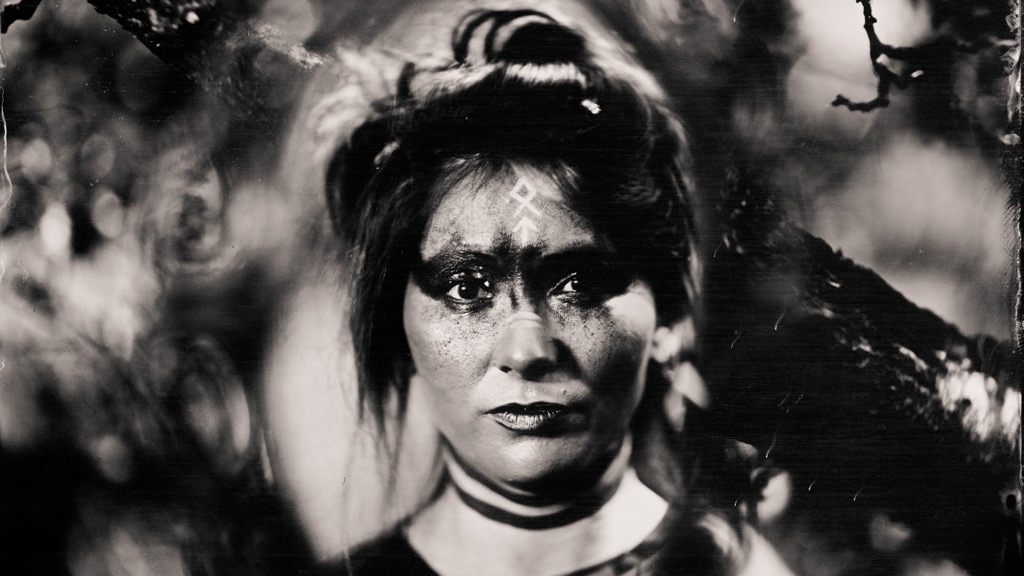
Archive for the 'nassplatte' Category

Wednesday, March 15th, 2023

Testing 6 Types of Wet Plate Varnish

I did a live stream about different types of varnish for my Patreon supporters (If you join tier 2, you can rewatch the recording of the live stream). Because some of you complained after my posting about Lukas varnish that this one is not available in your country, I bought more different ones and did this video. Enjoy guys: I show tested lots of interesting alternatives. My favourite right now is the Cobra odourless varnish gloss 102. You can get it here: international https://amzn.to/3YAVx8k Germany https://amzn.to/429li2D

  • Get yourself a beautiful print here: http://prints.mhaustria.com

  • Find all the tools I use here : http://list.mhaustria.com

  • Looking for wet plate gear? http://gear.mhaustria.com

  • Buy me a tea: https://www.buymeacoffee.com/mhaustria

  • Patreon: https://www.patreon.com/mhaustria

  • Get cool analog shirts here http://shirts.mhaustria.com
  • Posted by Markus | Filed in ambrotype, collodion, diy, nassplatte, varnish, wetplate | Comment now »


    Wednesday, March 8th, 2023

    Shooting an ultra fast lens (140mm F1.0) with an ultra large format camera

    In short words “this lens is something else”. It’s extremely fast, huge and has a strange focus distance. It was used in Sony CRT Projectors from 1997. I bought it some years ago from a very interesting guy. He had so many more great stuff in his shop and I regret that I did not buy more. It took me some time to find the right opportunity to use that lens. But I think it was worth the waiting. I am glad my friend and former workshop participant Alois Stingl came over with is wonderful ultra large format camera.

    Before I could use it, it needed some cleaning, I used a cloth that was soaked with water and just put it on the lens without wiping to avoid more scratches.

    with some patience I could clean it.

    I measured the lens at infinity to calculate the F-Stop. I measured 135mm and the front element was 145mm That is about a F0.9 lens. But a document I found on the internet told me its more an F 1.0 lens. Still crazy fast.

    You can see here how short the focusing distance is. That makes it hard to focus un an ultra large format camera.

    When I saw the yellow coating on the front element of the lens, I thought about Mathieu Stern’s video about radioactive lenses. If it really is made of Thorium, it is indeed radioactive, but only for a very small amount. Watch Mathieu’s video to learn more about this Material

    Thorium was used to get more light into the lenses back then.

    Because the lens is very fast it is still dangerous. If it focuses the sun on something, it will start to burn immediately. That’s the reason you should not put the lens near a window and always put a lens cap on it.

    In the video I will show you how easy you can start a fire with that lens

    I thought it would be interesting to calculate the crop factor of an 40x50cm ultra large format camera. If you use the common formula to calculate crop factors you will see that this plate size has a crop factor of 0.0067 compared to a full frame sensor. With that you also can calculate the comparable depth of field F-Stop. This would also be F 0.0067 compared to F 1.0 on a full frame camera. When I tried to focus on the ground glass, I could barley find something in focus. Thats why you see me focusing for a very long time.

    it took quite some time to focus with this very fast lens.
    I think this shows pretty well how sensor and plate sizes compare

    But there is more. a 140mm lens is a tele lens on a full frame camera, but it’s a wide angle lens on an ultra large format camera. This is because of the bigger plate size of the ULF camera. listen to my full explanation in the video.

    My drawing shows in a simple way that the subject needs to be farer away from a full frame sensor the get the same angle of view as the close setup of the ULF camera.

    To “connect” the lens to the camera, I designed and printed a basic flange in Tinkercad. It needed some pool line and tape, but eventually it worked out.

    I think Tinkercad is one of the most yeas to use tools for 3D printing.
    a very basic part, but incredible helpful
    No screws, just tape, pool liner and my 3d print. Sounds funny, but worked wonderfully

    The next issue was the fact that my darkroom was not made for 40x50cm plates. only for 30x40cm ones. After some tests with smaller plates, we only had one cup of developer left. Beside that, everything starts to get unpleasantly expensive if you pour on plates with this size. So my goal was to make it work with only one attempt. I did some dry runs to get comfortable with everything. Not only the dark room work was something I had to prepare for, but also the camera. These old beauties all have some quirks. Besides that, Alois made a beautiful plate holder by himself. These holder needed also some special attention. But as explained in the video, I love these challenges. It makes the result at the end even more sweet.

    To calculate the strobe power I needed, I used my wet plate strobe calculator that I created for my Patreon supporters. Since I made it, I use it all the time for myself, because it makes life much easier with the wet plate process. If you are a fan of analog photography and the wet plate process, have a look at our wet plate conversation magazine on Flipboard. Besides many great stories about our favourite process, you’ll wind there also work from other wet plate artists.

    I really like how this portrait turned out. As expected it is very abstract because of the F-Stop and the wide angle lens.Here you can see again how huge that tintype is.

    But this is not the end, because of some kind of funny coincidence, a former workshop participant sent me a very similar lens over. I am thinking to do a still life plate with that one. What do you guys think?

    Two very similar lenses. Funny how sometimes things turn out.

    But there is more, I got also a very tiny lens. I guess I need to build a camera for this one

    A full functional lens in the size of a thumb. I haven’t seen such a thing before. What a cutie.

    I hope you enjoyed that journey. It took me a long time to finish everything, but I am again glad that I worked through it.

  • Get yourself a beautiful print here: http://prints.mhaustria.com

  • Find all the tools I use here : http://list.mhaustria.com

  • Looking for wet plate gear? http://gear.mhaustria.com

  • Buy me a tea: https://www.buymeacoffee.com/mhaustria

  • Patreon: https://www.patreon.com/mhaustria

  • Get cool analog shirts here http://shirts.mhaustria.com
  •  

    Wednesday, March 1st, 2023

    How to fix this Tintype/Wet Plate Problem!

    I see more and more lines on tintypes these days. From my point of view these appear because of glue residue. In todays video I show you how you can get rid of them. Hope this helps. Let me know if it solved this for you or if you have still this issue. Scroll down for samples

  • Get yourself a beautiful print here: http://prints.mhaustria.com

  • Find all the tools I use here : http://list.mhaustria.com

  • Looking for wet plate gear? http://gear.mhaustria.com

  • Buy me a tea: https://www.buymeacoffee.com/mhaustria

  • Patreon: https://www.patreon.com/mhaustria

  • Get cool analog shirts here http://shirts.mhaustria.com
  •  

    Wednesday, December 28th, 2022

    Denis Krieg – Inspired Series

    I’ve known Denis for a few years now and over time a nice friendship has developed. We met for the first time during the Camera Obscura Festival in Germany, but we were in contact several times before that.

    From Denis I bought my current large format camera and some lenses. Also one of my more important lenses – the Dallmeyer 3b which I use a lot for this series is from Denis. Read more in this post https://blog.markus-hofstaetter.at/2021/03/inspired/

    His knowledge of historical equipment is fascinating. His craftsmanship and restoration skills are also second to none. Check out his website here www.wetplatedreams.com.
    Denis keeps historic history alive with his work.

    I also captured a portrait with Denis and his Wife Sybille that I like a lot.

    Denis Krieg of wetplatedreams.com
    Denis with his wife Sybille

  • Get yourself a beautiful print here: http://prints.mhaustria.com

  • Find all the tools I use here : http://list.mhaustria.com

  • Looking for wet plate gear? http://gear.mhaustria.com

  • Buy me a tea: https://www.buymeacoffee.com/mhaustria

  • Patreon: https://www.patreon.com/mhaustria

  • Get cool analog shirts here http://shirts.mhaustria.com
  • Posted by Markus | Filed in inspired, nassplatte, portraits, wetplate | Comment now »


    Friday, November 18th, 2022

    Wet Plate Strobe Calculator with Light Modifier Comparison

    How much power do I need for my wet plate setup? I get this and similar questions asked a lot. Thats the reason I build a calculator for that. With the calculator, there comes also a knowledge base. Because there is much more to know about strobes and the wet collodion process. This is exclusive for Patreon supporters (Tier 2). With tier 2 support you get, also wet plate troubleshooting, access to recorded Patreon videos, early access to videos and much more. Link to this Patreon posting: https://www.patreon.com/posts/wet-plate-strobe-74548519
    More about the calculator in this video:

  • Get yourself a beautiful print here: http://prints.mhaustria.com

  • Find all the tools I use here : http://list.mhaustria.com

  • Looking for wet plate gear? http://gear.mhaustria.com

  • Buy me a tea: https://www.buymeacoffee.com/mhaustria

  • Patreon: https://www.patreon.com/mhaustria

  • Get cool analog shirts here http://shirts.mhaustria.com
  •  

    Wednesday, September 7th, 2022

    Freilichtmuseum Salzburg Wet Plate Experience (rainy days)

    Wet plate in the rain? Sure thats why its called wet plate 🙂 We had a great time in Salzburg and it was a pleasure to be there again. It’s great to do portraiture in these wonderful old houses. You have to visit this museum when you are nearby. It is totally worth it. The best time would be when I shoot portraits there 😉

  • Get yourself a beautiful print here: http://prints.mhaustria.com

  • Find all the tools I use here : http://list.mhaustria.com

  • Looking for wet plate gear? http://gear.mhaustria.com

  • Buy me a tea: https://www.buymeacoffee.com/mhaustria

  • Patreon: https://www.patreon.com/mhaustria

  • Get cool analog shirts here http://shirts.mhaustria.com
  •  

    Wednesday, July 27th, 2022

    Darkroom Home Automations

    Even I am an analog guy, I am not shy to bring new technologies to my darkroom. With the wet collodion process I always try to avoid touching anything unnecessarily. So I build some home automations to assist me with that. Every analog photographer knows the struggle. You work in your darkroom and in this very moment you don’t want to be disturbed. Just imagine, somebody opening the door and your film/paper/plate is exposed to light. For sure, you just can mount a red light on the entrance door and you are safe. But in my case (and I am pretty sure I am not the only one), I have a main entrance to the darkroom and two other doors. One door leads to my studio and the other door to my pouring room. That means if any of these doors are open, it is safe to enter the darkroom. If I just would have a red light on the main entrance door, it would be hard to understand for my workshop participants or sitters if it is safe to enter. Thats the reason I build a solution for that with Apple Homekit (you for sure can build it also with Google/Alex or anything else). But there is more. We all have running water in our Darkrooms. And I think some people will have a water detector. But what if you have to wash something with running water and are not in your darkroom all the time? I used Homekit for that as well. I show you also a solution for measuring time without touching anything. This may be very specific to the wet collodion process, but maybe it may be helpful for others as well. The last topic is about how I feel more safe with my 3D printer.

    I looked also for Google/Alexa devices, but most of them are working with wifi instead of low power bluetooth or thread. So I am not sure if I want to recommend any of these, please let me know which ones work great and I post them here.

    Works with Homekit: Eve Energy power switch
    International https://amzn.to/3BfCqIH Germany: https://amzn.to/3cEAH5s
    Eve Door sensor
    International https://amzn.to/3J3MV3S Germany: https://amzn.to/3b4PiXu
    Eve Waterguard
    Inernational: https://amzn.to/3Pxnn1n Germany: https://amzn.to/3POEJHv
    Eve smoke is not available right now, I found only this alternative from Netatmo
    https://amzn.to/3Ou6T8Z

    Works with Homekit and Google/Alexa
    Philips Hue lightstrip
    International: https://amzn.to/3J7jnlR Germany https://amzn.to/3cGmZzd
    Philips Hue Bridge
    International: https://amzn.to/3z6bYP9 Germany: https://amzn.to/3cxRdEl
    Philips hue switch
    International https://amzn.to/3b1NGxY Germany: https://amzn.to/3Ox1kGX

    Apple Watch app https://apps.apple.com/de/app/click-metronome/id705075264

    Water resistant JBL BT Speaker (new version
    International: https://amzn.to/3Be74Cj Germany: https://amzn.to/3J4DKjA

  • Get yourself a beautiful print here: http://prints.mhaustria.com

  • Find all the tools I use here : http://list.mhaustria.com

  • Looking for wet plate gear? http://gear.mhaustria.com

  • Buy me a tea: https://www.buymeacoffee.com/mhaustria

  • Patreon: https://www.patreon.com/mhaustria

  • Get cool analog shirts here http://shirts.mhaustria.com
  • Posted by Markus | Filed in 3d print, collodion, darkroom, nassplatte | 4 Comments »


    Wednesday, May 18th, 2022

    Inspired Series – Henrik Brahe and Gerhad Sokol

    My inspired series is going on slowly, but for sure I captured wonderful people on metal plates. First you see Henrik Brahe. An archaeologist and photographer from Portugal. He brought me a wonderful book of his work. Find out more about him at http://henrikbrahe.com He visited with his beautiful wife Sanne. I could not resist to capture them together as well.

    Gerhard Sokol is a well know photographer who captured history with his work. But after all these years in photography, he did not stop there, he went on to work with lots of different techniques. He also published a book recently that tis worth to buy. you can find his work and book on https://www.bilderges.at

    More information about the Book (with beautiful prints and stories) and the Inspired Series: http://inspired.mhaustria.com

  • Get yourself a beautiful print here: http://prints.mhaustria.com

  • Find all the tools I use here : http://list.mhaustria.com

  • Looking for wet plate gear? http://gear.mhaustria.com

  • Buy me a tea: https://www.buymeacoffee.com/mhaustria

  • Patreon: https://www.patreon.com/mhaustria

  • Get cool analog shirts here http://shirts.mhaustria.com
  •  

    Thursday, May 12th, 2022

    Growing Together – World Wet Plate Day 2022

    I decided to participate this year for the world wet plate day. I discussed it with my girlfriend and she was the one who came up with the idea. First we thought to make it in one shot, but I couldn’t wrap the outcome into my mind because of the limited depth of field. So I came up with the double exposure solution. I was pretty happy with the outcome, but thought I could improve it a bit -> that was not my best idea (happy I did a scan before that). As you can see in the video, I got also unlucky with the varnish. So I am working right now on that to fix it. I will write about my result here on ma Patron page, you can support me and join here: Become a Patron!

    Growing Together 18x24cm collodion wet plate – Zeiss Tessar 300mm
    this is how we positioned each other.

  • Get yourself a beautiful print here: http://prints.mhaustria.com

  • Find all the tools I use here : http://list.mhaustria.com

  • Looking for wet plate gear? http://gear.mhaustria.com

  • Buy me a tea: https://www.buymeacoffee.com/mhaustria

  • Patreon: https://www.patreon.com/mhaustria

  • Get cool analog shirts here http://shirts.mhaustria.com
  •  

    Wednesday, May 4th, 2022

    Building a Wet Plate Frankenstein Camera and Capture a Ghost

    Corrine of www.corrinewestmedia.co.uk booked a wet plate workshop before the pandemic started. Two years later we were finally able to do it. The main subject was to get comfortable with the wet collodion process and to create images similar to the ones of spirit photographer William H. Mumler. Mr. Mumler created images (probably double exposures) where his clients could take a picture with their deceased relatives. The photograph of Mary Todd Lincoln with the “ghost” of her husband (Abraham Lincoln) was his most famous one. Corrine found my double exposure wet plates and that was the reason she contacted me in the first place. About two months before the workshop Corrine surprised me with a question: “Can we build a wet plate camera together?”. I talked with a friend and after a long visit at a DIY market I was sure that we can do it. A DIY Camera and capturing ghosts, that sounds like a fun workshop for me 🙂

    I could not capture everything in the video, because I was focused to deliver a great workshop experience. So let me explain a bit here. I build a diy camera kit so to say. But I did not want to build everything. It was important for me that we put the major parts together in person, to really create a camera and an understanding how a camera works.

    the camera kit

    It took me a long time to figure everything out, I wanted to create a diy camera, that is adaptable and upgradeable without any special parts. It also should be able to shoot portraits and landscape and if something breaks, just go to your diy marked and get a replacement part. The only thing needed is my self designed camera back. I wanted to invent/adapt something that you can get in the market, but I was without luck finding such a part. The 3D printed design took many hours and a lot of filament to work as expected.

    The first prototype of the camera back with an international film holder

    For the lens I went for a 150mm Leitz Dimaron (F2.8), Elmaron (F2.8) or Hektor (F2.5). These lenses have three things in common. 150mm is kind of a “normal” lens for the 4×5 large format and they all have the same diameter and not too expensive if you buy them online. All of them are pretty sharp as well as you could see in the video (this was a Dimaron)

    one lens mount, lots of options without breaking the bank

    The camera and lens support is build like this one in that posting: Camera and Lens support

    For the Film/Plate holder I decided to go for the std international 4×5 holders. I had them water jet cut for a clean look and we modified it with silver wires, because these are more resistant against acid and fit into the silver nitrate workflow

    std 4×5 film holder modified for the wet collodion process

    We were super happy with our first result. The portrait looked awesome and the resolution of the lens is great. When you look closely at the video you will see, that we used two boxes for portrait distance.

    the ground worked also great – here is a explanation how we did it
    https://blog.markus-hofstaetter.at/2019/12/ho-to-make-a-ground-glass-for-a-large-format-camera/
    For me it’s always exciting to see my idea come to life.

    Here is a detail scan of Corrine’s eye – pretty impressive result of a 4×5 plate shot with a self made camera and a projection lens.

    a scan of Corrine’s eye with my Screen Cezanne Scanner

    For the spirit photographs that are inspired by Mr. Mumler we wend for wet plate double exposures.
    To make our live easier, we marked all positions with sticky tape on the ground.

    tape is always your friend for any photography project

    We decided to use my Dallmeyer 3B Petzval lens for the first double exposure, because it fits better to the time when the original images were captured.

    William H. Mumler. inspired wet plate double exposure

    The second double exposure was a bit more modern, but also should get the ghost look. For that we used a Zeiss 300mm F4.5 Tessar lens. This lens is pretty new (about 2ß-30 years old) and is very crisp. I thought that makes more sense for this kind of image and also fits to the story (see caption of the image)

    Profession – Yesterday, Today and Tomorrow An image about photography has changed

    What a great 3 Day workshop that was. We created so many different portraits. (more in the gallery) and time flew so fast. At this point I want to say thanks again to Corrine for visiting my workshop and trusting me with the camera design. I looking forward to see what she will do for her PHD with the wet collodion process.

  • Get yourself a beautiful print here: http://prints.mhaustria.com

  • Find all the tools I use here : http://list.mhaustria.com

  • Looking for wet plate gear? http://gear.mhaustria.com

  • Buy me a tea: https://www.buymeacoffee.com/mhaustria

  • Patreon: https://www.patreon.com/mhaustria

  • Get cool analog shirts here http://shirts.mhaustria.com
  •