Skip to content
  • YouTube
  • Facebook
  • Instagram
  • X
  • Linkedin
  • Flickr
  • Threads
  • TikTok

Markus Hofstätter's blog

  • Blog
  • Contact
  • Waterhouse Stops Database
  • Newsletter
  • About
  • Website
  • Patreon
  • My Life
  • ©
  • Toggle search form

DSLR Scanning on a Budget: Unlock Stunning Results with an Affordable Enlarger Lens

Posted on October 23, 2024October 23, 2024 By Markus

You can quite fall in a huge rabbit hole if you read about scan negatives with your mirrorless or DSLR camera, lots of people recommend different lenses. 

You easily can spend 1000+ Euro for a macro lens that will disappoint you when scanning negatives.
On my last DSLR (or mirrorless) Scanning video/article, I got some hints to use an enlarger lens, or even one of the more expensive Macro lenses that look like enlarger lenses. So I looked in my cabinet and found a Rodenstock Rodagon 80mm F 4.0 from my durst enlarger.

The Rodenstock Rodagon 80mm 4.0 is normally mounted on my durst enlarger. But for now it will scan negatives.

To use this lens on my Leica M11, I needed a bellow. I bought myself an old used Novoflex Bellow for about 45 Euros. It’s very precise and easy to use

This one connects to M42 lenses, this is ideal for enlarger lenses, because you can get easily an adapter for M39 lenses as well.

The lens I used before to scan my negatives was the Canon EF 100MM F/2.8L Macro IS USM. This is a very sharp and great lens, I love it even for portraits on my Canon 5D MKIV. But it has its downsides for scanning negatives. The corners are always soft. The Rodenstock lens is made to project images on flat surfaces. Thats why it performs that well with negative scanning.

what a tiny lens the Rodenstock Rodagon is compared to the Canon 100mm macro

Filmwise I waited to develop a roll that I used for reportage images that will be part of my inspired series book With that project I portray people with the wet collodion process who are inspiring. You can watch my video about it here: https://youtu.be/lMRuFIXIy7s?si=GZHmPDgu1iTt9HPn

Michael White – Producer/Director/Author/Technician – part of my inspired series


Check the video for all comparisons:

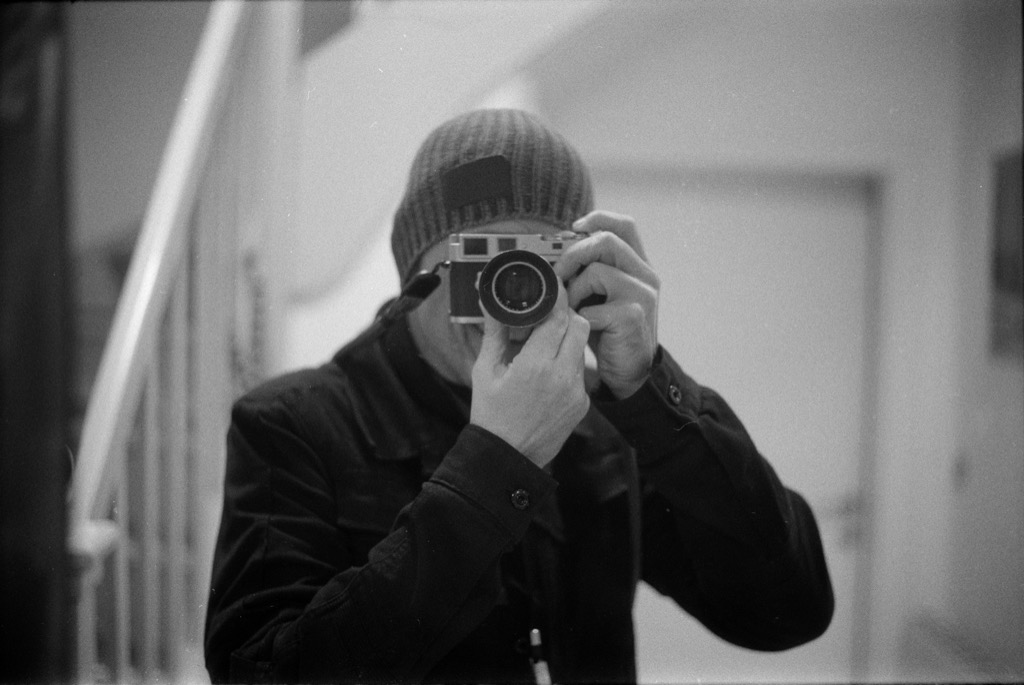
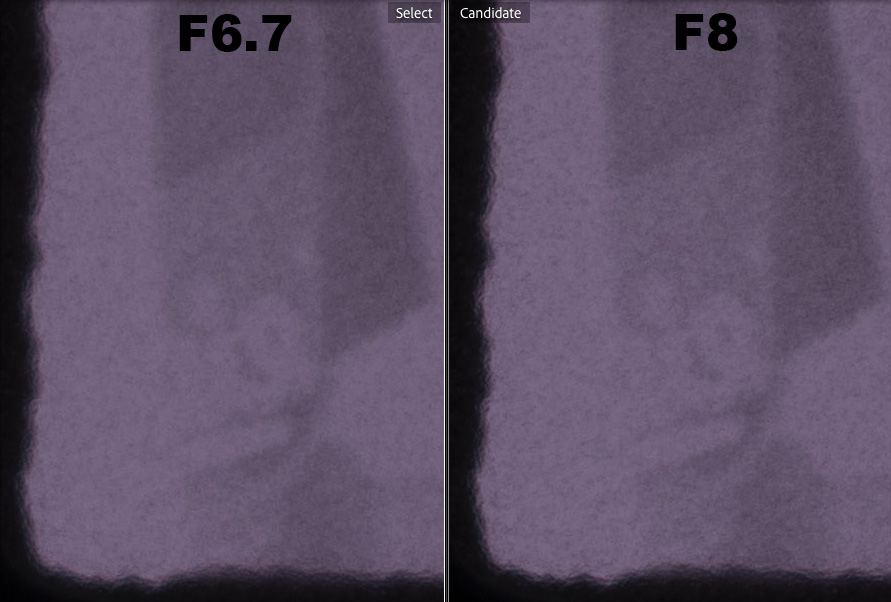
First I tested different stops to see what will be the best one for scanning negatives with my Leica M11.
It’s kind of a Leica inception, because I scan my Leica M2 negatives with my M11 🙂
Now let me show you, why I chose F8 for that lens

The Rodenstock Rodagon Lens ist much softer at the corner at F4 compared to F8
At the center F4 looks a tiny bit sharper compared to F8
F8 has again an advantage in corner sharpness compared to F 6.7
but centerwise I would give F 6.7 a slight win.
When comparing F8 to F11, F8 looses to F11. Not much but it does.
But centerwise F8 takes an easy win over F11. The grain is much softer at F11 on the Rodenstock Rodagon 80mm lens

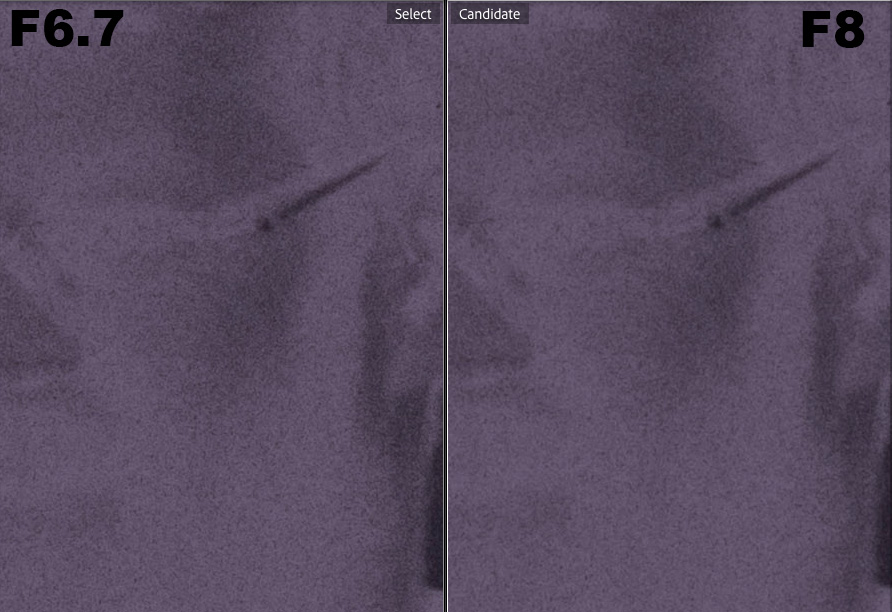
Ok, now after I came to the conclusion, that F8 is the way to go, I compared the Rodagon lens with the 100mm Canon macro. Before that I tested also the Canon lens with different apertures.

Here both look very similar. When using the 100mm Canon on my Leica camera, I had a little bit more distance between the lens and the negative, thats why it is a bit smaller.
there is nothing more to explain here, the 120 euro Rodenstock lens, just kills the Canon in that discipline. But as said before, that lens is made to project flat surfaces.

The Rodenstock Rodagon 80mm F4 is a wonderful lens for scanning negatives, it’s cheap, sharp and small. But honestly, it all depends with what you want to do with your scanned negatives. If you just want to post on social media. Use the lens that you have and maybe buy some extension rings. Or spend about 100 Euros and get this great combination. I hop I could help some of you with that article. If you want to support my work and this free blog without any advertisement (since 2009), you can support me on patron http://patreon.mhaustria.com , buy me a tea https://buymeacoffee.com/mhaustria or just use this link https://paypal.me/mhaustria.
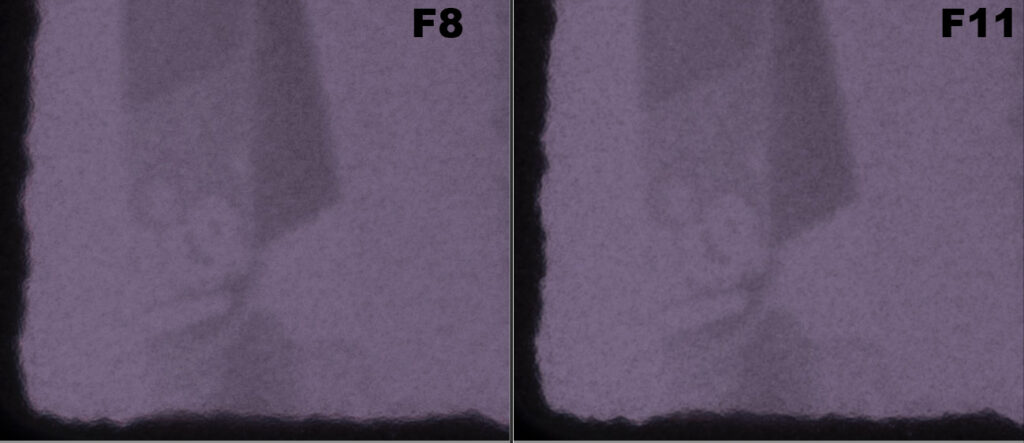
some more scans


  • Get yourself a beautiful print here: http://prints.mhaustria.com

  • Find all the tools I use here : http://list.mhaustria.com

  • Looking for wet plate gear? http://gear.mhaustria.com

  • Buy me a tea: https://www.buymeacoffee.com/mhaustria

  • Patreon: https://www.patreon.com/mhaustria

  • Get cool analog shirts here http://shirts.mhaustria.com
  • analog, darkroom, film deveopment, inspired, scanning, tutorial

    Post navigation

    Previous Post: Unveiling Film from a 110-Year-Old Camera – Cold Film Development!
    Next Post: Why Photographers Are Ditching the Viewfinder

    Related Posts

    A Wet Plate Collodion Experience in Slovenia alumitype
    The First Analog Photography Festival After The Pandemic alumitype
    Shooting an ultra fast lens (140mm F1.0) with an ultra large format camera 3d print
    I was not ready for this analog
    Shooting wet plates handheld – yes it is possible and I did it Steampunk style! – my 4-months long journey on video alumitype
    My new easy to use Darkroom analog

    Copyright © 2025 Markus Hofstätter's blog.

    Powered by PressBook Masonry Dark