Monday, April 15th, 2019
Stereo 3D Ultra Large Format Wet Plates
Click or Scroll down for English Version
Noch ein Projekt, das viel länger gedauert hat, als ich mir ursprünglich vorgestellt habe.
Dieses Projekt hat viel Energie, Enttäuschung und Freude in mein Leben gebracht. Vieles erkläre ich im folgenden Video und noch mehr im Artikel darunter.
Die Ausstellung
Nach einem Besuch auf der http://3dimensionale.at – eine Ausstellung im Technischen Museum in Wien, hat mich das 3D Fieber gepackt. Ich sah dort eine Stereo Nassplattenkamera und dachte mir, dass ist sicher ein lustiges Projekt. Wenn ich vorab gewusst hätte, dass hinter diesem Projekt so viel Arbeit steckt, hätte ich es sicher gelassen.

Bücher
Zum Glück wies mich ein guter Freund auf dieses Buch hin: Stereofotografie und Raumbildprojektion von Gerhad Kuhn – ISBN 388955119X. Im Urlaub las ich dieses Buch immer wieder, bis ich das Prinzip der Stereofotografie verstanden hatte. Dieses Wissen erschwerte mir den Bau der Kamera, da mir jetzt klar war, dass ich nicht einfach zwei Objektive nebeneinander platzieren kann. Um etwas flexibler zu sein, mussten die Objektivplatten variabel sein. Die Distanz zwischen den Objektiven sollte verstellbar sein (Stereobasis), außerdem wollte ich die Objektive Schwenkbar machen, damit ich auch im Macrobereich arbeiten kann.
Bevor ich weiterschreibe, möchte ich euch noch auf das Buch von dem Gitarristen und Songtexter Brian May (Queen) hinweisen. ISBN: 9780957424685
Die Geschichte von Queen in 3D ist wirklich lesens und sehenswert.
Herr May wäre auch sicher spannend in 3D abzulichten 😉

Objektivsuche
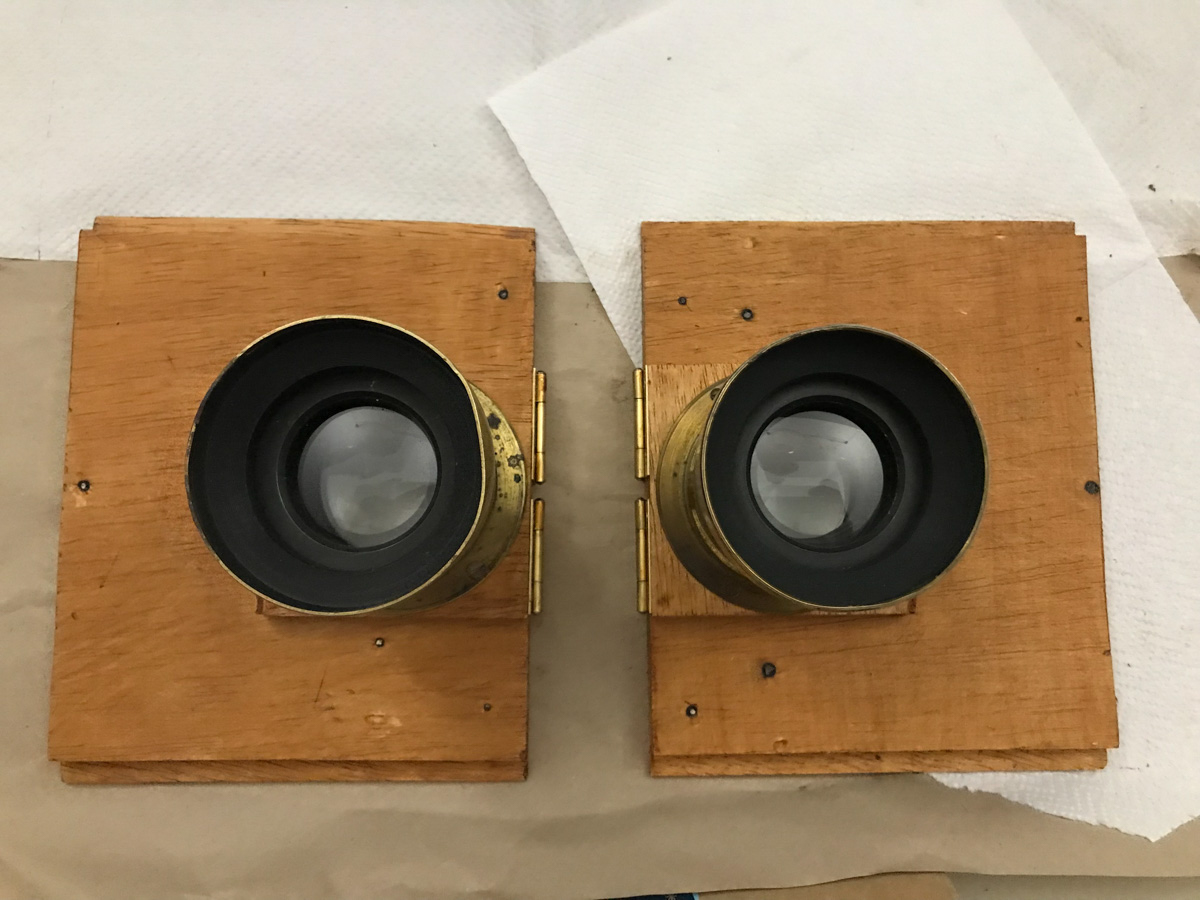
Jetzt habt ihr hier schon meinen fast fertigen Umbau gesehen. Bis dorthin war es jedoch ein langer Weg, mit vielen Ups and Downs. Ich hatte einen hirnrissigen Gedanken im Kopf – die Kamera sollte mit zwei historischen Petzvalobjektiven betrieben werden. Da ich schon eines hatte, machte ich mich auf die Suche nach einem Zweiten. Ein zweites Objektiv zu finden, dass auf denselben Punkt wie das erste fokussiert, war wie ein Gewinn im Lotto. Als ich mit einem Händler über mein Projekt sprach, meinte er nur, dass er froh ist, dass er nicht selbst daran arbeiten muss. Die Suche danach war wirklich frustrierend und mit vielen Enttäuschungen verbunden. Irgendwann fand ich dann ein Objektiv, dass annähernd ähnlich fokussiert und somit begannen die Umbauarbeiten an der Kamera.

Der Umbau
Einen Großteil meiner Zeit verbrachte ich in Baumärkten, wobei Rudolf Holzmann https://www.rudolfholzmann.at in Wien eine angenehme Abwechslung war. Das muss ich hier einfach erwähnen, da ich dort jedes Mal nur wenige Minuten verbracht habe. Da jeder Mitarbeiter sofort wusste was ich benötige und wo es liegt. Die Firma Rudol Holzmann wurde 1860 gegründet – also in der Zeit wo die Nassplattenfotografie sehr aktuell war.
Bei den großen Märkten habe ich viele Stunden verbracht und hab leider oft auf meine Fragen keine Antworten bekommen. Ihr kennt das ja, wenn man von einem zum anderen gesendet wird.
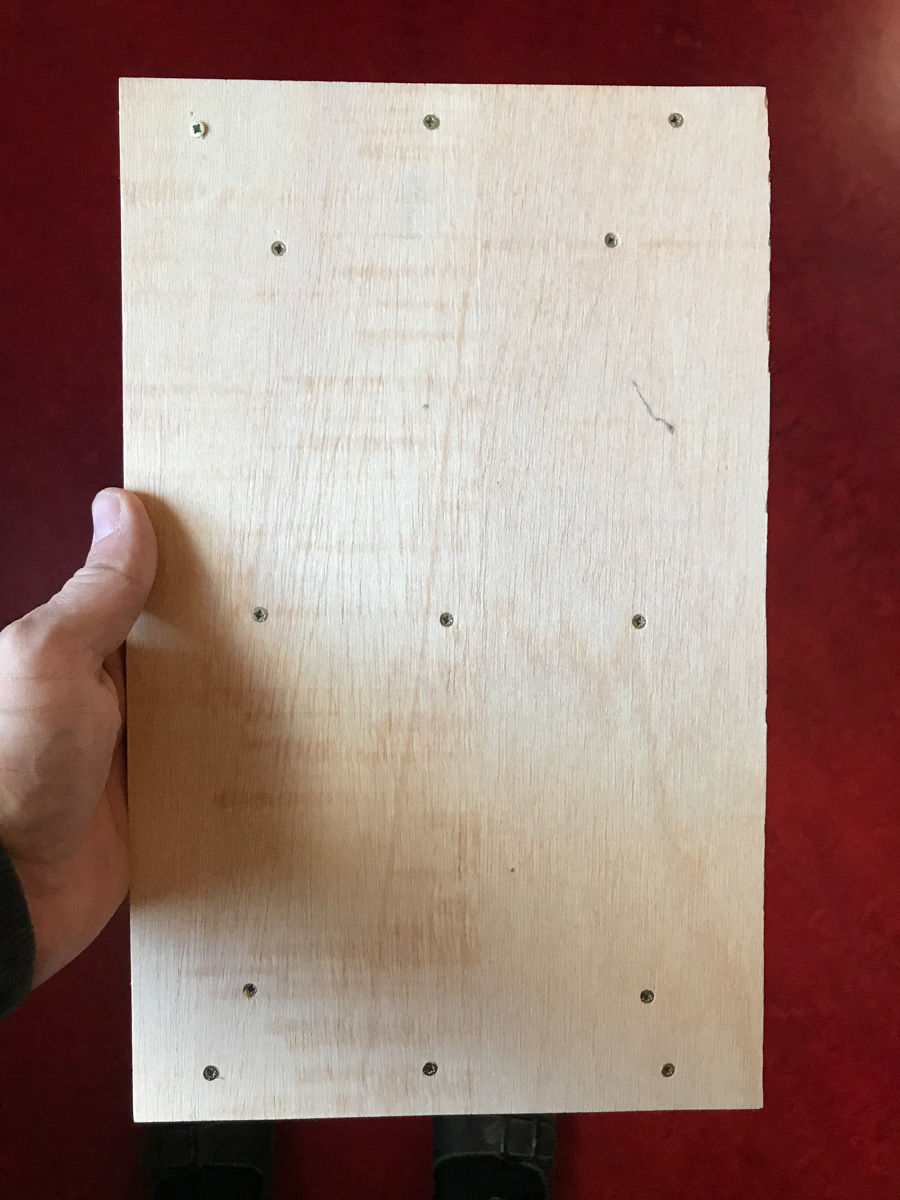
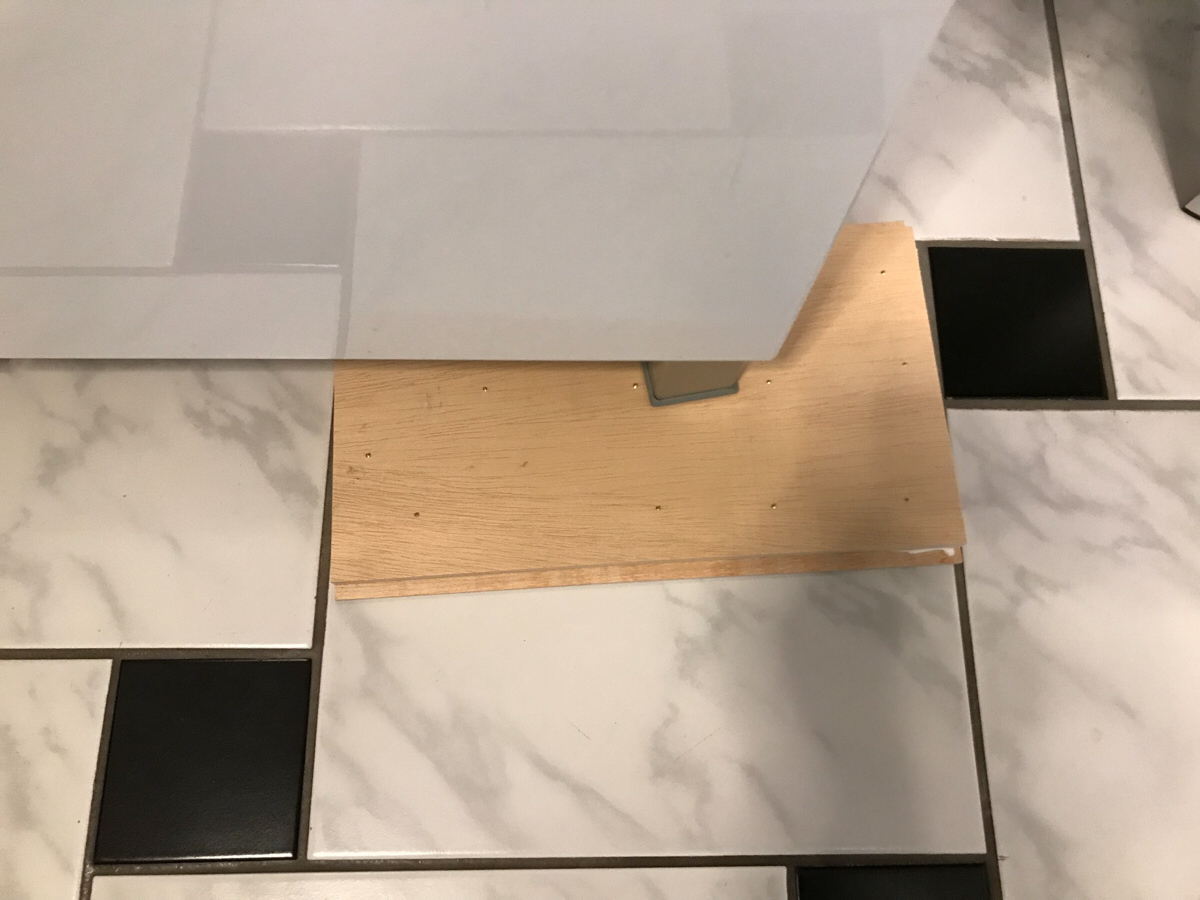
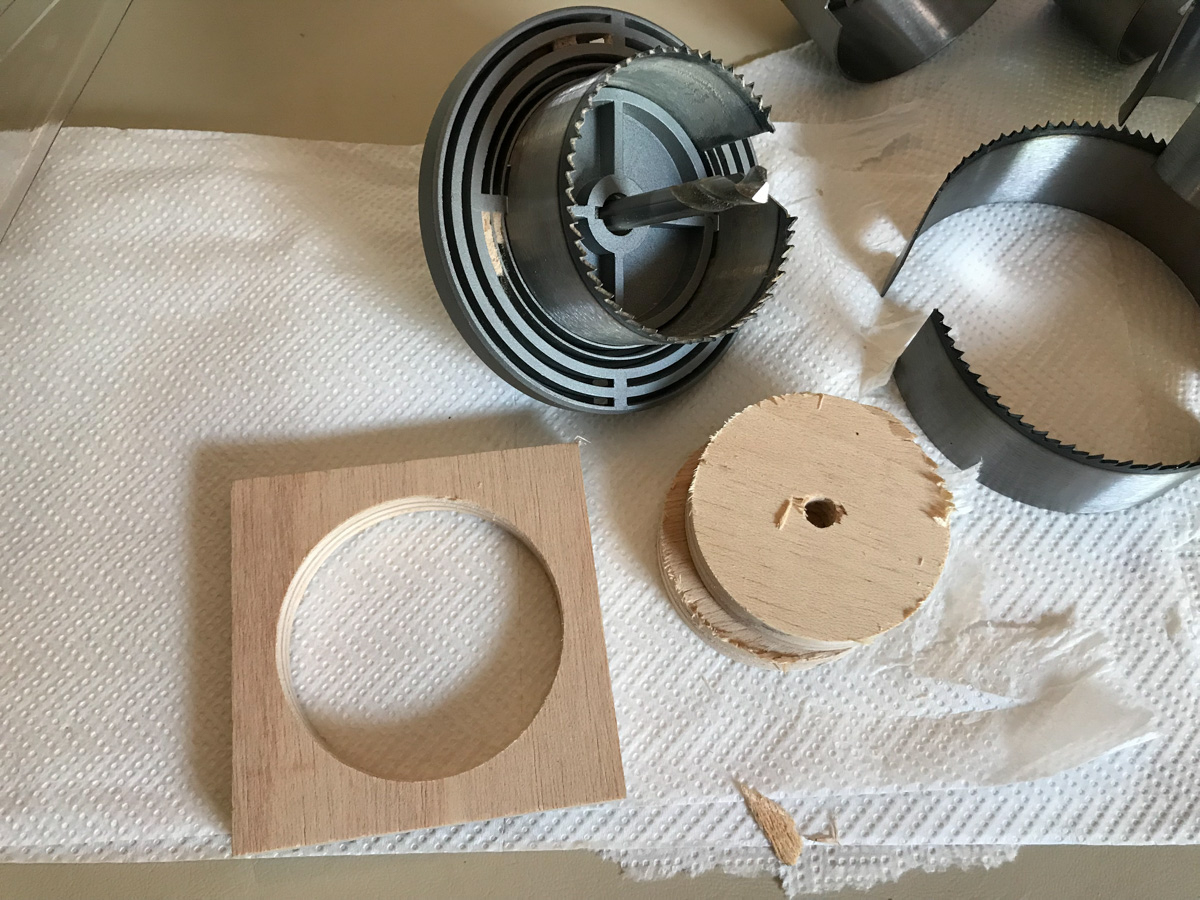
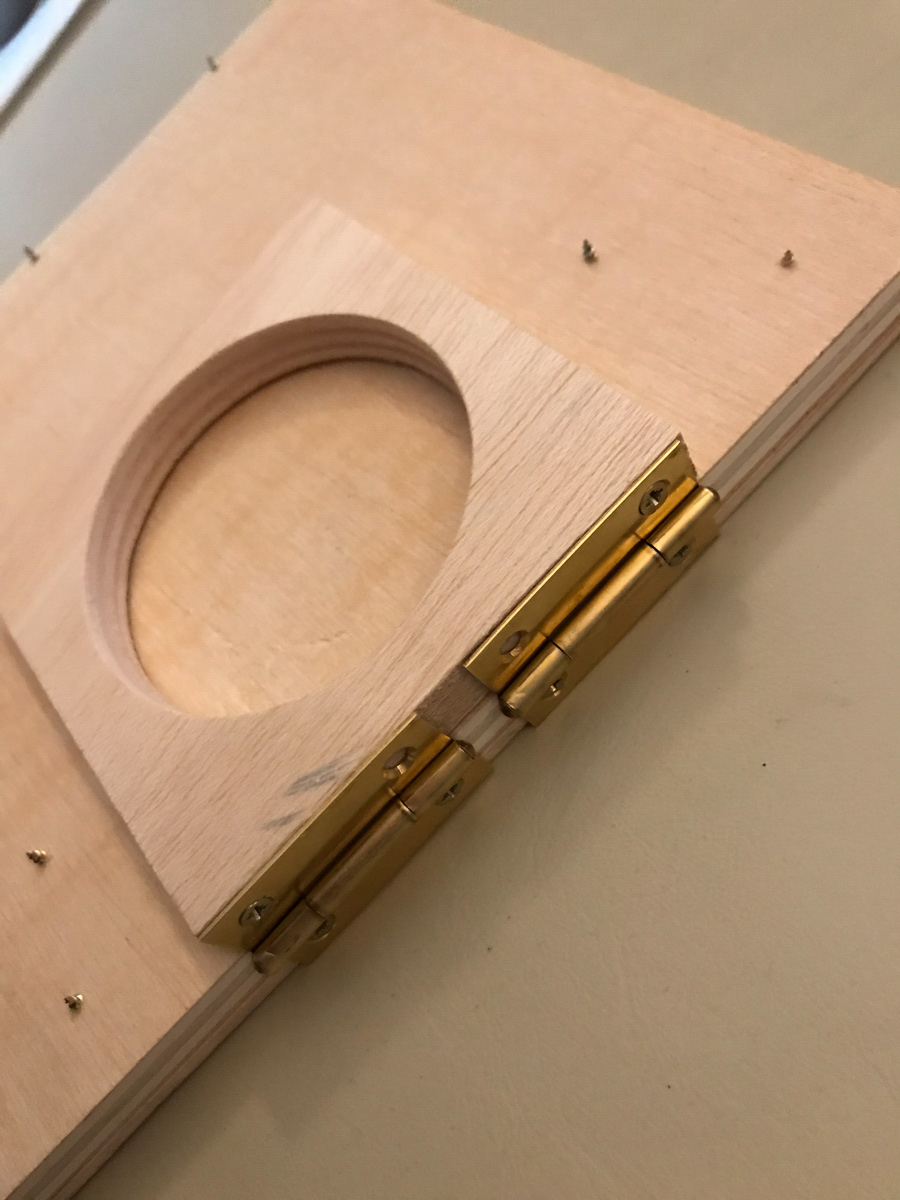
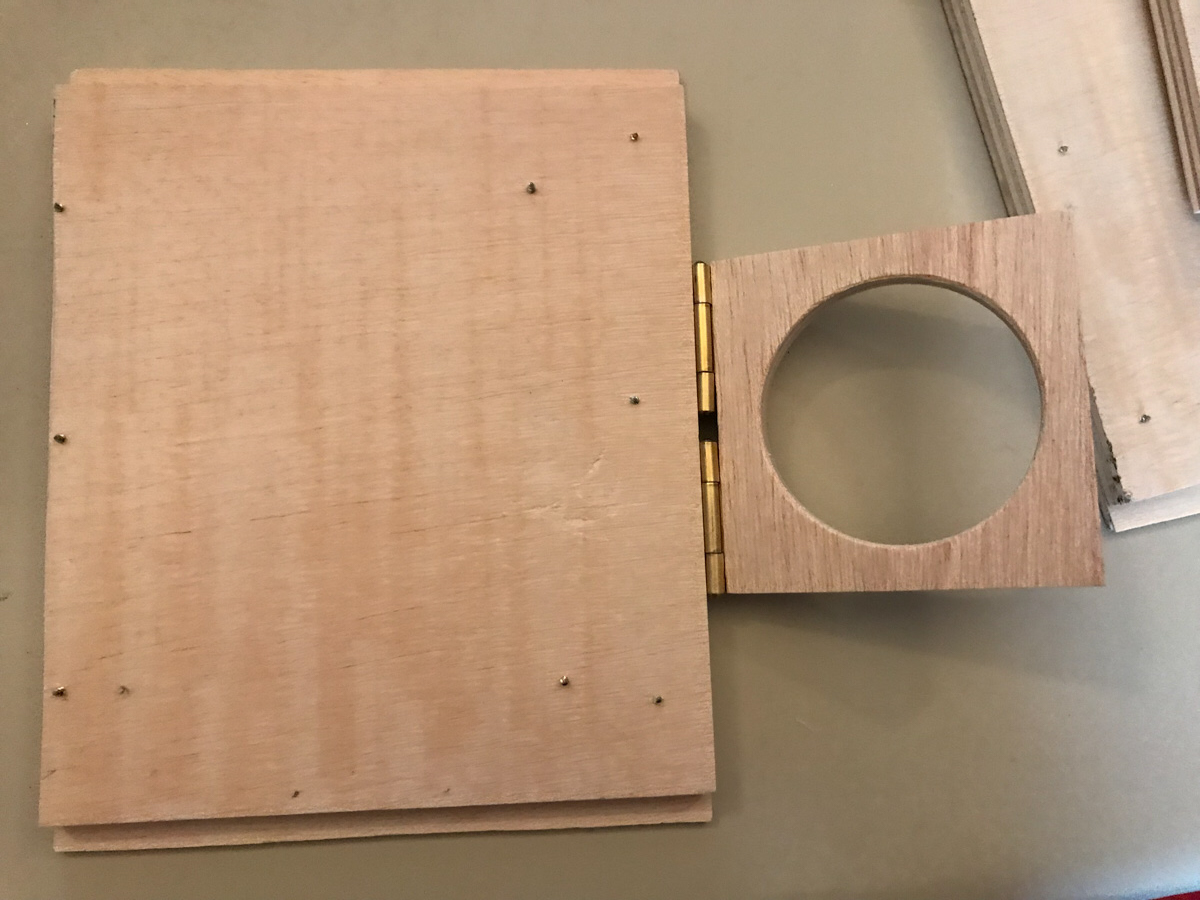
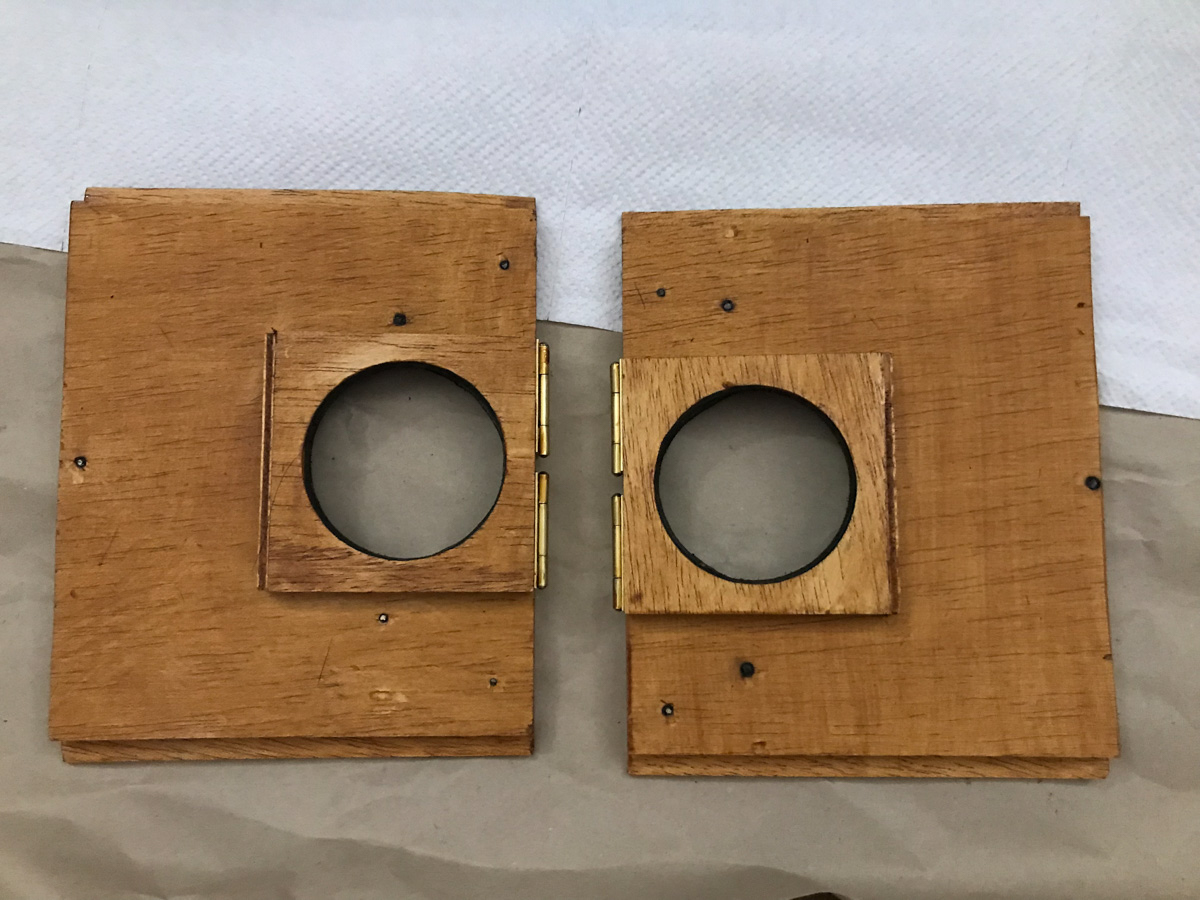
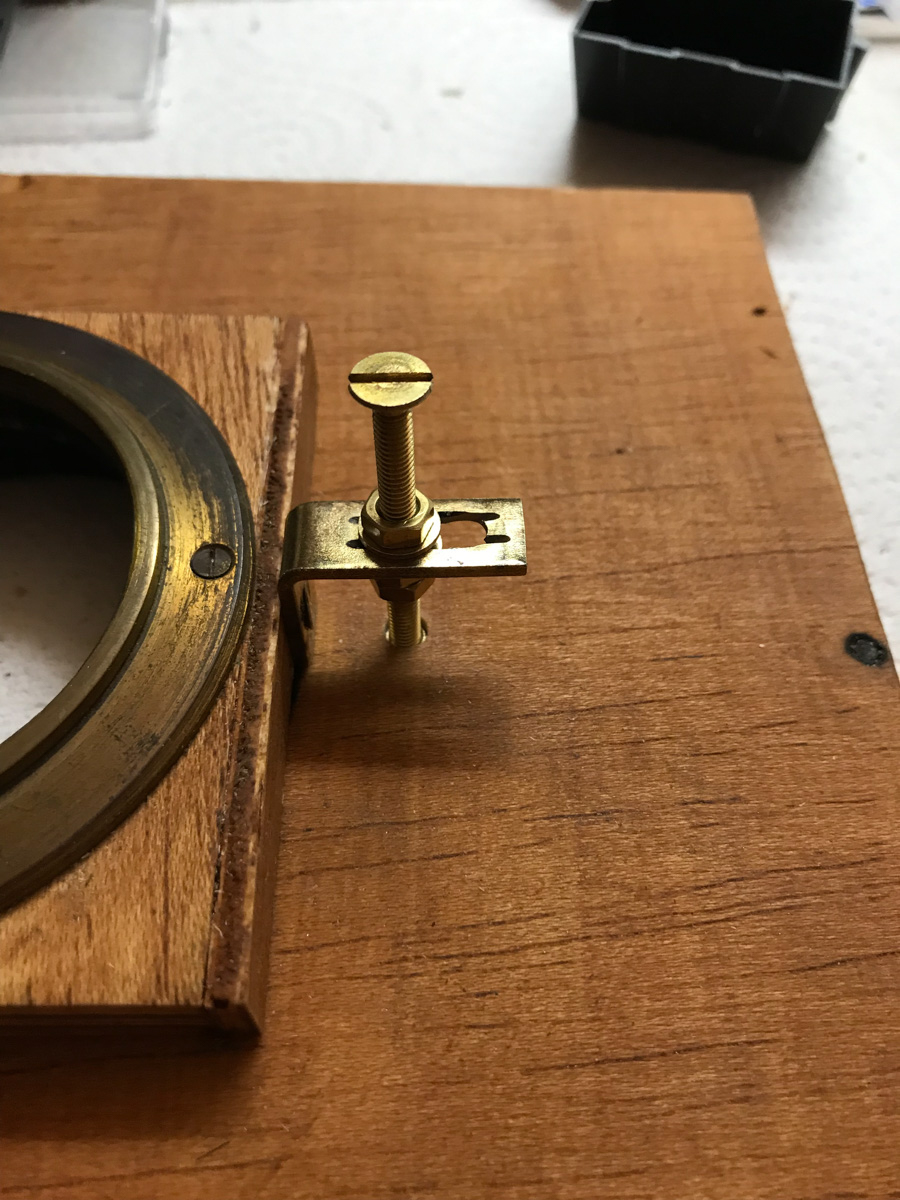
Nachdem ich dann endlich den Großteil meiner Materialen zusammen hatte, fing ich an meine Pläne in die Realität zu bringen. Da ich schon mehrere Objektivplatten gebaut hatte, war der Grundstein dafür keine Hexerei für mich. Doch der Schwenkmechanismus brachte anfangs noch viele Fragen auf, also kaufte ich viele unterschiedliche Scharniere, Schrauben und Holzplatten ,bis ich die richtige Kombination zusammen hatte.
Diese Kombination montierte ich dann auf die Objektivplatte.

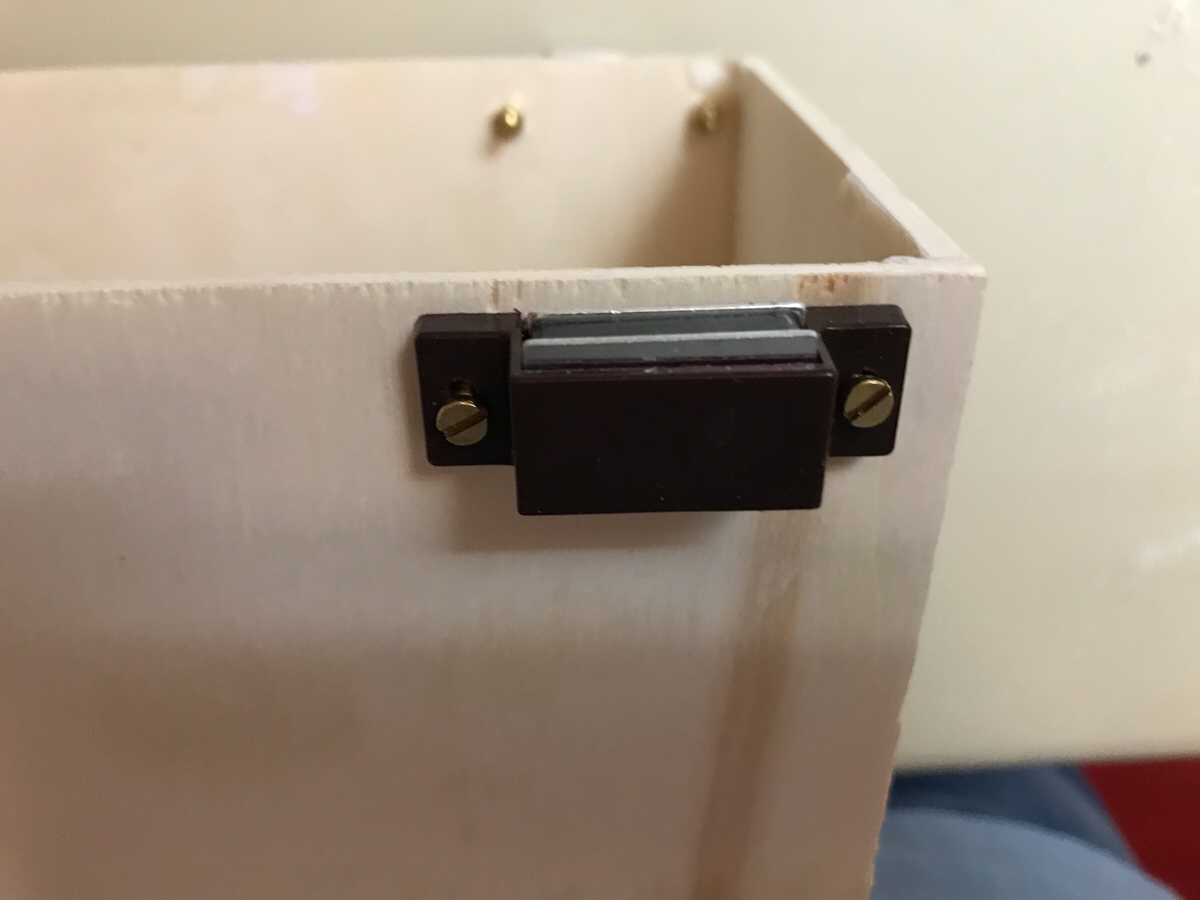
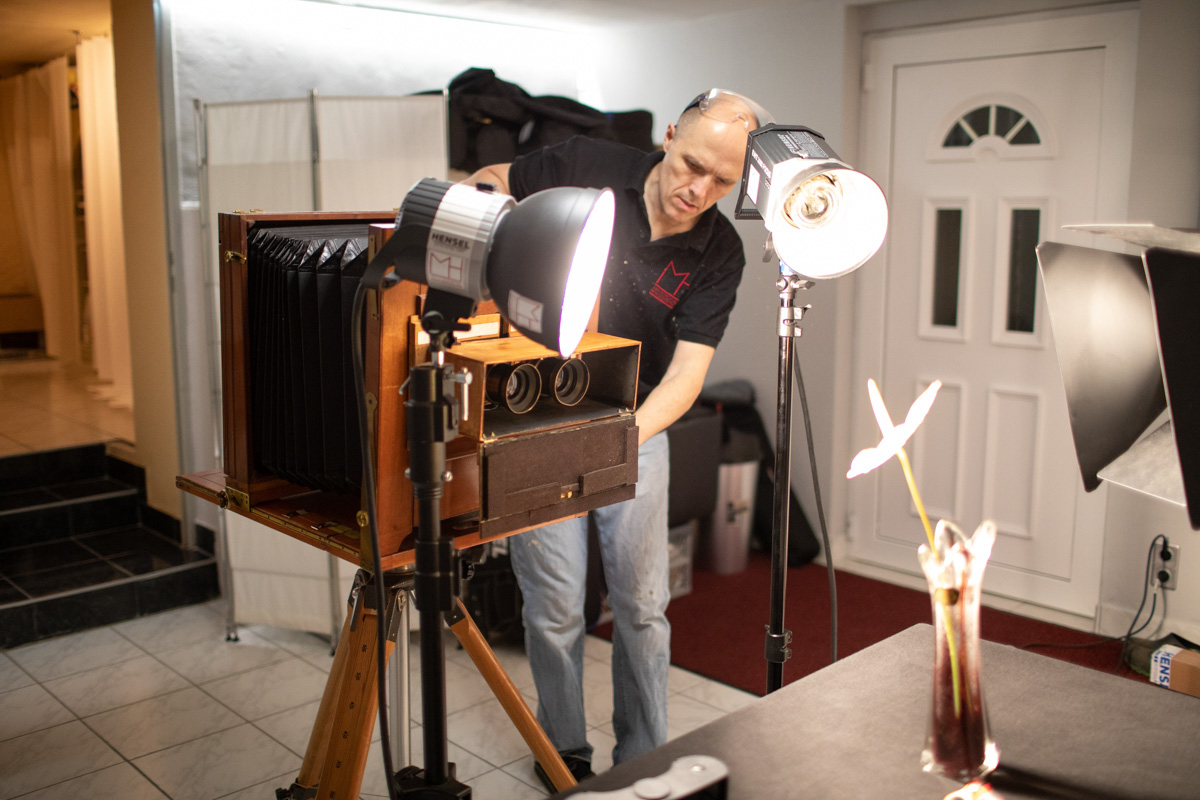
Danach musste ich noch einen Verschluss für die zwei Objektive bauen. Da ja beide zur selben Zeit auslösen sollen. Der Verschluss musste sich natürlich an die Variabilität der Objektivplatten anpassen und leicht abnehmbar sein. Somit verklebte ich Metallleisten auf den Objektivplatten und Magnete auf dem Verschluss.
Somit konnte ich den Verschluss immer einfach aufbringen, egal wie die Objektive eingestellt waren.


Die Frontplatte des Verschlusses rastet mit einem einfachen Regalverschluss ein.

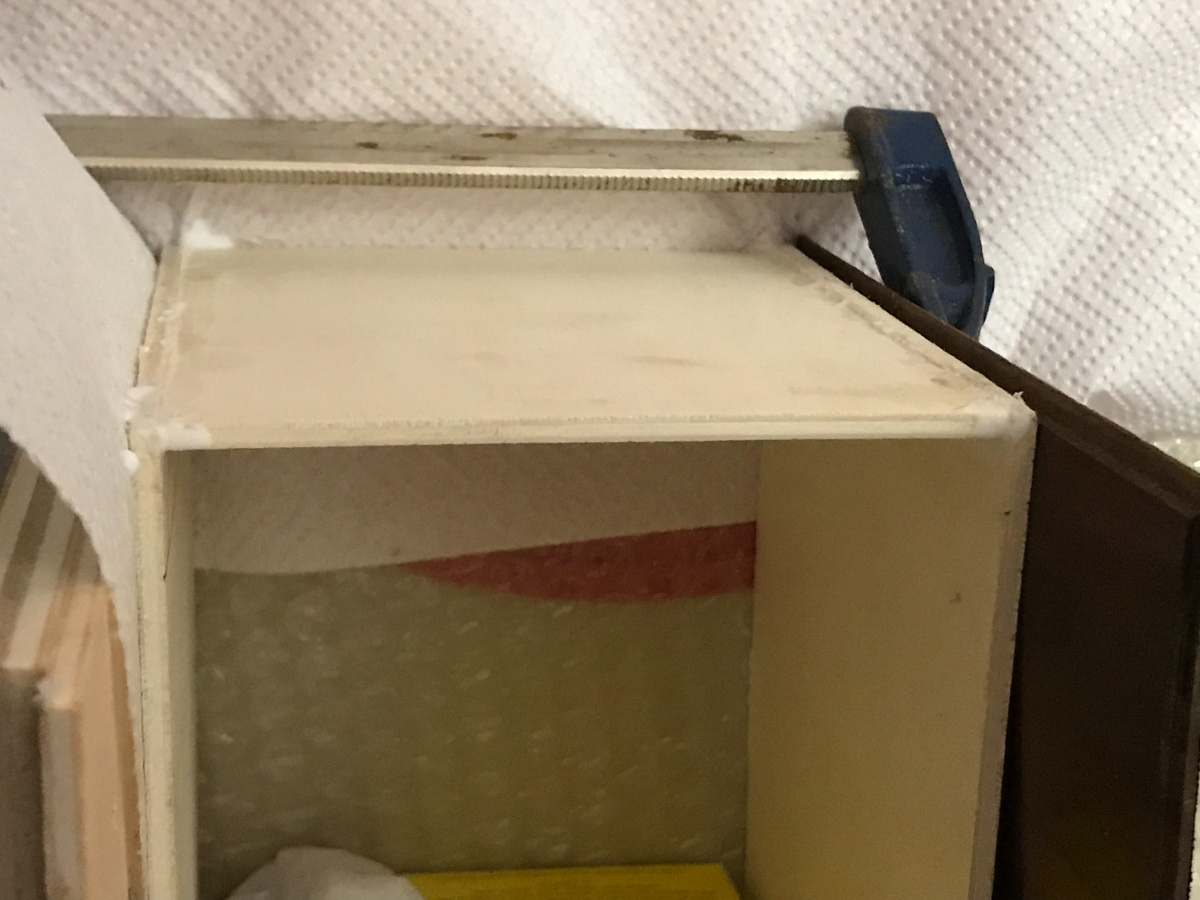
Mein erster Beruf war Feinmechaniker, deshalb bin ich es gewöhnt mit Werkzeugen zu arbeiten und habe auch einiges an Werkzeugen zuhause. Für die Tischlerarbeiten fehlen mir jedoch Pressen und Abstandshalter. Deshalb haben viele Haushaltsgegenstände dafür herhalten müssen.

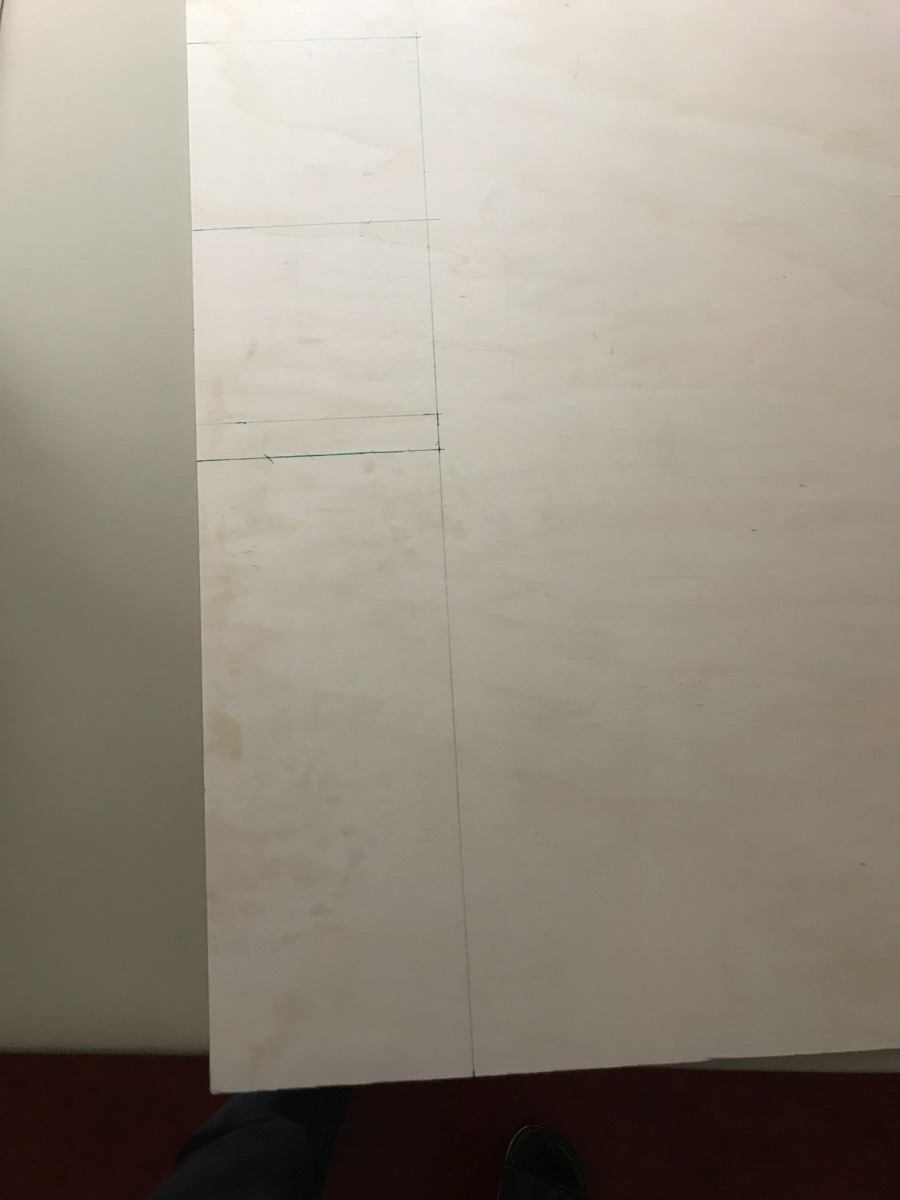
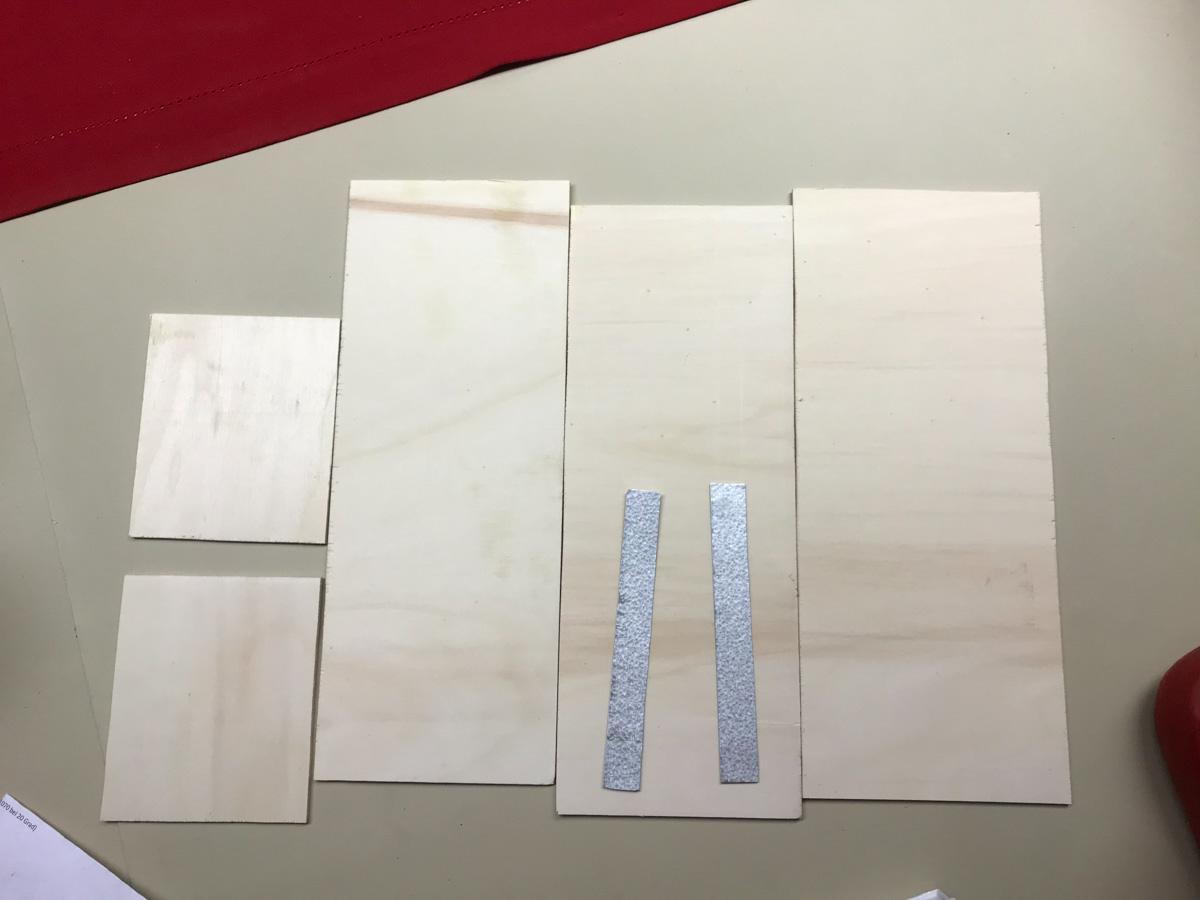
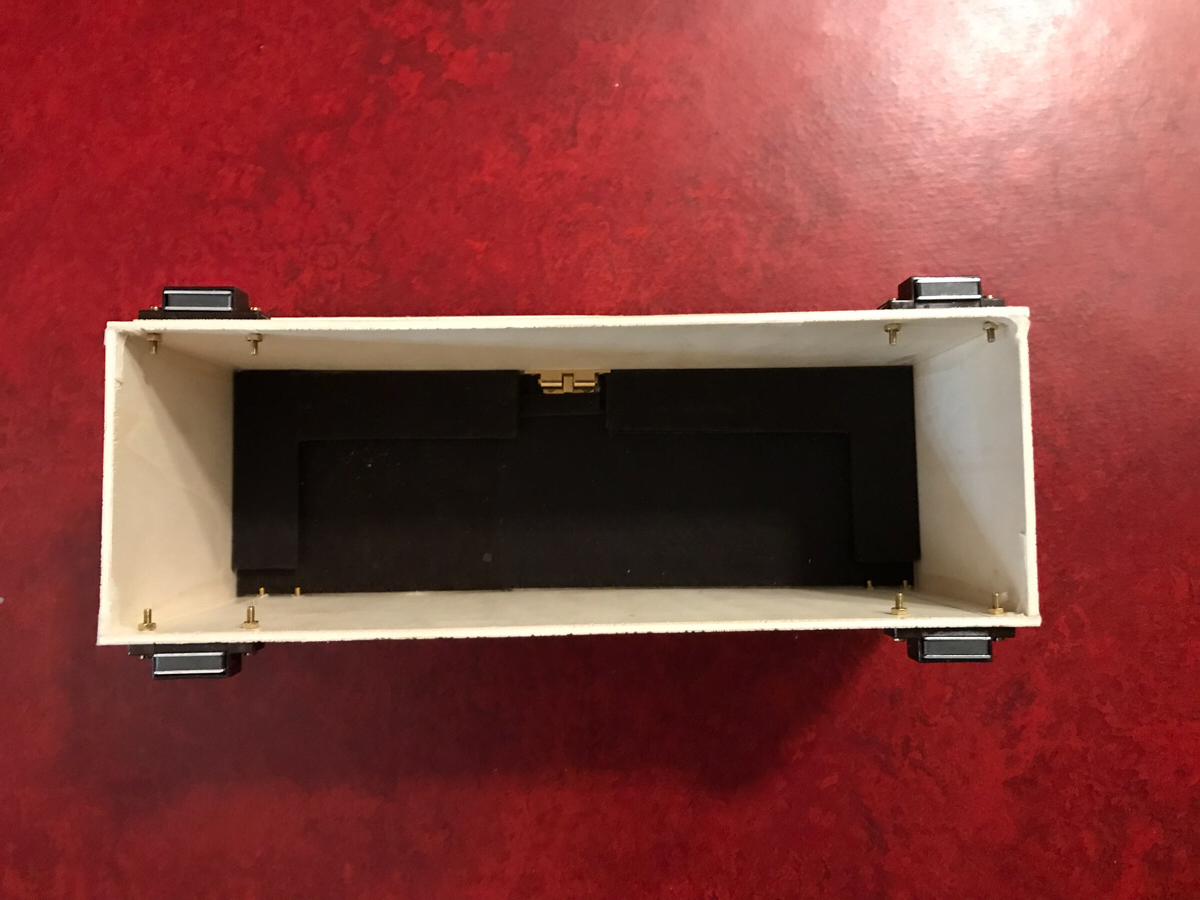
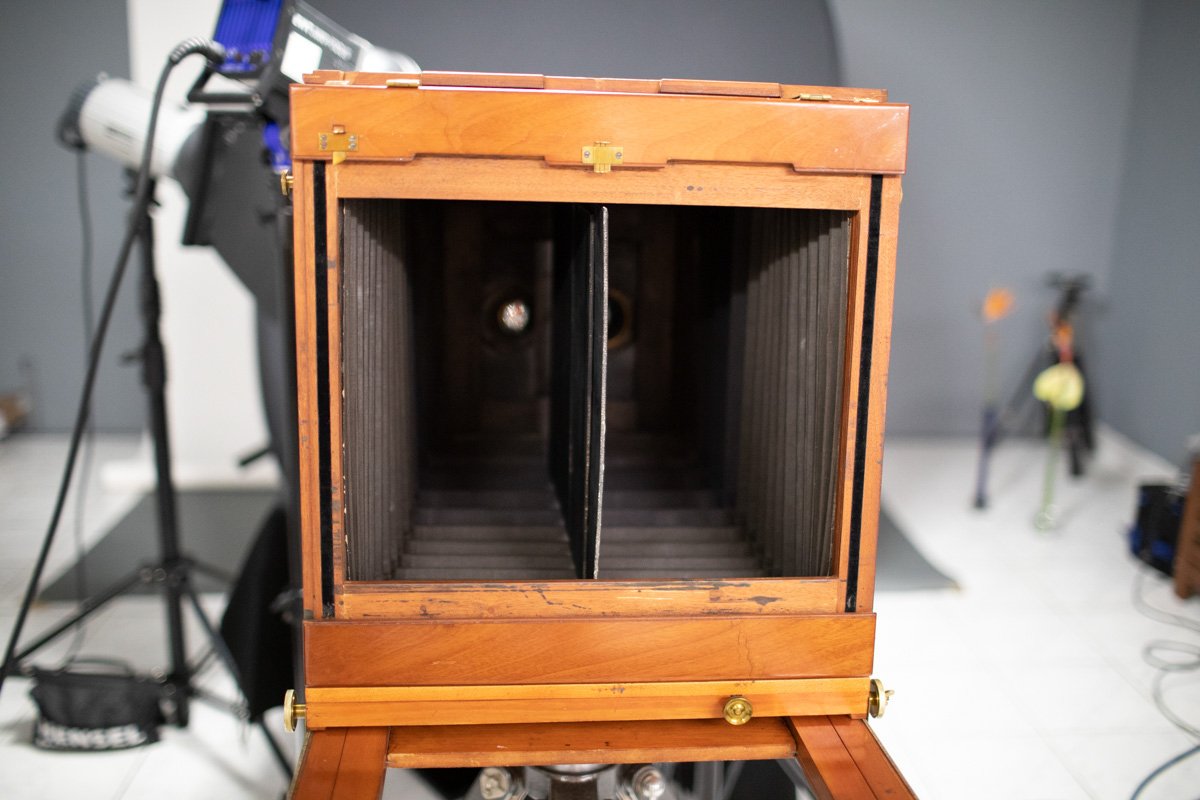
Jetzt fehlte mir noch eine Trennung im Inneren der Kamera, damit sich die projezierten Bilder nicht überlappen. Dazu erstellte ich ein Holzstecksystem aus Balsaplatten. Sicher nicht die edelste Lösung, aber Funktionell und variabel, je nach Auszug.


Zum Abschluss fehlte mir noch ein Minibalgen für die schwenkbaren Objektive, diesen erstellte ich aus einem dünnen, matten Klebeband.

Hier noch die komplette Gallery von den Umbauarbeiten


Die erste 3D Platte
Jetzt war es endlich soweit und ich konnte mit der ersten Stereoplatte beginnen.
Mein erstes Model war eine weitere alte Nassplattenkamera mit einem Petzval Objektiv.
Um mehr tiefe zu erlangen, stellte ich diese neben meine Holzhütte. Ich habe damals nicht darauf geachtet wie lange ich für die erste Platte benötigt habe. Das Einstellen der Kamera war sehr aufwendig (ein Freund von mir, hat mich schon früher darauf hingewiesen, dass es so sein wird). Mir kam es wie eine Ewigkeit vor. Ich war aber vom ersten Ergebnis begeistert. Die plastische Wirkung ist wirklich gut. Zum Betrachten der der großen Platten benötigt man eine spezielle Brille mit vier Spiegel – meine habe ich hier bestellt:http://www.3dworldshop.com/epages/544034815.sf/en_GB/?ObjectPath=/Shops/544034815/Products/4007

Hier die Ergebnisse vom ersten Stereoshooting:


Hier noch eine anaglyphische Version die Ihr mit einer anaglyphischen Brille betrachten könnt:


Hier noch eine Version für den Kreuzblick (Dafür wurden die zwei Bilder vertauscht): https://de.wikipedia.org/wiki/Stereoskopisches_Sehen


Floating Flowers 3D Makro Nassplatte
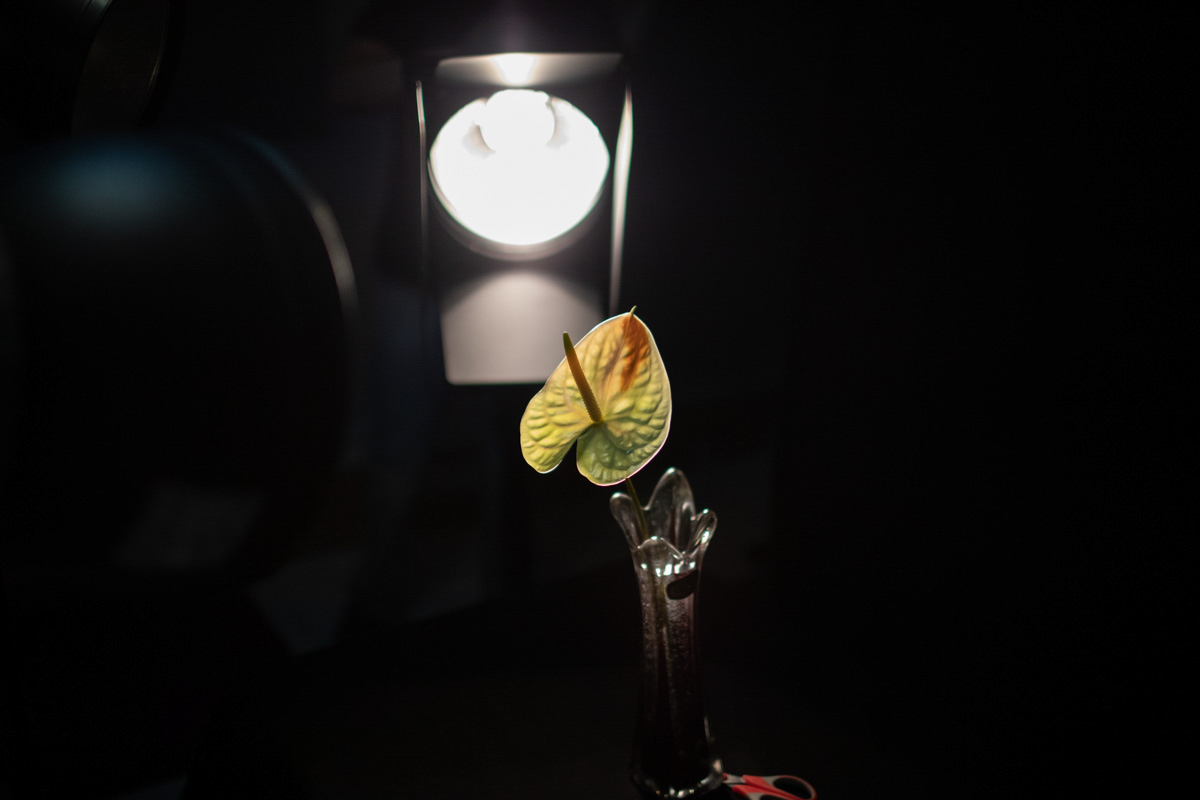
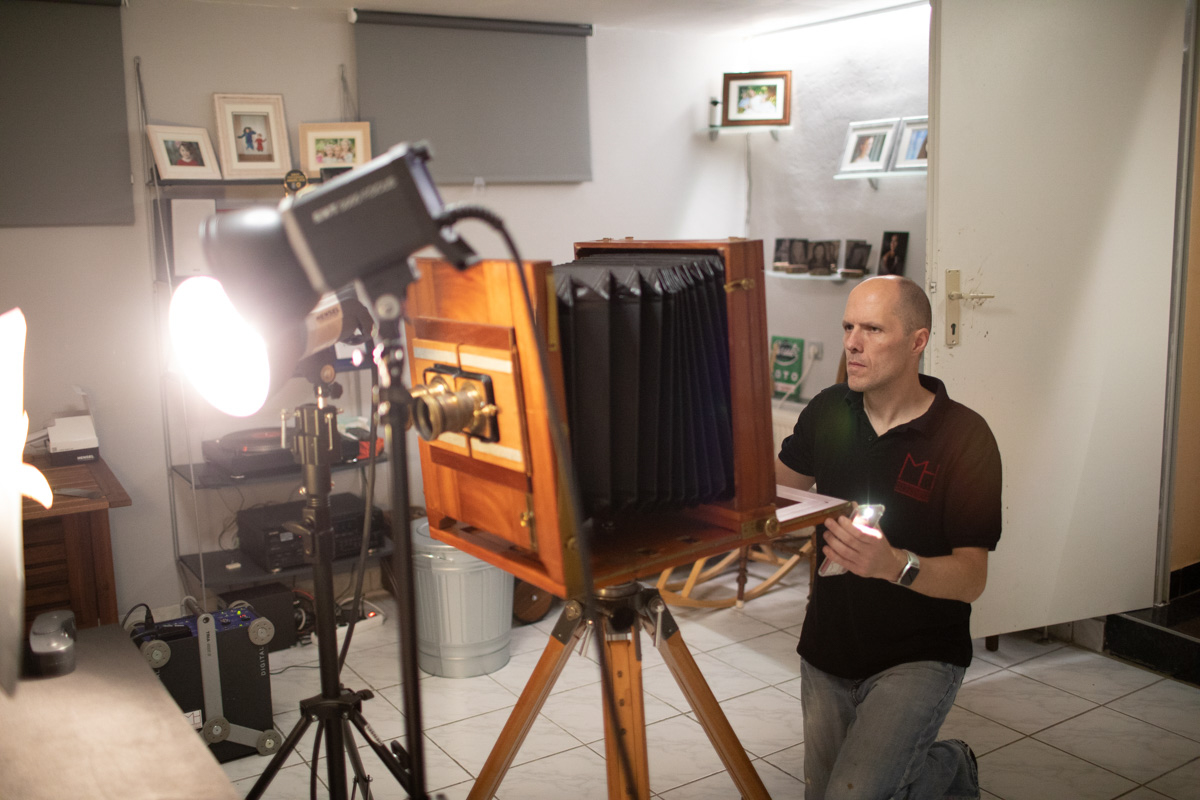
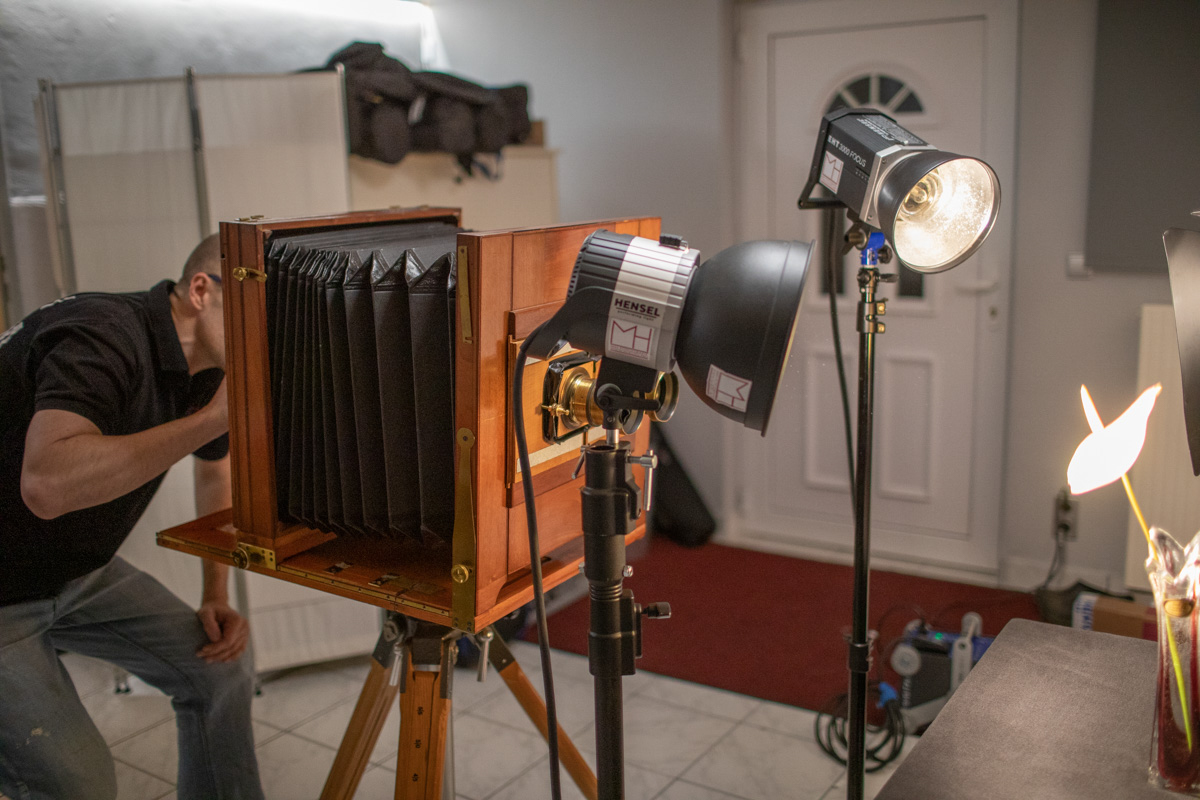
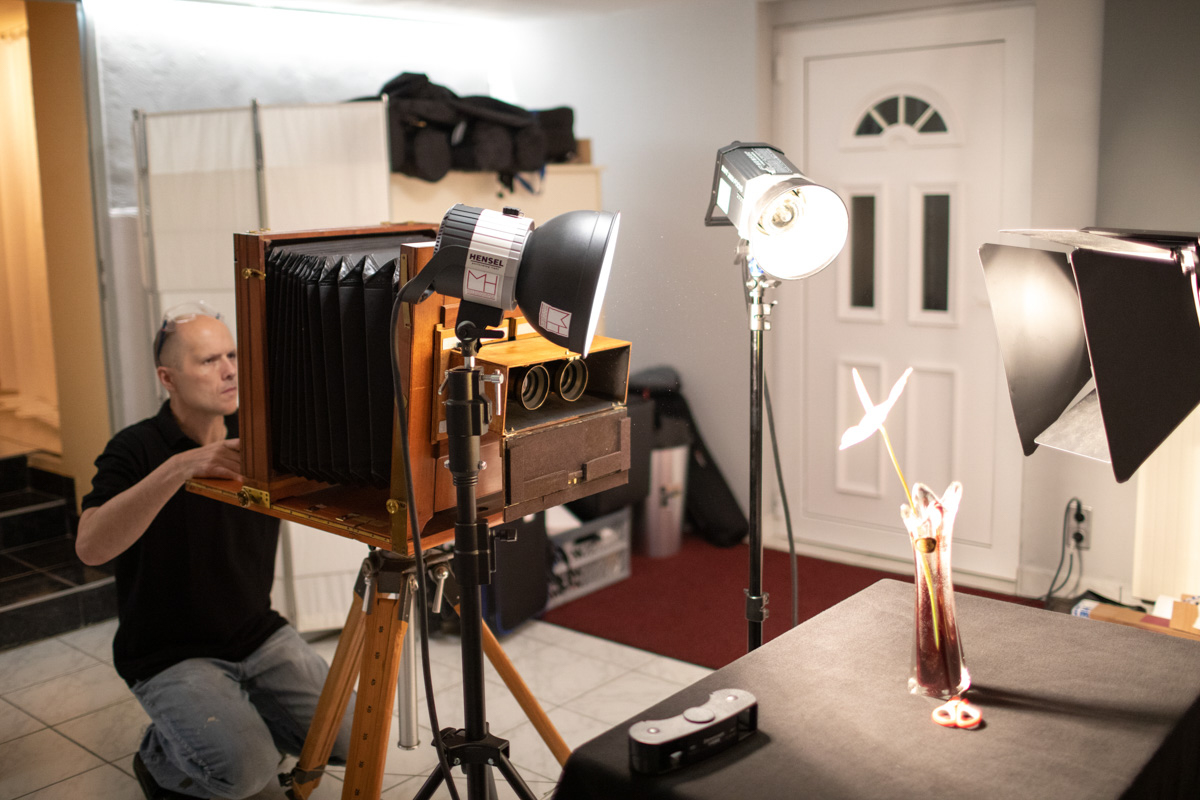
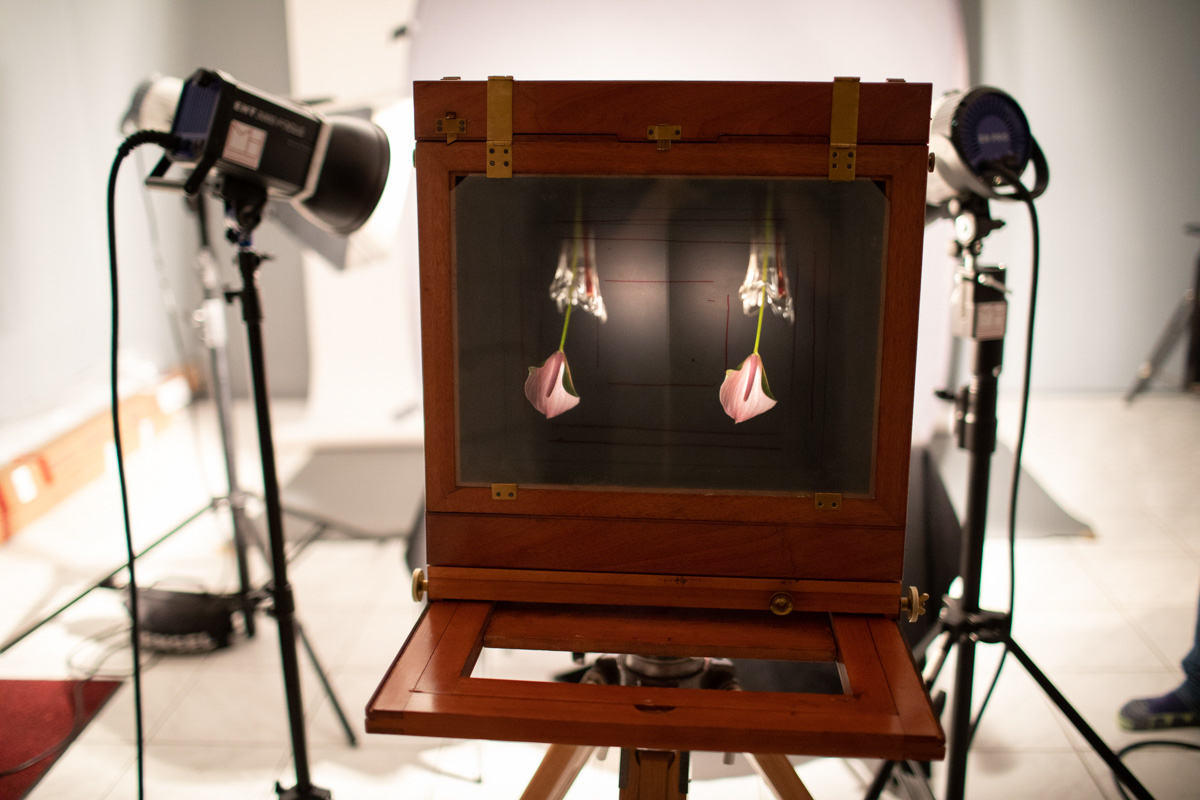
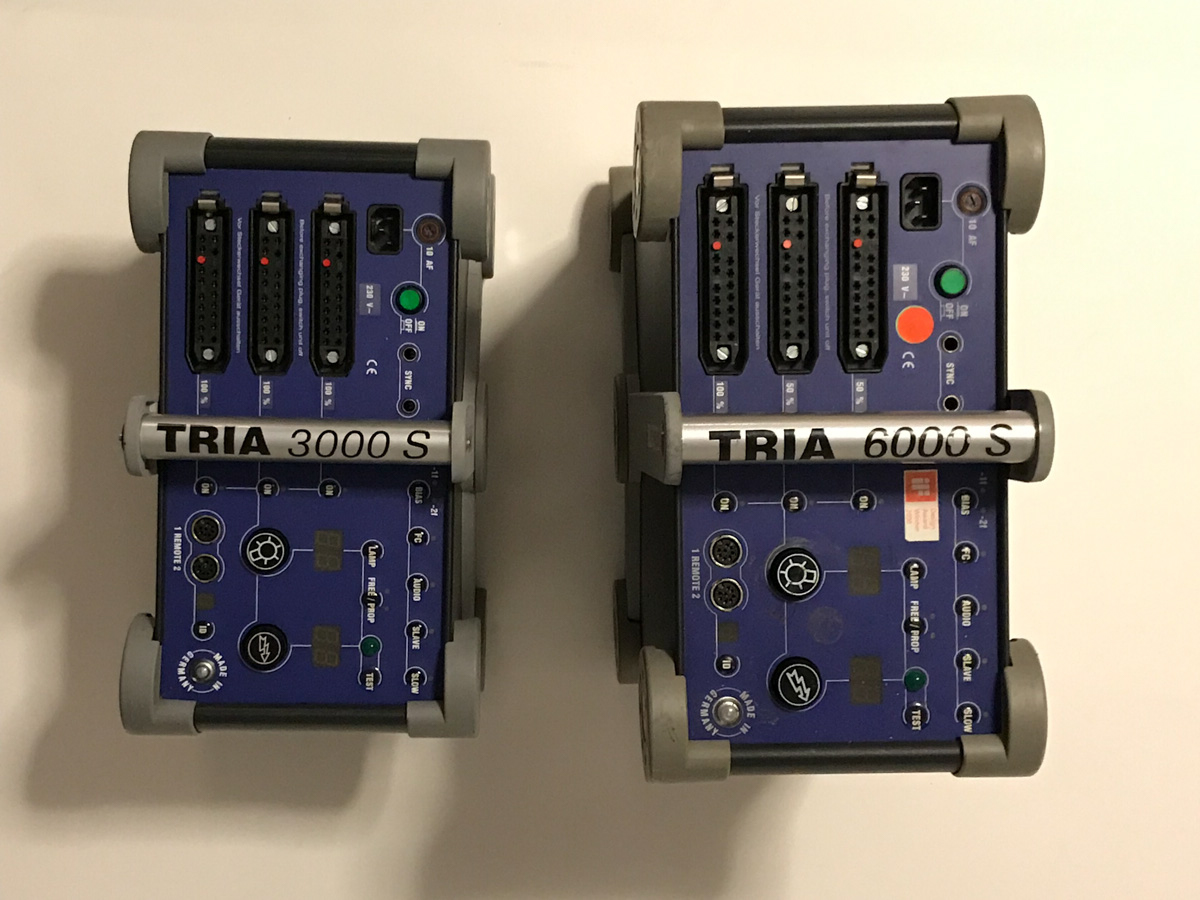
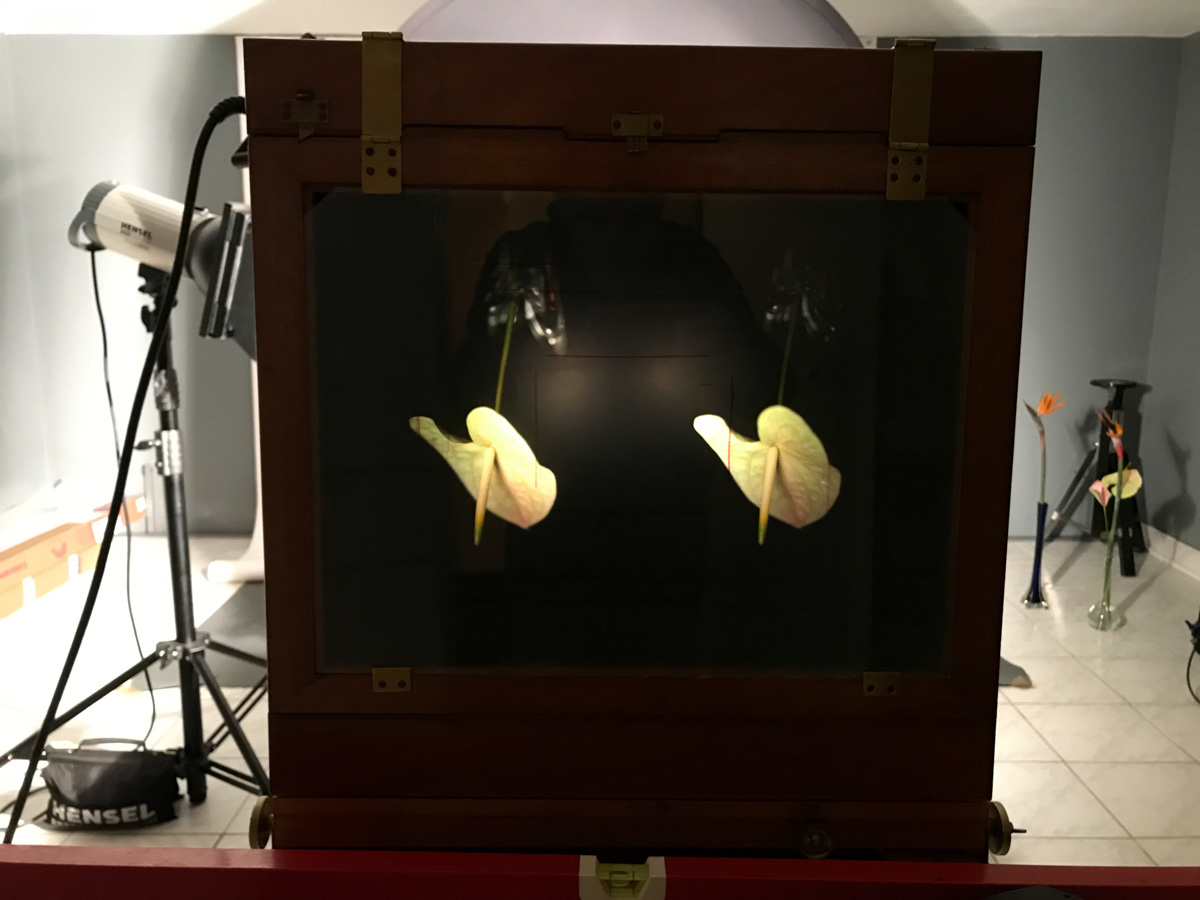
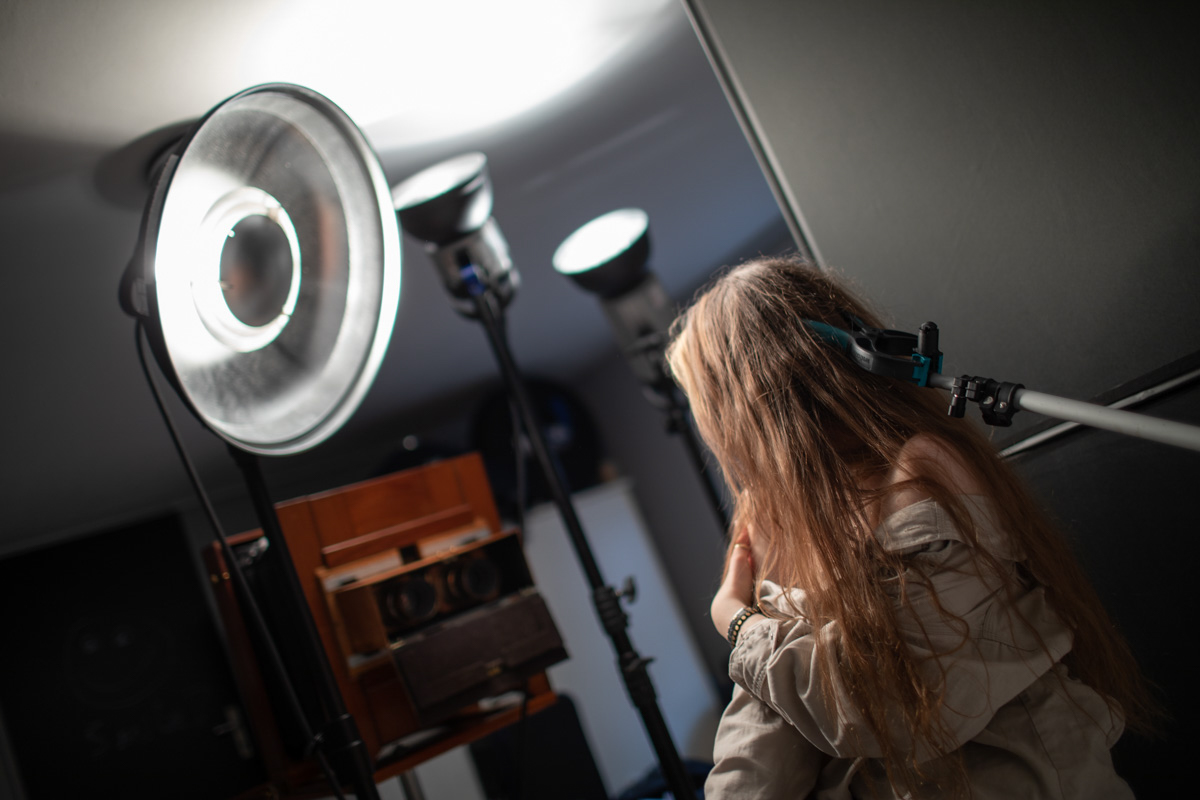
Als nächstes waren Makrofotos von Blumen angesagt, diesmal habe ich die Zeit mitgestoppt 🙂 Der Aufwand für ein Stereofotonassplattenfoto in der Größe 30×40 cm ist immens. Ich war bei dem Shooting hochkonzentriert, da ich die Platten beim ersten Mal richtig belichten wollte. Aus dem letzten Shooting nahm ich folgende Erfahrung mit. Neben der Tatsache, dass die Objektive nicht gleich fokussieren, musste ich auch noch feststellen, dass die Objektive unterschiedlich hell belichteten. Somit gab es einen weiteren Punkt bei den Vorbereitungen den ich beachten musste. Die Liste der Variablen für ein Stereofoto auf Nassplatte wurde immer mehr: Fokussierung auf beiden Seiten checken (Vielleicht selbstgebauten Adapterring verwenden – mit dem Rein- und Rausdrehen der Objektive konnte ich mir zusätzlich helfen), plastische Wirkung überprüfen, Helligkeit der einzelnen Objektive überprüfen, Belichtung mit einer Testplatte (18×23 cm) überprüfen und den ganzen Kollodium Nassplattenprozess kontrollieren. Eine alleinige (ohne Stereotechnik) 30x40cm Platte sauber zu Beschichten und zu Entwickeln ist schon sehr fordernd. Bevor ich mit der Belichtung der ersten Platte begonnen habe, vergingen ungefähr 4 Stunden. Somit war ich dann beim Ablauf des Verfahrens hochkonzentriert und aufgeregt zu gleich. Ich hatte keine Lust die Platte ein zweites Mal zu erstellen, da neben dem Aufwand die Materialkosten auch nicht zu vernachlässigen sind. Als Lichtquelle diente mir der Hensel Tria 6000 und der Tria 3000 Generator samt EH Pro 6000 und EH Pro 3000 Blitzköpfe. Zusammen mit meinem 1000 Watt Starken Integra 1000 Plus leuchtete ich die Szene mit 10000 Watt aus. Wobei die Einstelllichter mir eines meiner Models etwas verbrannten:

Doch genau diese Verbrennung sah auf der Nassplatte sehr cool aus.
Am Ende lief alles gut und ich produzierte nach sieben Stunden Arbeit zwei saubere Platten mit einen schönen 3D Effekt.


Hier wieder die anaglyphische Versionen (3D Brille benötigt, siehe oben)


Und die Versionen für den Kreuzblick https://de.wikipedia.org/wiki/Stereoskopisches_Sehen


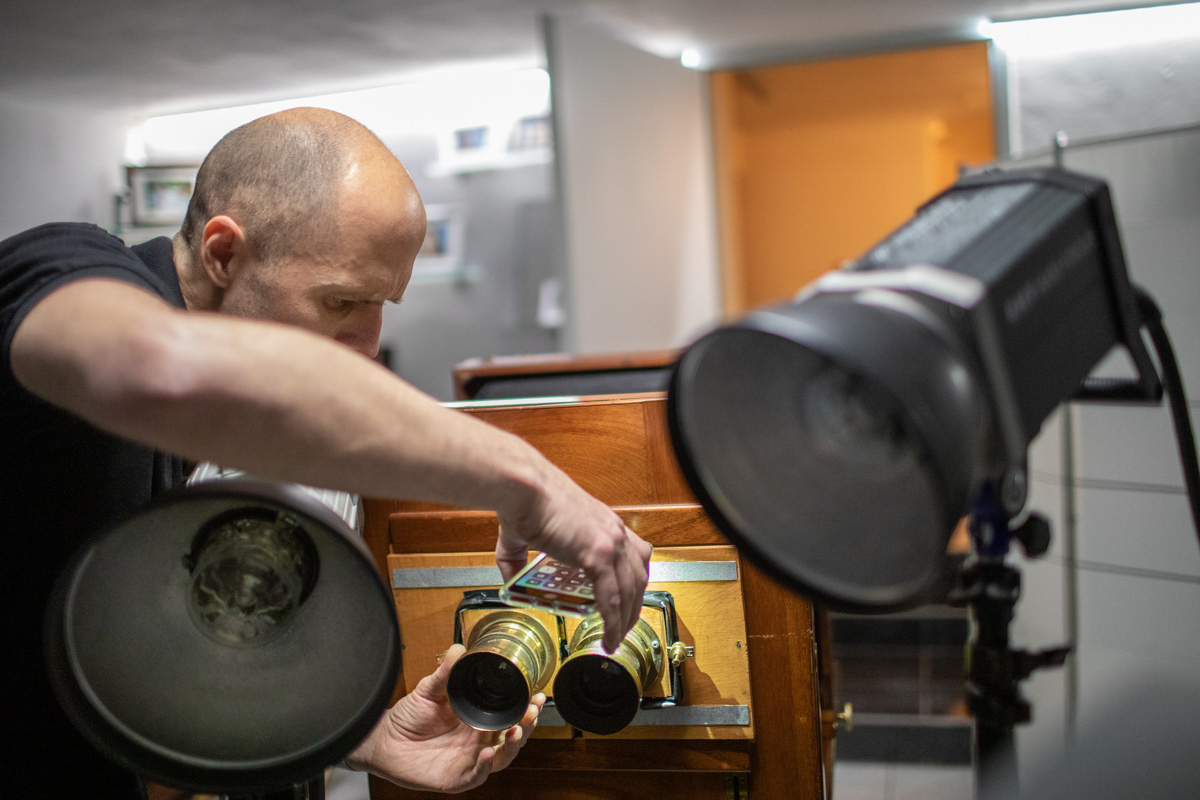
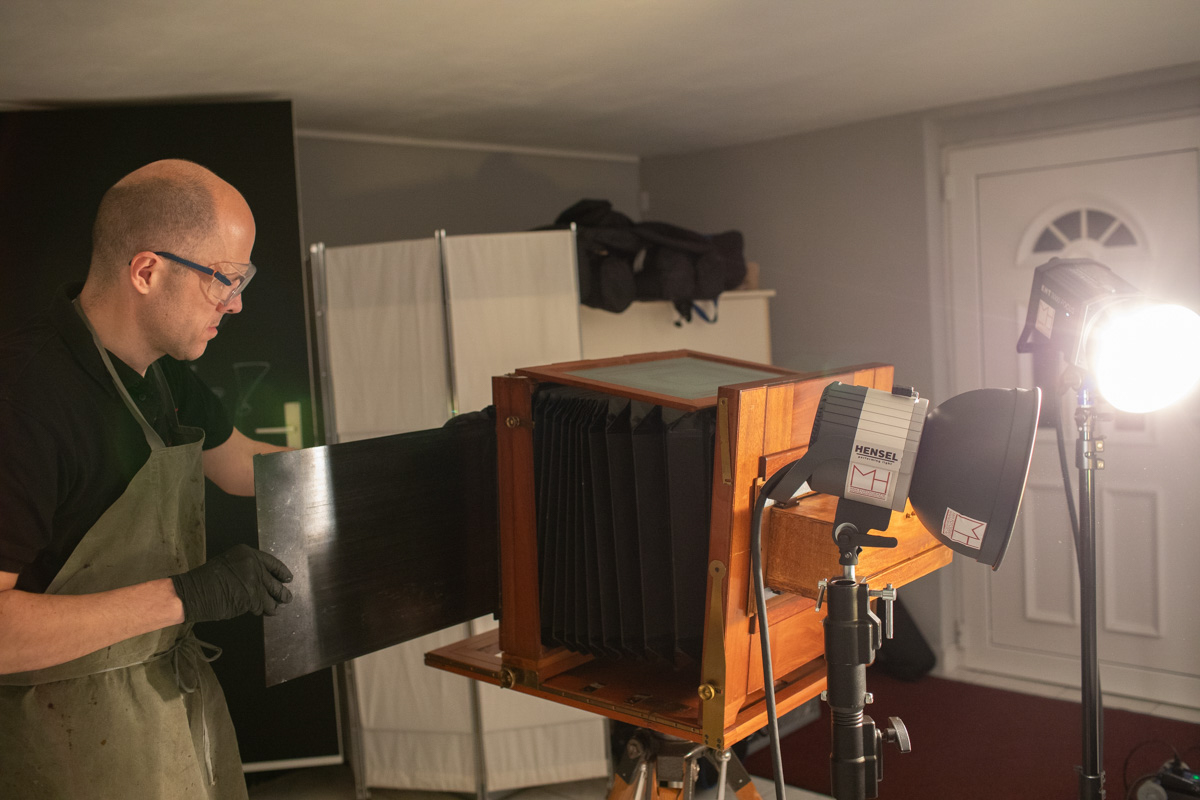
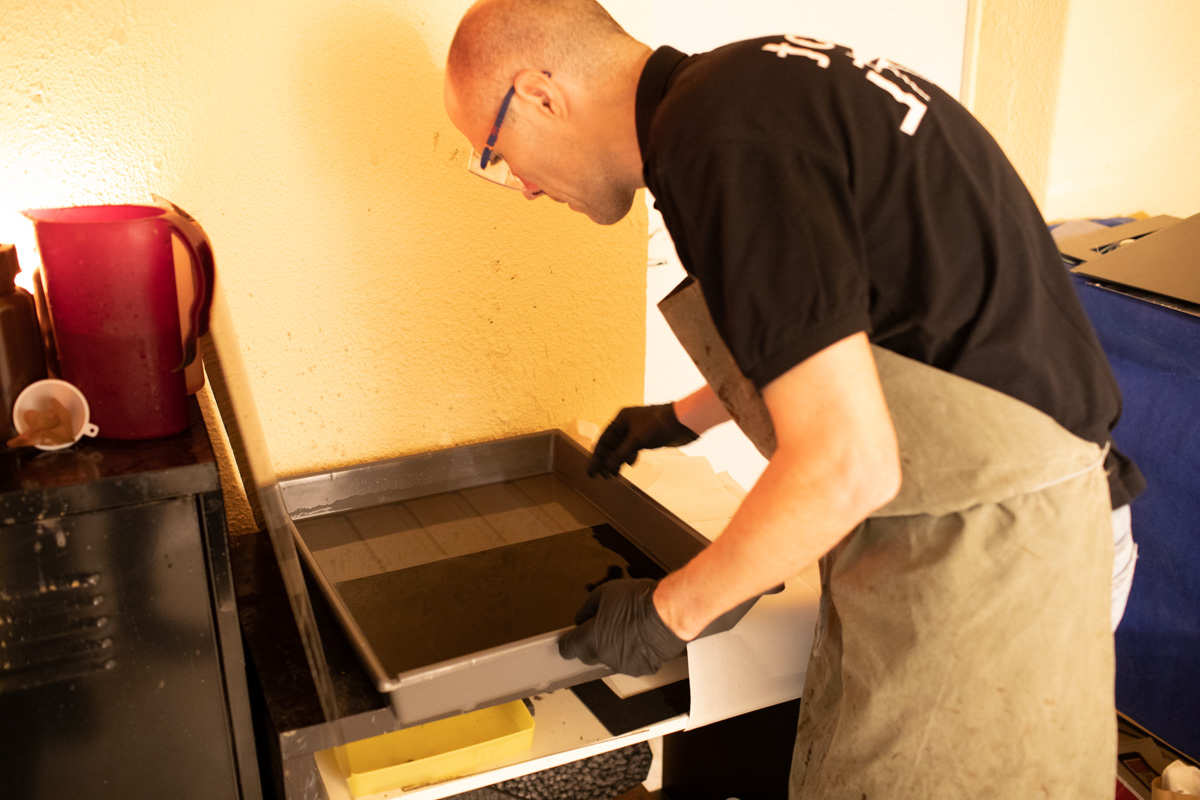
Die Gallery mit den Behind the Scene Aufnahmen:


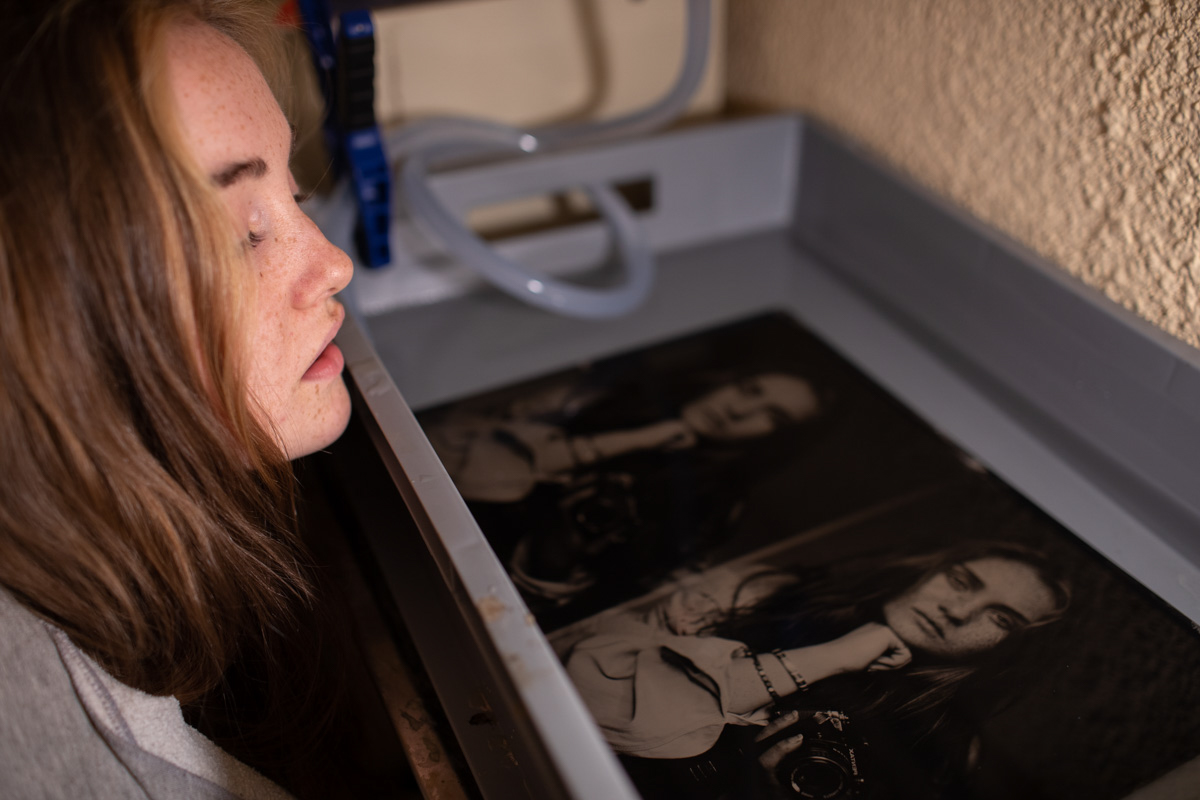
Porträts in 3D
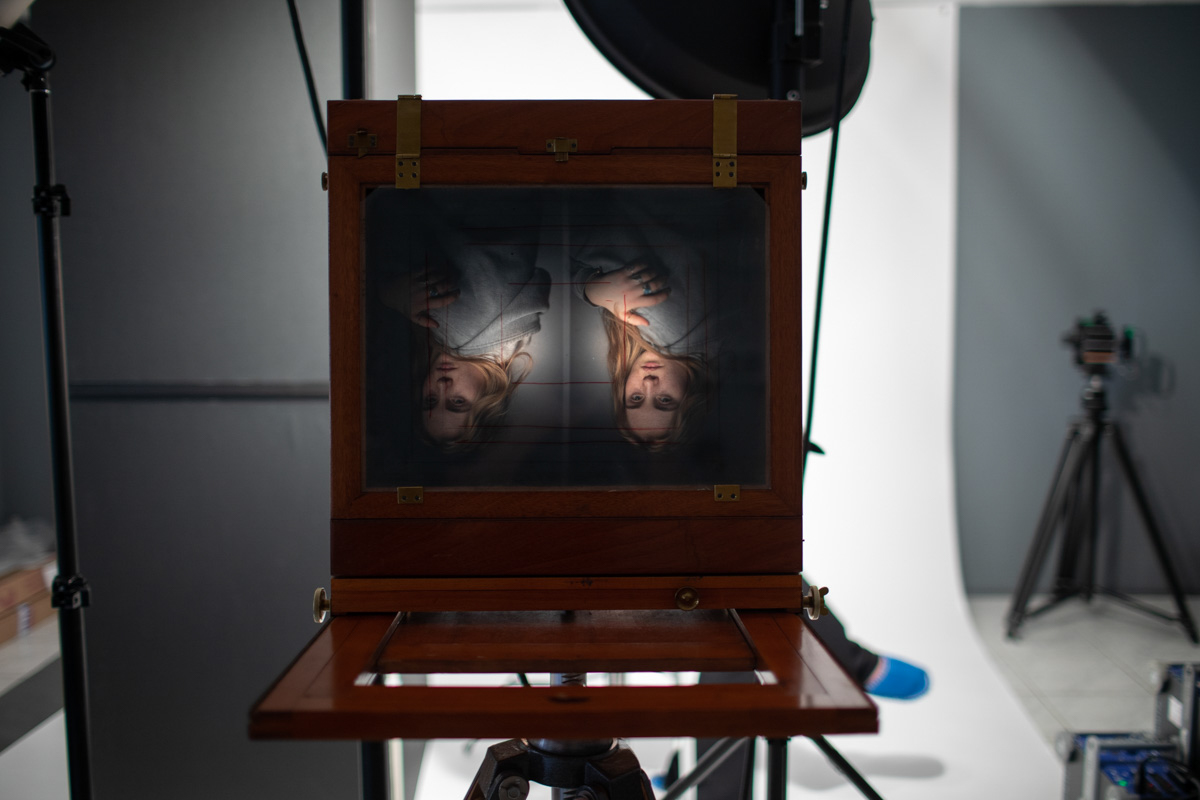
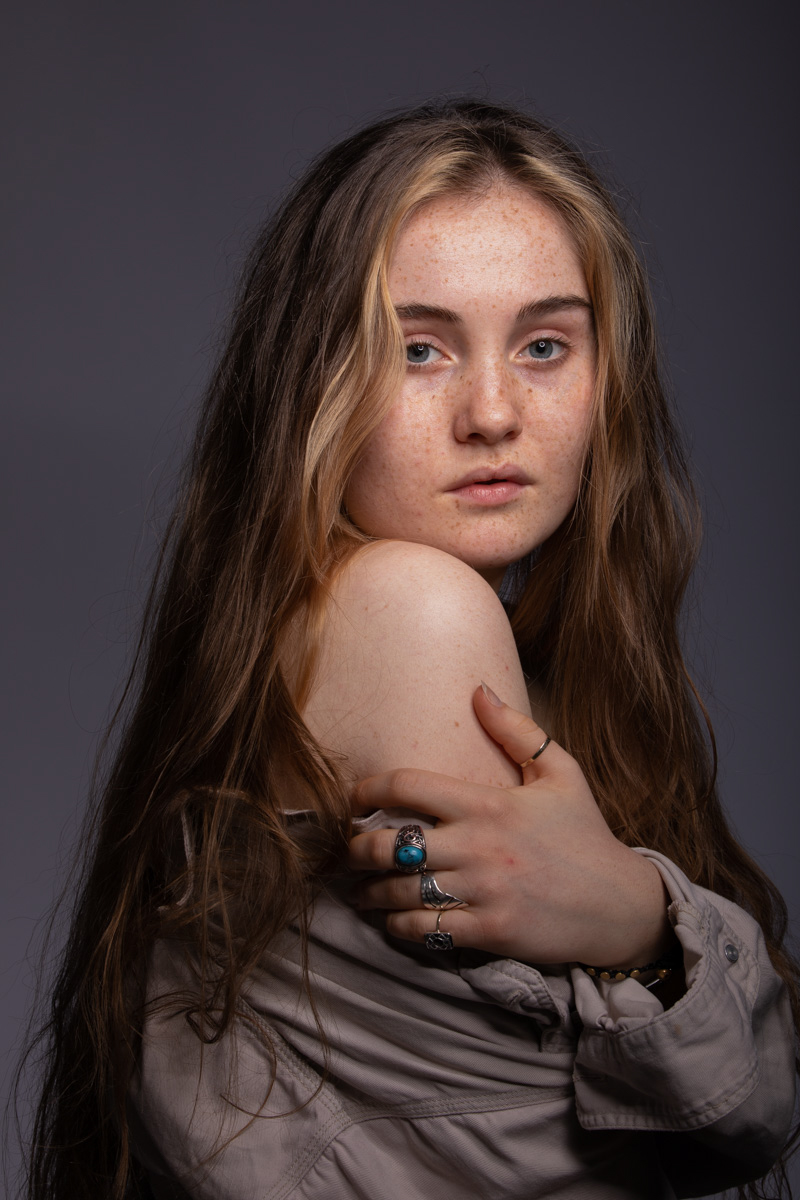
Vielen war sicher klar, dass mein finales Ziel 3D Portraits waren. Clarissa (https://www.instagram.com/clarissajelinek/) war perfekt für das Shooting und zum Glück auch sehr geduldig. Wenn ihr jetzt denkt, dass dieses Shooting einfacher abgelaufen ist als die anderen, dann denkt ihr falsch.
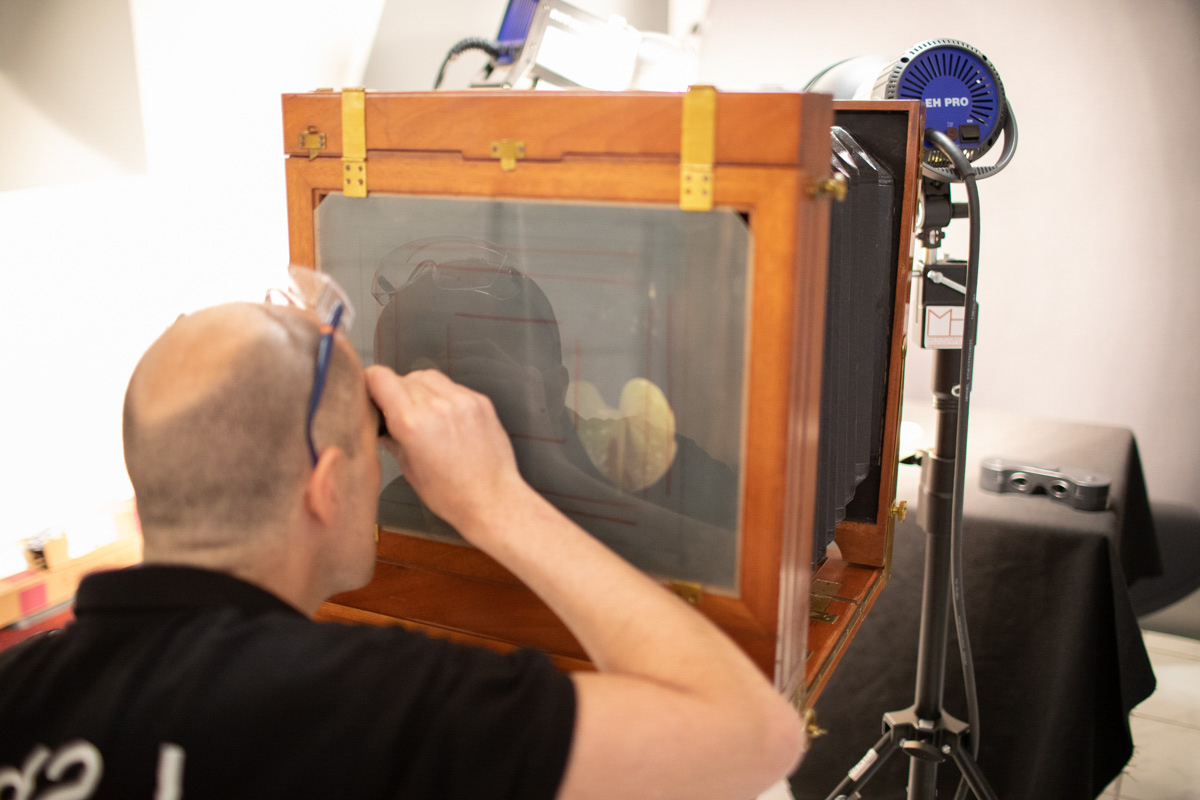
Ich liebe simple Portraits, aber genau diese sind langweilig in 3D. Das war der Grund warum ich Clarissa gesagt habe, sie soll ein faltiges/zerknülltes Hemd mitnehmen. Je mehr Struktur und Unebenheiten, desto interessanter das 3D Bild. Für ein gutes Porträt in 3D war also ein komplettes umdenken für mich notwendig. Zusätzlich war ich mit der geringen Schärfentiefe der Ultragroßformatkamera limitiert. Somit waren für die Portraits wieder viel Hirnschmalz angesagt. Es sollte sich viel im Bild abspielen, aber nicht zu viel, damit ich beim Abblenden noch im Belichtungsspielraum bleibe (10000W bei Blende 12 und ISO 0,5). Je nach Lichtformer ist da schnell der Ofen aus.
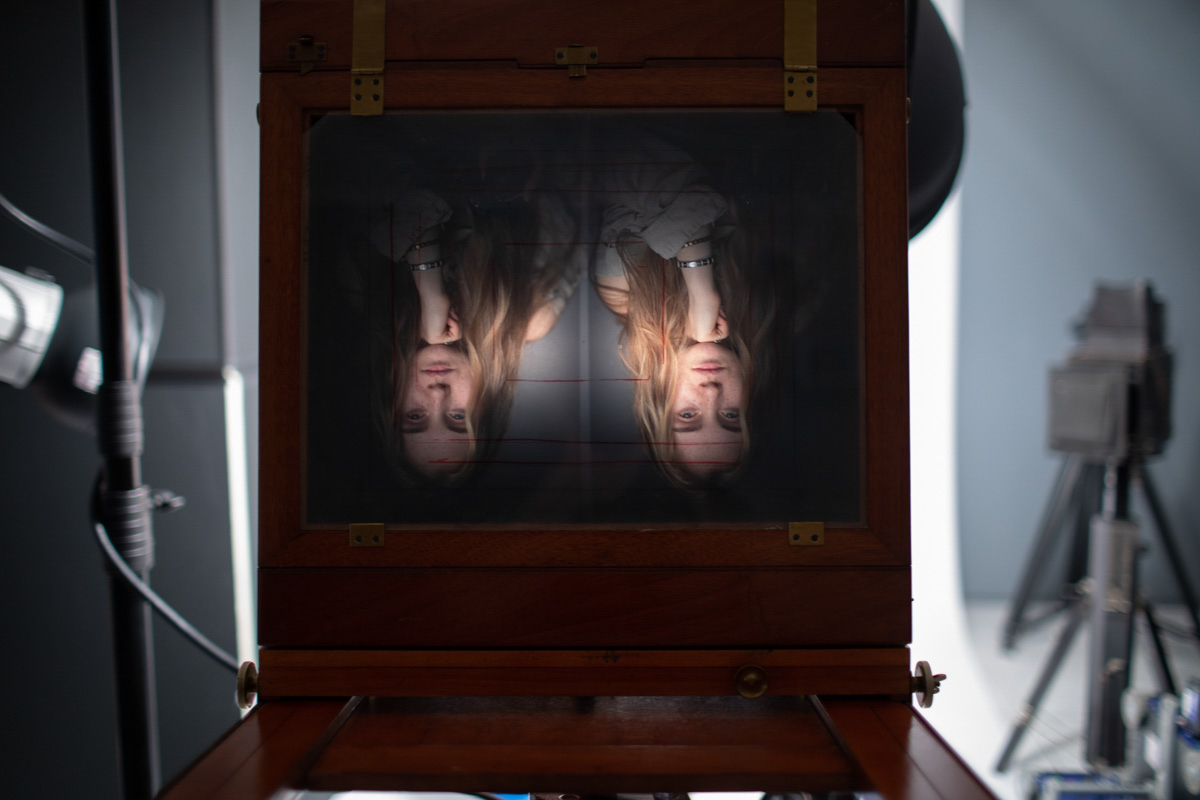
Doch auch diese Hürde konnte ich überwinden und eine schöne plastische Stereo Nassplatte erstellen (Wobei es ein kleines Missgeschick dabei gab – mehr dazu im Video)


Hier wieder die anaglyphische Versionen (3D Brille benötigt, siehe oben)

Und die Versionen für den Kreuzblick https://de.wikipedia.org/wiki/Stereoskopisches_Sehen

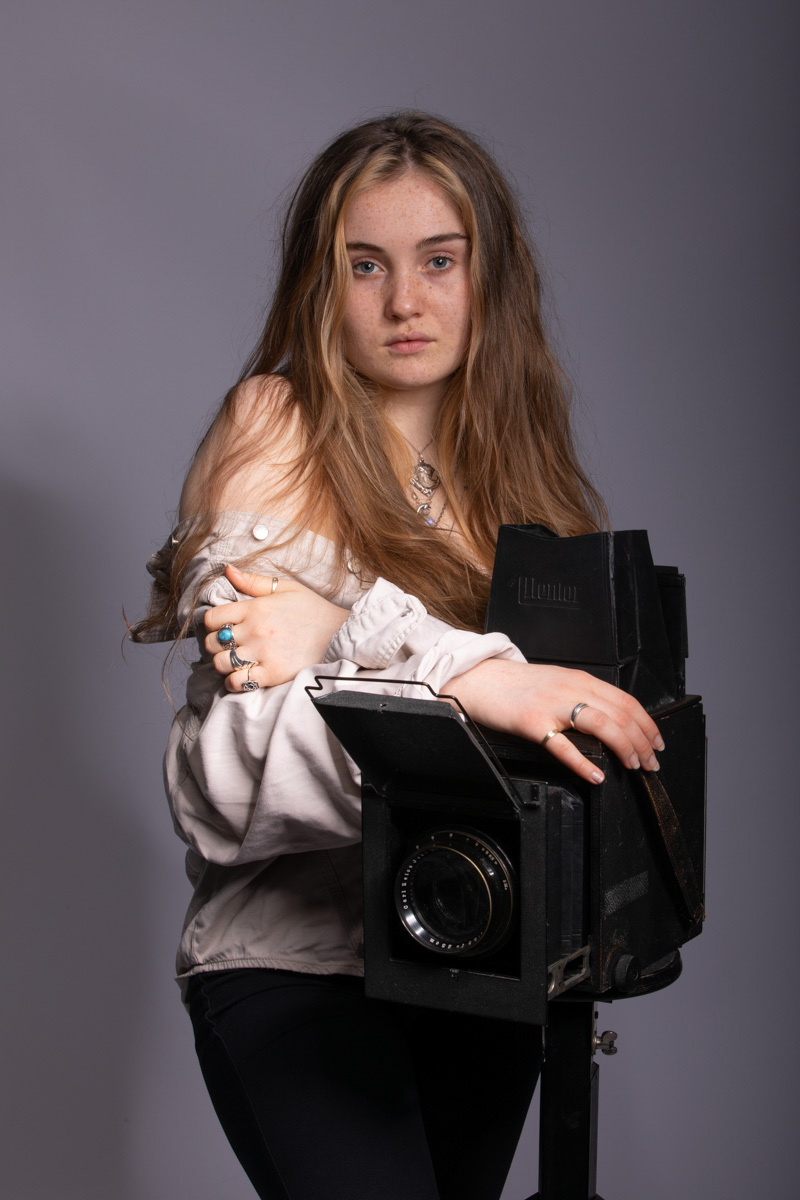
Als zweites Thema war ein Portrait mit Kamera angedacht. Wir probierten viele Posen aus (mit digitalen Aufnahmen). Aber am Ende war die kleine Pentax ME die richtige Kamera für Clarissa. Alle anderen waren zu groß und lenkten zu sehr von ihr ab.

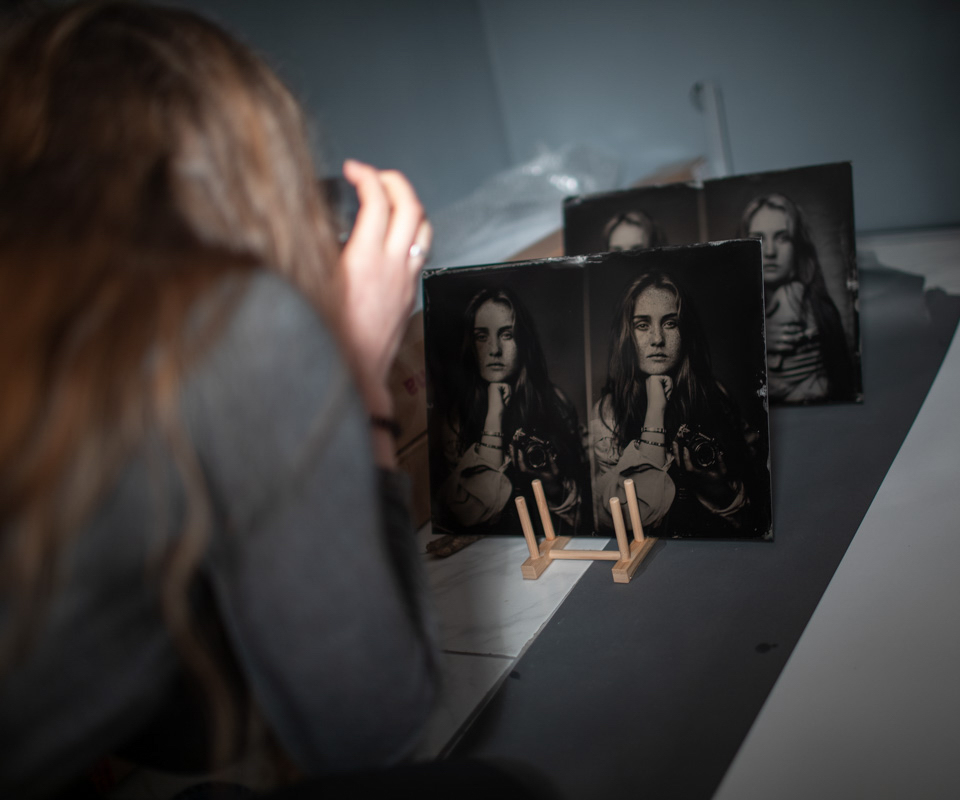
Nach insgesamt 7 Stunden war auch die zweite Platte fertiggestellt. Diese zwei Platten gefallen mich sehr, da ich von der plastischen Wirkung, Bildkomposition und Reinheit der Nassplatten begeistert bin. Alle Großformatplatten von diesem Artikel stehen hier zum Verkauf. Um mehr Leuten eine Chance zu geben diese Platten zu genießen, gibt es dieses Mal auch 10 limitierte Finartprints davon: http://www.markus-hofstaetter.at/pages/storeplates/
Werde ich weitere Stereo Nassplatten erstellen? Vielleicht mit der richtigen Motiviation und einen interessanten Menschen für eine Portrait….. Wie zum Beispiel Brian May


Hier wieder die anaglyphische Version (3D Brille benötigt, siehe oben)

Und die Versionen für den Kreuzblick https://de.wikipedia.org/wiki/Stereoskopisches_Sehen

Hier noch mehr Einblicke vom Shooting:


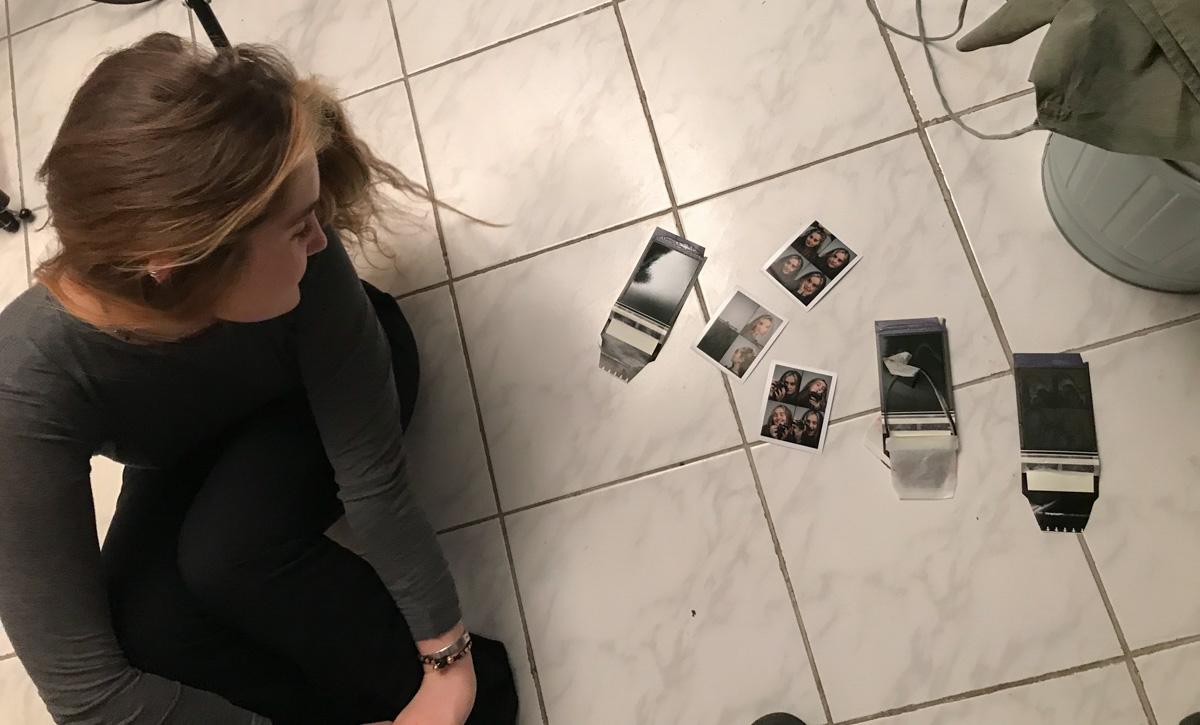

Polaroid Miniportrait
Wie ihr vielleicht schon in diesem Post gesehen habt: https://blog.markus-hofstaetter.at/2019/03/collodion-wetplate-passport-photo/ Machte ich meine ersten 3D Nasspalttenversuche mit der oben genannten Polaroidkamera. Jedoch ist die plastische Wirkung damit eher bescheiden, da die Objektive nur auf 120cm Entfernung scharf stellen. Dennoch hatten wir viel Spaß mit der Kamera und haben neben dem analogen Foto auch eine Nassplatte erstellt. Wobei mich die Objektive der Polaroidkamera begeistert haben. Diese lösten extrem scharf aus und wird wegen dem Spaßfaktor auch bei meinen Workshops verwendet: http://www.markus-hofstaetter.at/pages/workshops/


Nächste Workshops: http://www.markus-hofstaetter.at/pages/workshops/
Für individuelle Workshops kontaktiert mich hier http://www.markus-hofstaetter.at/pages/kontakt/
Wollt ihr selber eine Nassplatte samt Entstehung erleben – kontaktiert mich einfachhttp://wetplate.art
Wollt ihr immer auf Letztstand sein, tragt euch in meinen Newsletter einNewsletter: https://blog.markus-hofstaetter.at/Newsletter/
English Version
Another project that took way longer to finish as I would have ever imagined. This project brought disappointment as well as happiness into my life. It took more than 6 energy consuming month to finish it. I show you the most things in the following video and a little more in my article below.
The Exhibition
It all began after a visit at the http://3dimensionale.at in Vienna. This was a great exhibition about stereo photography in Vienna. I saw there a stereo wet plate camera and this triggered my brain to think it would be a cool idea to build one by myself. Oh boy, would I have known what I get myself into with that thought, I never would have done it. Even I’m very happy and excited now with the outcome of this project.
Books
I was lucky a good friend recommended a good book about stereo photography to me. This is for German speaking people only: Stereofotografie und Raumbildprojektion from Gerhard Kuhn – ISBN 388955119X. I read this book during my 14 days vacation in Portugal again and again until I was able to understand the main principles of stereographic photography. With this knowledge it was crystal clear for me that it would not be enough to just put two lenses together for a stereographic image. The distance between the two lenses (the stereo basis) had to be changeable, so I can put them more apart for subjects that are far away. For macros and some other specific applications there was also the need of a tilting mechanism, because at some point you can’t get your lenses any closer together.
Before I go on with my article I want to give you guys a recommendation for another great book:
It’s from the great guitarist and songwriter Brian May. He tells the Queen story in great 3D photographs. Beside the images it’s a great read too. https://www.queenin3-d.com/.
And I think Mr. May would be also a great subject for a stereographic wet plate project 😉
Finding the right lens
Now you have seen already my nearly finished lens board design. It was a very long way to get there. I had this idea in my head to build my camera with two very old Petzval design lenses.
I own already one and thought it would be a great idea to find a second one. To find a second one that focuses on the same spot was a big pain. It took forever, some of the guys from the wet plate community know what I’m talking about and I guess I will make the smile with this sentence. I remember when I talked with a shop assistant in a vintage camera shop in Vienna about my project, he just said he is happy he is not doing it. He was so right….
At some point, I found a second lens that fitted my needs and so the building process started
Building a stereo camera
I spent a lot of my time in hardware stores to get all the stuff I need. I guess you guys know that you can spend several hours in these big mega stores without finding anything or anyone that can help. If you live near the Vienna area, this can be different. Because in the 21st district there is a hardware store called Rudolf Holzmann https://www.rudolfholzmann.at. All the shop assistants in this store know their business and you are able to get all you need in Minutes. This store was founded in 1860 – so we are talking about the wet plate area – I just love the detail about this and would strongly recommend all the people with hardware needs to go there.
After I had the most parts for my camera together, I started to build the movable lens boards. This was a pretty easy task because I already built some boards. What brought up a lot of questions to my mind was the tilting mechanism for the lenses. For that, I bought different hinges, screws and wooden boards. I put the right combination of all this on my lens board.
After that, I had to build a shutter that is able to do a simultaneous exposure on both lenses. This shutter must, of course, be able to adjust to the movable lens boards. To make this happen, I glued little iron bars onto the lens boards and mounted my shutter with magnets on it. This way I was able to easily mount and dismount my shutter within different lens board positions.
The front board of the shutter was mounted with two hinges not the corpus. To fix this board in its closing position, I used a shelf fastener (hope this is the right term for it)
I learned to use all the different tools during my first job in metal working. That means I have lots of tools at home, but I’m not a carpenter. That means I’m missing the tools to press things together. That was the reason I used different household objects for it.
The nearly last thing that was missing now was the inner separation for the camera. This was needed to separate the two image circles on the plate and on the ground glass. I build a system that can be connected together out of balsa wood.
For sure not the most beautiful solution, but it worked.
At the end, I needed a little bellow for the tilting lens boards. I used a very thin black sticky tape for this.
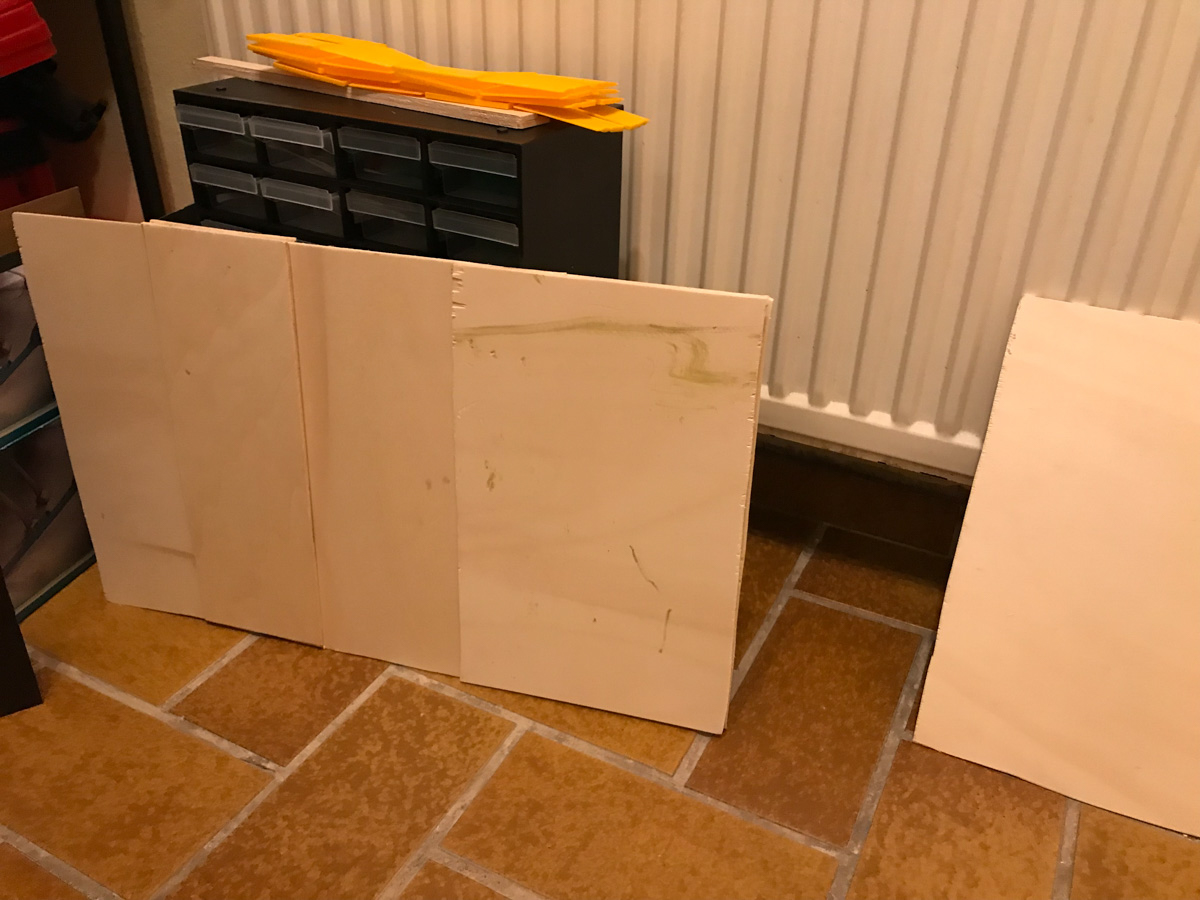
Check out this gallery with much more DIY content
The first stereo wet plate
Finally, I could start to create my first 3D wet plate. My first model was another wet plate camera. I shot outdoor near my wooden cabin to get a nice depth effect.
I do not remember how long it took to do this plate, but I do remember that the first exposure was very long (about a minute) and the second plate got too dark even I did a 4 to 5-minute exposure.
A friend of mine told me already that it will take lots of time to set the lenses up the right way for a nice 3D effect – oh boy he was right.
But the end result turned out really nice and the 3D effect was great.
You need special glasses to see the 3D effect in such big plates. These goggles have 4 mirrors in it so you can watch a single 3D image. I ordered mine here:http://www.3dworldshop.com/epages/544034815.sf/en_GB/?ObjectPath=/Shops/544034815/Products/4007
And now enjoy my first stereographic image:
This is an anaglyph Version you can enjoy with 3D glasses:
Here is another version (with interchanged images) for the crosses eye method (wiki) and an animated gif: https://en.wikipedia.org/wiki/3D_stereo_view
Floating flowers a 3D wet plate macro
The next subject for this camera were macro photographs of flowers. This time I had an eye on the time the plates consumed. The effort to make clean 30×40 cm collodion stereo wet plates is huge. I had to take care of the right focus distance on both lenses and maybe use an adapter ring to compensate that. Adjusting the focus distance and maybe the tilt angle on the lens boards. Measuring the exposure with an 18 by 24cm test plate. During my first plate, I learned that one of the lenses did a brighter exposure than the other one, so I had to compensate that too with the aperture. After I had all these things under control, I had to take care of the whole wet plate process on ultra large format plates. Maybe you can imagine now how focused I was during shooting to get everything right on the first shot/plate. Besides that, it’s not that cheap to make 30x40cm wet plates. I used a Hensel Tria 6000, a Tria 3000 (including the EH Pro strobe heads) and a 1000 Watt Hensel Integra compact strobe with brings together 10 000 Watt of power for the exposure. The modeling lights of these three guys burned my first model a bit, but this little wound looked great on the plate:
But exactly this “defect” looked great on the wet plate.
At the end (after 7 hours for two plates) everything worked out great and I produced two nice looking plates:
Here again the anaglyph version (3D glasses needed, see info above)
The version for the crosses eye method (wiki) and an animated gif: https://en.wikipedia.org/wiki/3D_stereo_view
More Behind the Scene pictures:
3D Portraits
I guess it was obvious for all of you guys who know me that I will end this project with portraits.
Clarissa (https://www.instagram.com/clarissajelinek/) was a great model for this portrait and luckily she was very patience too.
If you guys think that this shooting must have been easier then the other ones, because I knew what I was doing, you are terribly wrong.
I love to shoot simple portraits, but in the stereographic world, simple portraits just don’t pop.
That was why I told Clarissa to bring a wrinkly shirt to the shoot. The more little things stuck out of your model the more interesting is the final plate to watch. But with this thought in my mind I had to be careful. I had to control the depth of field. Ultra large format cameras produce a shallow depth of field. And with stopping down the lenses to much, depending on the light modifier I could end up with having to less power for the exposure. Just make the math: F12 @ ISO 0.5
But I was able to overcome this obstacle and produce a clean 3D plate (with a nasty little accident as you can see in the video)
The anaglyph version (3D glasses neede, see info above)
The version for the crosses eye method (wiki): https://en.wikipedia.org/wiki/3D_stereo_view
The second portrait should include a photography topic. So I brought several cameras into the picture. We tried different poses, but ended up with the small Pentax me, because all other cameras were to big and the main subject still was Clarissa.
After 7 hours overall I finished this project with the second 3D portrait. I love how these plates turned out, both of them pop out of the tintype (ok its an alumitype) when you use the goggles. Beside the 3D effect I am also very happy with the lightning and the pose we were going for. The second one below was a bit more tricky, because of the extra light I hat to direct to the camera.
This is my favorite plate and it will be hard to let got, because all of these plates are for sale here: http://www.markus-hofstaetter.at/pages/storeplates/ There you can also buy one of 10 fine art prints on high end luster paper.
So, will I go on with stereo wet plates? Maybe with the right motivation for an interesting portrait….for example Brian May 🙂
The anaglyph Version you can enjoy with 3D glasses:
The version for the crosses eye method (wiki): https://en.wikipedia.org/wiki/3D_stereo_viewnoreferrer”>https://de.wikipedia.org/wiki/Stereoskopisches_Sehen
More BHTS photos:
Polaroid Miniportrait
As you maybe have seen in this post already:https://blog.markus-hofstaetter.at/2019/03/collodion-wetplate-passport-photo/ I did some stereo wet plate tests with a Polaroid camera. But the 3D effect was not that great, because there is no option to try different distances with these fixed focused lenses (focus distance is 120cm). Besides that, we had lots of fun with it and I was amazed how much detail these lenses can resolve. Because this camera is so much fun, I will use it during my workshops too: http://www.markus-hofstaetter.at/pages/workshops/
Upcomming workshops: http://www.markus-hofstaetter.at/pages/workshops/
For individual workshops please contact me here: http://www.markus-hofstaetter.at/pages/kontakt/
If you guys want to experience yourself how a tintype is made and own a one of a kind wet plate, please contact me via my website http://wetplate.art
Don’t forget to subscribe to my Newsletter: https://blog.markus-hofstaetter.at/Newsletter/
April 15th, 2019 at 22:24
It took six months to create these ultra large 3D wet plates – R Francoeur Photography said:
[…] a look at more photos from the project below, and make sure to visit Markus’ blog to read more about the making of this awesome 3D […]
April 21st, 2019 at 16:16
Cámaras de placa estereoscópicas, la muerte de Bayard, un regreso a Notre Dame de 1800 y más: Galaxia Xataka Foto said:
[…] Abajo podéis ver un video del proceso, para conocer todo el trabajo realizado podéis ver el blog oficial del fotógrafo (en inglés y alemán). Ahora sabréis cómo hacer anaglifos en gran […]